Showing posts with label Video. Show all posts

Monday, May 10, 2021

Art Gallery Showstopper Card - Video Tutoiral

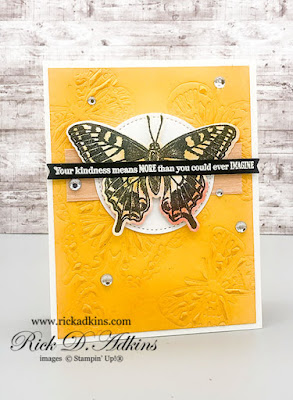
 Hello and welcome to my blog; today I have a showstopper card for you and I do mean a show stopper.  This is a definite WOW card.  When I showed it to Charles last night his first word was "wow!"  He never has a reaction like that.  He most of the time just says that they are nice and pretty, but never a wow.  So, I know that it's differently a wow card.  Any way you can decided your self here's a look at the front of the card. 

Fine Art Gallery Showstopper Card click here to learn more about this fun fold card and to watch the video tutorial.

Wednesday, April 28, 2021

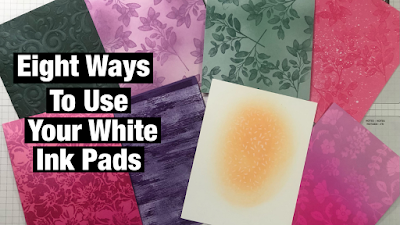
Eight Techniques to use with Your White Craft Ink

 Hello and welcome to my blog; last night during my weekly Facebook Live I shared eight different ways to use your White Craft Ink on your cards or papercrafting projects.  I know you are like me and probably never touch it, because you forget about it. Hopefully todays post and video tutorial will change that.  

I have eight different super easy techniques to share with you using your White Craft Ink.  Click to learn more!

Monday, April 26, 2021

Three White Pigment Ink Techniques that Pack A Punch

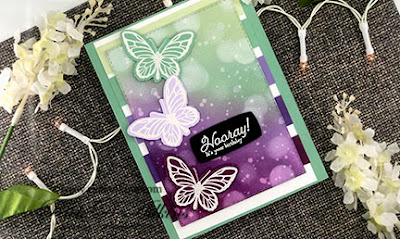
 Hello and welcome to my blog; today I am going to share with you three techniques using White Pigment Ink that will put a punch in your papercrafting.  If you are like me your white pigment ink or White Craft Ink if you use Stampin' Up! products is your most under used supply.  I am here to help change that this week.  Here's a look at my card where I used these three techniques.  

Learn three white pigment ink techniques that will pack a punch in your card making and papercrafting!  Click here to learn more

Wednesday, April 21, 2021

5 Cards from 1 Card Sketch - Facebook Live Replay 4/20/21

 Hello and welcome to my blog; last night during my weekly Facebook Live I shared how to make five different cards using the same card layout and sketch.  Card sketches are a great way to find inspiration for your creative process, and to help jump start your mojo if you are having problems coming up with ideas.  


Find out how to use one card sketch to make five different cards using the Dragonfly Garden Bundle.  Click to learn more

Monday, April 19, 2021

Dragonfly Garden Super Easy Fun Fold Card Video Tutorial

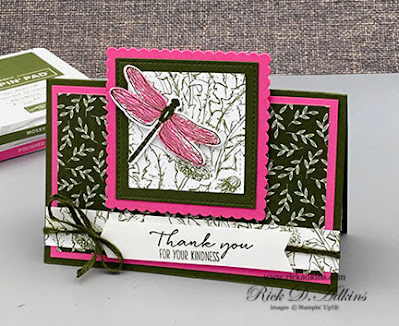
I know that you are ready for a fun fold card that you can make quick & easy!  Just like everything that I love to create this card is quick easy and looks more complicated than it really is.  Sometimes it’s just a little fun to fold a card differently than the standard A2 size card.  

Check out this super easy fun fold card featuring the Dragonfly Garden Bundle from Stampin' Up!  Click here to learn more

Monday, April 12, 2021

May 2021 Paper Pumpkin Batter Up! Subscribe today

 Hello and welcome to my blog; I am here today to share with you some of the details about the May 2021 Paper Pumpkin Kit entitled Batter Up!.  So step on up to the plate, take a swing, and knock it out of the park with the May 2021 Paper Pumpkin Kit.  To get this kit you have from April 11th till May 10th to subscribe to Paper Pumpkin.  


Wednesday, April 7, 2021

Stampin' Up! Art Gallery - Best Wishes Card for April's Creative Stampers Blog Hop


Hello and welcome to my blog; today I am going to share with you a card that I made for the Creative Stampers Tutorial Bundle Blog Hop.  The Creative Stampers are a group of Stampin' Up! Demonstrators that I have pulled together for one purpose.  And that purpose was to team up and help each other and out customers create by creating a set of tutorials around one suite, theme, or product.  This way we could inspire everyone with creative ideas.  This month the featured item for the Creative Stampers Tutorial Bundle for April is the Fine Art Floral Suite from the January - June Mini Catalog.  Each month we share even more ideas using the featured products with you as alternative projects to our project for that month's tutorial bundle.  

Monday, March 8, 2021

How to Create A Stampin Bends Color Chart - And Why You Want To!

 Hello and welcome to my blog; today I am going to share with you how to create a color swatch chart for your Stampin' Blends and why you will want to!  There are many reasons why artists create color swatch charts for their supplies; so, I am going to share with you some of those today.  

Learn why you want to create a Stampin' Blends Color Swatch Chart plus get my free color chart PDF to make your own.  Click here to learn more

Color swatching is basically the process of laying out your coloring media in a grid so you can see it.  This also allows you to actually see the true color of the media.  Because we all know that the caps or tip on the media my not look the same as the ink, paint, or marker.  

Monday, March 1, 2021

Just Because - Brushed Blooms Bundle Stampin' Up!

 Hello and welcome to my blog; I am back from my little staycation celebrating my birthday last week.  And, I have a super cute card to share with you today using the Brushed Blooms Bundle from the January-June Stampin' Up! Mini Catalog.  Here's a look at my card.  

Just Because Card using the Brushed Blooms Bundle from the January-June Mini Catalog.  Click here to learn more and download the free tutorial

I think the Brushed Blooms Bundles is probably one of my all time favorite bundles from Stampin' Up! in the last couple years!  Mainly because of the wonderful Beautiful Brushstrokes Dies.  Which creates these beautiful layered die cut roses.  

Saturday, February 20, 2021

You're a Good Egg - Hey Chick YouTube Live Replay

 Hello and welcome to my blog; today I have a super cute card for you that I made during my YouTube Live yesterday!  I used scraps of designer series paper to create this simple but stunning background and the Hey Chick Stamp Set for my card.  Here's a look at my project. 


Wednesday, February 17, 2021

Butterfly Bouquet and Many Messages Video Tutorial

 Hello and welcome to my blog; today I am going to share with you a card using the upcoming early released Butterfly Bouquet Bundle and coordinating products.  I am also using the Many Messages Bundle from the 2021 January-June Mini Catalog.  Here's a look at the card.  

Fun card using the Many Messages Bundle and the upcoming early release Butterfly Bouquet Bundle.  Click here to learn more

Saturday, February 13, 2021

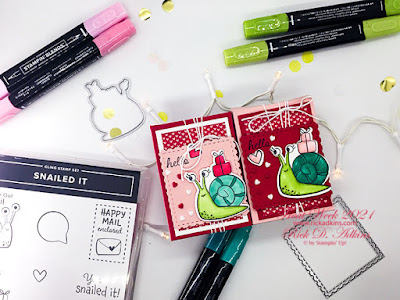
Snailed It Sour Patch Kids Treat Box - Treat Week 2021 Day 6

 Hello and welcome to my blog; today is day sixth of Treat Week 2021, and I have a super cute project for you today.  Today's project features products from the Snail Mail Suite in the Stampin' Up! January-June Mini Catalog.  

Day 6 of Treat Week 2021 - Snailed It Sour Patch Kids Treat Box Click here to learn more!

This cute little treat holder features one of my favorite suites in the January-June Mini Catalog.  

Friday, February 12, 2021

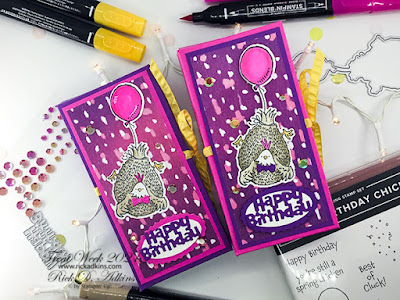
Hey Birthday Chick M&M Treat Box - Treat Week 2021 Day 5

 Hello and welcome to my blog; today's Treat Week 2021 project features the Hey Birthday Chick Stamp Set and matching Birthday Chick Dies.  I created this project to hold a regular size pack of M&M candies.  Here's a look at the project:

Treat Week Day 5 project features the Hey Birthday Chick Bundle.  Click here to learn more

Thursday, February 11, 2021

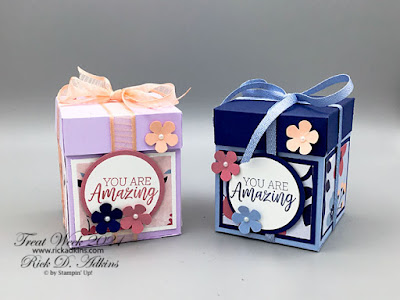
You Are Amazing Paper Blooms Candle Gift Box - Treat Week 2021 Day 4

 Hello and welcome to my blog; today is day four of Treat Week 2021.  And, I have a super cute little project for you featuring the You Are Amazing Stamp Set and the Paper Blooms Designer Series Paper.  The Paper Blooms Designer Series Paper is a free Sale-A-Bration Item currently, and the You Are Amazing Stamp Set coordinates with the You Are Amazing Project Kit.  So, for today's project I created a gift box that will hold one of the jar Candles from Target's Dollar Spot.  Here's a look at my project. 

Treat Week 2021 Day 4 - You Are Amazing Paper Blooms Candle Gift Box Click to learn more!

Wednesday, February 10, 2021

Shark Frenzy Godiva Treat Box - Treat Week 2021 Day 3

 Hello and welcome to my blog; today is day three of Threat Week 2021.  If you are unfamiliar with Treat Week.  Each day this week I will be bringing you a new treat project using new products from the January-June Mini and Sale-a-Bration brochure.  Today's project features the Shark Frenzy Bundle from the January-June Mini Catalog; which can be found on page 46.  Here's a look at today's project.  

Jump in the big crafting waters with this month's online Crafty Corner Bundle class featuring the Shark Frenzy Bundle from Stampin' Up!  Click here

Friday, May 29, 2020

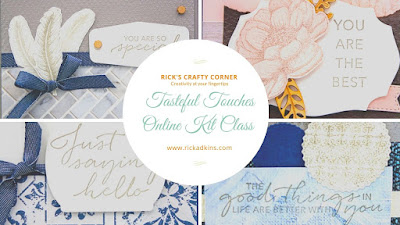
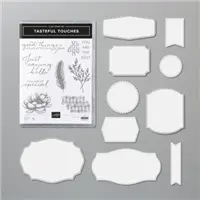
Tasteful Touches Just Saying Hello Card Video Tutorial & Tasteful Touches Kit Class Announcement

Hello and welcome to my blog; today I have another card for you and a little process video for you.  And I am also announcing my new Tasteful Touches Kit Class.  I designed this card to go along with my June Kit Class so that you would have another idea to create with the supplies in the class.  I am loving this new bundle from Stampin' Up! and the Designer Series Paper is to die for.  I Cased one of the cards from the new catalog to share with you today.  I selectively edited the card to create this design.  


The Tasteful Touches Stamp Set will allow you to create projects with the versatile textures and all-season sentiments.  I love the large script font on the sentiment I used today.  And It just makes me happy and I am sure that it will make you happy as well.  You will love the juxtaposition of the texture in the embossing folder and matching designer series paper with the wonderfully beautiful fonts and images in this stamp set.  They play so very nicely with each other and creates the perfect card.  

 
With the Tasteful Label dies you can create the perfect little accent pieces for you card or project as well as the perfect sentiment label.  I used the banner die to cut out all the different pieces of the In Good Taste Designer Series Paper and the Sentiment Die.  I used the Tasteful Textile 3D Embossing Folder to create the background layer that I added the designer series paper banners to.  


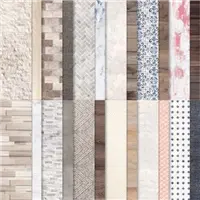
The In Good Taste Designer Series Paper is a larger pack.  It features 12 double sided designs all with wonderful textured backgrounds, and there are a lot to pick from.  You have been seeing some of them the last few weeks but didn't know it.  I picked one of each of the designs to feature as backgrounds for my photos for my projects since it came in.  I am so in need of another pack I have almost used it all that's how much I love it.  And, I am sure you are going to love all the wood grains, tile, and other patterns in it just as much as I do.    

Video Tutorial: 


Tasteful Touches Kit Class Details: 

Date: June 16, 2020
Time:  Your Convenience 
Location:   Comfort of Your Home 
RSVP & Payment Due:  June 2, 2020
Cost:  Based on Budget Option Picked 


Details: 

Join me in my Touches of Texture Kit Class on June 16, 2020, as we combine beautiful layers and rich texture to make the perfect creations and the best part you don’t even have to leave the comfort of your own crafty space.  Everything for this class is shipped right to your door.  

In this class you will make eight cards (2 each of 4 designs) using new products from the In Good Taste Suite from the new 2020-2021 Stampin’ Up! Annual Catalog.  

This month’s kit class features the Tasteful Touches Bundle.  Which you will need both the bundle and the embossing folder for this class.  Along with the Tasteful Textile 3D Embossing Folder.  You can add both items onto your kit class and save 19% with the add on options.  Or you can use something you may already own.  

The Tasteful Touches Kit Class includes the following: (*based on availability)
  • All the cardstock cut ready for you to make the projects (does not include die cut pieces, stamped images, or any of the embossing done for you)  You will be doing that yourself during the class.   
  • PDF printable instructions with links to videos to make each project
  • 1 bolt of the 3/8” Denim Ribbon 
  • 1 pack of the In Good Taste Elements *
  • ¼ pack of the In Good Taste Designer Series Paper (cut at 6” x 12”) * 
You will need your basic tool kit (bone folder, snips, adhesive, etc.) Die cutting and embossing machine, and a Gray Granite Classic Ink Pad.

Cost of this class is $28.00 plus $7.75 Priority Shipping.  You may add on the Tasteful Touches Bundle and the Tasteful Textile 3D Embossing Folder with the following add on options.  
  • Add on Option 1:  Tasteful Touches Bundle with the Touches of Texture Class – $48.50 for a total of $76.50 plus $7.75 Priority Shipping 
  • Add on Option 2:  Tasteful Textile 3D Embossing Folder with the Touches of Texture Class - $9.00 for a total of $37.00 plus $7.75 Priority Shipping 
  • Add on Option 3:  Tasteful Touches Bundle & the Tasteful Textile 3D Embossing Folder with the Touches of Texture Class – for a total of $85.50 plus $7.75 Priority Shipping 
Deadline to sign up and pay for the class is June 2nd.  

To sign up for this class by June 2nd you will need to email me for the link before the deadline.  I will place the order for all the supplies on June 3rd and have it sent to me cut everything resort it and get it out to you in the mail by June 12th.  So as you can see there's going to be a very quick turnaround on this class so don't delay in ordering your kit.  


Happy Stampin' 
Rick Adkins 

Stampin' Up! Shopping List: 


Sunday, May 24, 2020

Tips & Tricks of Refilling Your Ink Pads

Classic Stampin' Ink, Ink Refill, Stampin' Up!, Rick Adkins

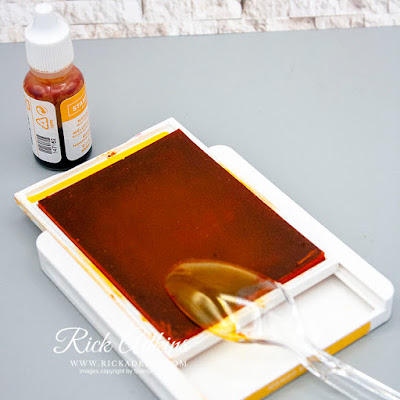
Hello and welcome to my blog; today I have a quick little tip video for you on refilling your ink pads.  This is something that we all must do to keep our ink pads working properly.  Or, you can just toss it and buy a new one, believe me I feel you, but refilling is so much cheaper.  And not as hard as you may think.  

Classic Stampin' Ink, Ink Refill, Stampin' Up!, Rick Adkins

What do I have to Have:  

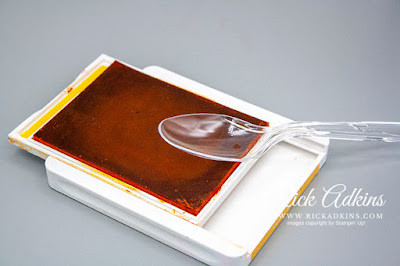
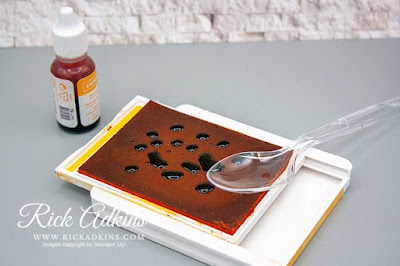
All you really need is your ink pad, an ink refill, and a plastic spoon.  Once you have these basic items on hand you can quickly and easily refill your ink pads without too much of a mess; unless you are like me and get ink everywhere.  If you are, bless you I feel your pain.  But in all honesty, it is not that hard.  

Tips & Tricks: 

Now, as I mentioned above, I do not use any fancy tools to do this I just bought a box of plastic spoons from the store and I use the back of it.  And I clean it off when I am done with a baby wipe so one spoon will last you for a while.  I simply take a few drops of my chosen ink refill and put on my ink pad and move the ink around with the spoon and press it into the pad a little.  It does not take a lot of pressure you really want gravity to do the work for you.  The ink will soak into the pad.  

Classic Stampin' Ink, Ink Refill, Stampin' Up!, Rick Adkins

You can also look at the side of the pad to see if color of the foam is getting darker.  As the ink soaks into the pad you will see it soaking into the pad.  But the spoon allows you to spread the ink around the pad so that you have good coverage.  Now another little tip is you can use this same technique to move ink out of your way if you are using a distinktive stamp.  These types of stamps work better with an ink pad that is not as juicy.  In this situation to much ink is not your friend.  

Classic Stampin' Ink, Ink Refill, Stampin' Up!, Rick Adkins

Now, one thing that I like to do after refilling my ink pad is:  I like to let it sit for a little while before I use it.  A freshly inked pad can still be to inky, so you do have to watch the amount of ink refill you put on.  To me it is best to do a little let it sit and come back and add more if need be.  Ink pads can be a finicky little so and so, but if you know how to take care of them when they are low on ink it will make your life so much easier.  

Classic Stampin' Ink, Ink Refill, Stampin' Up!, Rick Adkins

Another piece of advice I have for new stampers and well any stamper is to make sure when you order your ink pad go ahead and get the ink refill as well.  That way you will have one on hand and want have to wait for one to arrive when you pad is running low on ink.  

Video Tutorial: 


I hope that you enjoy this bonus video tip this week and it helps you out.  I know there’s a lot of new stampers and crafters out there that may not know how to refill their ink pad and may just toss it and buy new or get frustrated and stop stamping because they are not getting the results they want.  Remember to get your ink refills at the same time you purchase your ink pads it saves time, money, and heartache.  

Happy Stampin' 
Rick Adkins 
Independent Stampin' Up! Demonstrator 

Monday, May 18, 2020

Free As A Bird Card using Watercolor Pencils

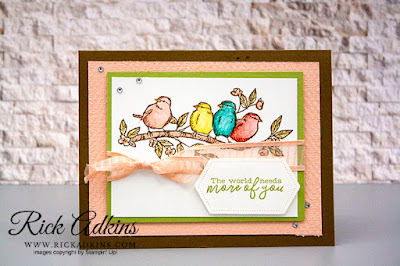
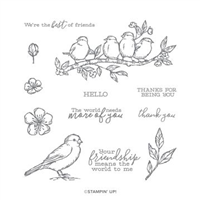
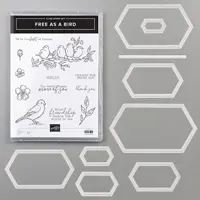
Hello and welcome to my blog; today I am going to share with you a fun card using the Free as A Bird Stamp Set, and some tips & tricks on using Stampin’ Up!’s Watercolor Pencils.  I have been playing with watercolor pencils for a long time and had a love hate relationship with them until Stampin’ Up! ®™ came out with their own a couple years ago.  Now I am in hog heaven using them.  Here is a look at the card I made today.  

Free As A Bird Stamp Set, Watercolor Pencils, Tasteful Texture 3d embossing Folder, Rick Adkins, Stampin' Up!

The Birds in the Free as A Bird Stamp Set are so cute and are just begging to be colored with your watercolor pencils.  Do not be afraid just go for it.  Once you follow a few simple tips & tricks I have for you today you will be able to send these cute little birds to all your friends because they deserve it.  
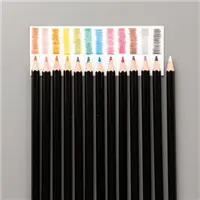
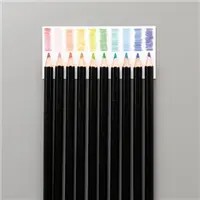
Our Watercolor Pencils now come in two sets, of high-quality, smooth color pencils; that are perfect for watercoloring any stamped image.   One thing that will help you to achieve a great look with your pencils is the type of paper you use.  You can use Whisper White cardstock just like I did today, but you must treat it very nicely.  Meaning you cannot use an aqua painter on plain cardstock.  You can however use a Blender Pen for best results.  This is my preferred method for moistening the pigment and moving it around to fill in my line art image.  Aqua Painters or any other type of water brush holds and release way too much water for the smooth Whisper White cardstock surface.  

s A Bird Stamp Set, Watercolor Pencils, Tasteful Texture 3d embossing Folder, Rick Adkins, Stampin' Up!

Now if I do use a aqua painter or want to use more water to more the pigment around for a nice wash type background I pull out my shimmery white cardstock or watercolor paper for this.  But I did not need that today, so I just stuck with the blender pen and the plain whisper white cardstock.  
Another thing you need to consider is the type of ink you are using.  If you are using a die-based ink like I did today you must sit the cardstock aside for awhile to completely dry or heat set with a heat tool.  I choice to just sit it aside and let the ink dry and soak into the cardstock.  Stazon which is the preferred ink for watercoloring is not one of my favorite inks, so I am fine with letting the other sit and dry the card my take a little longer, but I am happy to wait.  

s A Bird Stamp Set, Watercolor Pencils, Tasteful Texture 3d embossing Folder, Rick Adkins, Stampin' Up!

My next tip and this one is the most important one is how and where you hold your pencil.  Yes, there are certain places to hold your watercolor pencil or any pencil in art to achieve the correct look.  Watercolor pencils are all about the amount of pigment you put down on the paper.  You may be wondering why I put this here.  Well it’s because the closer to the end of the pencil you are holding in your hand the more pigment you are putting down on the cardstock.  So, if you want a dark area of color come closer to the point of the pencil and color.  Which means the for lighter and mid-range color you need to come back further from the tip of the pencil.  A good rule of thumbs is to hold the watercolor pencil in the middle area of the pencil for a medium amount of pigment to be placed on the cardstock.  And for lighter areas you want to hold the pencil closest to the end of the pencil as you will see in the video.  

s A Bird Stamp Set, Watercolor Pencils, Tasteful Texture 3d embossing Folder, Rick Adkins, Stampin' Up!

Once I have the entire image colored, I will come back with my blender pen and wet the pigment and get it to move around the cardstock blending the darks mediums and lights together.  This is how I achieved the gradient look on my images today.  

Video Tutorial: 


I hope that you find these little tips and tricks helpful as you explore watercolor pencils and stamping.  If you need any of the supplies, you have seen today you can pick them up in my online store by clicking on the item in the shopping list below.  

Happy Stampin' 
Rick Adkins 


Use the Host Code on any order of $50 (before taxes & shipping) or more during the month and receive a gift from me in May as a Thank You. If your order is $150 or more, please do not use the host code.  You will forfeit your Stampin' Rewards if you do; and I want you to get those rewards.


If you place any size order with me during the month of May, you will receive the May Creative Stampers Tutorial Bundle from me as a little thank you.  This month's tutorial bundle features Birthday Bonanza Suite of Products from the January-June Mini Catalog.  The Creative Stampers Tutorial Bundle can either be earned for FREE with any size order or Can be purchased for $20 from me.

Stampin' Up! Shopping List: 


Template Designed by creativeworkerbee