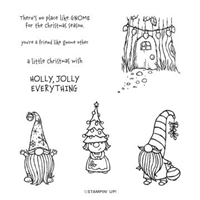
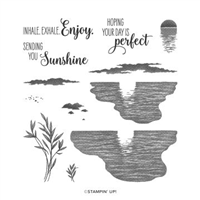
Have you wondered what else you could do with the Gnome for the Holidays Stamp Set in the Stampin' Up! August-December Mini Catalog? Have you looked at it and thought that's a cute little Christmas set? Or have you quickly turned the page because Gnomes freak you out?
Well, I am hopefully going to change your mind a little about Gnomes and the Gnomes for the Holiday Stamp Set today! The Gnomes for the Holiday Stamp Set can be used for more than just Christmas! It all depends on how you treat them, and how you color them.

Tips & Tricks on Turning the Gnome for the Holidays Stamp Set into a Fall Card:
Really and truly this is not as hard as you may think. It all depends on what you pair the stamp set with and how you color it. When I saw this stamp set in the August-December Mini Catalog I fell in love with the cute little line art images of the Gnomes and the Gnome Home and it was just begging to be colored. I know that Gnomes are not everyone's cup of tea, and some people are down right scared of them, but I think they are super cute and couldn't wait to get my hands on them.
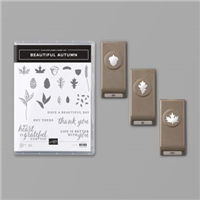
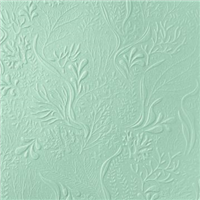
This week's sketch Challenge over at The Spot gave me the perfect opportunity to pull out this set and add ink to paper. But, I wasn't quite ready to make it as a Christmas Card just yet. So I paired it with the Gilded Autumn Speciality Designer Series Paper and the Beautiful Autumn Bundle to create a fun little Fall themed card. Here's the inspiration for this week's challenge at The Spot.
 |
| You can play along with us at the Spot with this week's challenge by clicking here. |
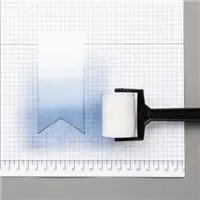
I started my card with a Thick Whisper White card base that was cut at 4 1/4" x 11" and scored in and folded in half at 5 1/2". I then added a large strip of the Gilded Autumn Specialty Designer Series Paper to the center. I also added a small strip of the reverse side in the center also. Next I stamped my Gnome on a piece of Whisper White Cardstock in Tuxedo Black Ink, and stamped the it again on a post it note. I cut the gnome from the post it note and added it over the gnome on my cardstock to create a mask.
 |
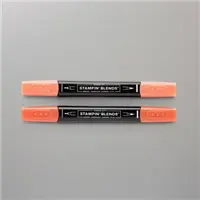
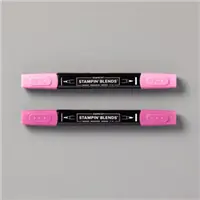
Once I had the gnome masked I could stamp the background. I stamped the Gnome Home in the background in Tuxedo Black ink. I removed the mask and I could start coloring everything with my Stampin' Blends. When I color with my Stampin' Bends (which are alcohol markers from Stampin' Up! and are great for those that may want to get into using alcohol markers in your crafting because they come in a light and dark of the same color to make blending easy) I fill in the area I am coloring with the light Stampin' Blend first then add the dark and then blend it out with the light again.

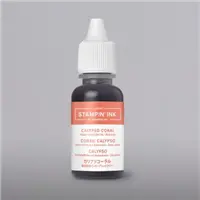
- Cajun Craze
- Mossy Meadow
- Soft Suede
- Just Jade
- Magenta Madness
- Misty Moonlight
- Highland Heather
- Daffodil Delight
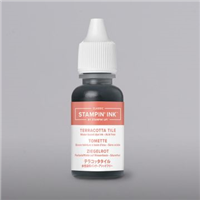
- Cinnamon Cider
- Crumb Cake
- Gray Granite
- Seaside Spray
- Ivory
- Bronze
I started out by coloring my gnome first. I colored his suite and hat in Cajun Craze. His beard with a little of the Gray Granite Stampin' Blends leaving a little white area where I wanted the highlights to be. When coloring white areas you want to only add color to the shadow areas of the object.
Next I colored in the Tree Home and the door. I colored the ground of the pathway with Crumb Cake, and the stones with Gray Granite. After that I colored in the background behind the tree. I used Misty Moonlight and Seaside Spray to do this. Now I know what you are thinking if you have used Stampin' Blends you are sitting there saying that these colors are to far apart to make blend. But it can be done! And here's how; take the darker of the color you want to blend and color some on a block. Then take the next color that you want to blend out to and pick up a little of the color from the block and start coloring out until it starts to get lighter and back to where it should be. Repeat until you have the entire area blended out. Then color as normal.


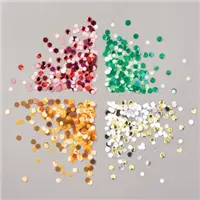
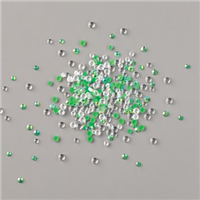
I finished off my card by stamping the sentiment in Cajun Craze Ink at the bottom of the panel. I used my Stamparatus to get the perfect impression and placement just right. I then added a few of the Sequins for Everything to the card front to add a little sparkle. Thanks for dropping by today If you need any of the supplies to create this card or other cards you can pick them up in my online store. All the supplies that I used today are listed in the Stampin' Up! Shopping List below.

Happy Stampin'
Rick Adkins

Host Code Closes on Wednesday, September 30, 2020
Use the Host Code on any order of $35 (before taxes & shipping) and get the make and takes for my Three Halloween Treat Holders Projects that I did on my Facebook Live on Wednesday as a free gift from me. Offer ends Tuesday September 8, 2020. If your order is $150 or more, please do not use the host code. You will forfeit your Stampin' Rewards if you do; and I want you to get those rewards.

If you place any size order with me during the month of September, you will receive the September Creative Stampers Tutorial Bundle from me as a little thank you. This month's tutorial bundle is a Mega Tutorial Bundle featuring projects for both Fall & Halloween. There are 20 tutorials featured this month. The Creative Stampers Tutorial Bundle can either be earned for FREE with any size order or Can be purchased for $22 from me.

I am very close to earning the 2021 Stampin' Up! Incentive Trip to Maui and your orders can help me get there. I am running a few special promotions until the end of September to not only help me earn this trip but to help you save a little cash as well.
With each $1000 I earn I will be cutting off a chain from my Maui or Bust Countdown Chain.


Deadline to sign up for my Online Fall Retreat is October 3, 2020! You still have time to join in on all the holiday fun. Click here to learn more about my Online Fall Retreat. Click here to register.

It's a great time to join my team of Kinsmon Crafters and take advantage of the always great Starter Kit Deal! The Starter Kit is always at a 20% discount. Join today!