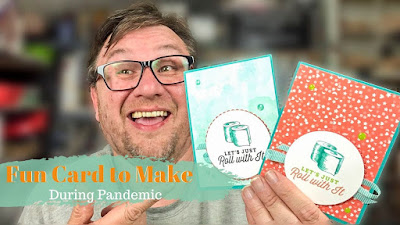
Hello and welcome to my blog; today I have an alternative project for you using the April 2020 Paper Pumpkin Kit My Wonderful Family and a few additional supplies. The April Kit was all about family and sharing how you feel about them; sharing a little love, and sharing a smile. If you are wondering what Paper Pumpkin is: Well it's Stampin' Up! Monthly Subscription Craft Kit! It's sent right to your mailbox each month. It contains everything you need to complete that month's featured projects. You also get an exclusive stamp set, Ink Spot, and instructions each month all for only $22 in the US. Each month I share at least one alternative with you here and I am part of the First Paper Pumpkin Blog Hop each month. Today's post was supposed to have been part of that hop but I didn't get done by the deadline so I am sharing my card with you anyway. Here's a look at my Alternative Project for this month.

The April Kit had some really cute products inside and the stamp set was a great one. Inside this month's little orange box was supplies to make eight cards with all the die cut pieces, card bases (scored ready to go) envelopes, adhesive dots, banners, little shimmery pearls in Soft Seafoam and Crushed Curry, and some Melon Mambo Ribbon. I forgot to mention the stamp set and the ink spot; which for this month was Pear Pizzazz. If you are just starting out as a crafter or want something crafty to do as a family Paper Pumpkin is a perfect solution.
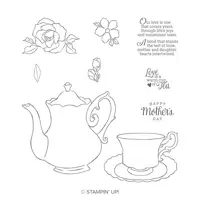
 |
| Image by Stampin' Up! |
Tips & Tricks:
For my Card this month I started out with a piece of Pear Pizzazz Cardstock and cut it down to 4 1/4 x 11 and then scored it at 5 1/2. I folded the card base and burnished it with my bone folder. I then cut the other half of the Pear Pizzazz Cardstock down to 4 x 5 1/4. With this layer I used the tree top image and inked it up in Pear Pizzazz Ink and stamped it all around this layer. Next I used the same image and took Soft Seafoam Classic Ink and then did the Rock n Roll Technique and inked the edges in Pear Pizzazz ink before stamping it down onto a piece of Whisper White Cardstock. I repeated the inking and stamping process again so that I had two of the tree tops. I then used my Paper Snips and cut it out.

I took my Pear Pizzazz layer and popped it up on Stampin' Dimensionals and placed it on my card base. I then took one of the die cuts from the kit, the one with the soft seafoam background and writing and cut it out with the Largest scalloped stitched rectangle die in the Stitched So Sweetly Dies to cut this out as my next layer and placed it on the card base with Stampin' Dimensionals. This project uses a lot of Dimensionals by the way. I then attached the tree truck with a little liquid glue. After the glue dried I added the two tree tops that I stamped above. Those were added with Stampin' Dimensionals.

To finish off my card I took one of the Soft Seafoam banners from the kit and stamped my outside sentiment on. I layered one of the Crushed Curry pieces on the stitched scalloped rectangle and placed my banner on top of that with Stampin' Dimensionals. I then added two of the die cut birds from the kit and one of the die cut butterflies. Next I added a few of the Shimmery Pearls from the kit around the card. I then added a piece of whisper white cut at 4 x 5 1/4 stamped with my inside sentiment to the inside of the card. Before adding it to the inside I did stamp the tree top in two of the corner one at the top and one at the bottom as a little tie in to the front in Pear Pizzazz Classic Ink.

Each month my subscribers get the exclusive Beyond The Box Paper Pumpkin Tutorial Bundle featuring alternative projects using that month's kit sent to their inboxes around the 9th of the next month as a thank you for being a subscriber. If you would like to get access to this exclusive tutorial bundle you can simply subscribe today and enjoy Paper Pumpkin each month. If you subscribe today your next kit will not bill and ship till June this time because the May Kit as sold out in recorded numbers. Click the image above to subscribe or
click here. If you would like to order the additional supplies I used to make today's alternative project you will find the list of items below in the Stampin' Up! Shopping List. Thanks for dropping by!
Happy Stampin'
Rick Adkins
Stampin' Up! Shopping List:


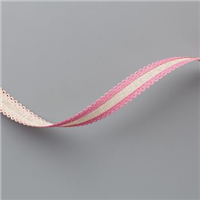
 Mini Striped Ribbon")