
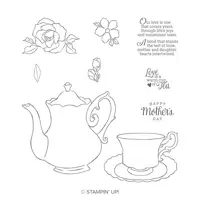
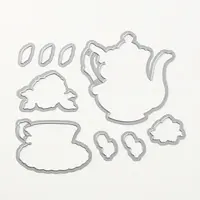
Hello and welcome to my blog; today I am sharing with my card for this weeks challenge at The Spot. The theme for this weeks challenge is Mother's Day. Everyone created projects for mother's day or to support of their mom. I picked the Tea Together Stamp Set to feature on my project today. One because it had a beautiful tea set, roses, and wonderful fonts. And, secondly it was the perfect image to create a fun scene card with my stampin' blends. Here's a look at my card.

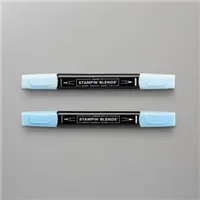
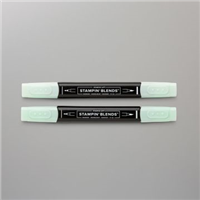
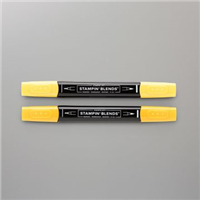
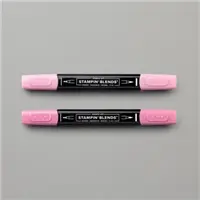
I started my card by stamping the tea pot and tea cup from the stamp set and added the rose buds and flower to both. I stamped in tuxedo black ink and colored the pot and cup in with Balmy Blue Blends and added just a little color lifter to blend out the lightest color. I colored the roses and flowers in Flirty Flamingo and Mint Macaron Blends. To color the handles, top, and bottom of the cup I used a combination of So Saffron, Mango Melody, and Soft Suede to create the golden color.

After coloring the cup and teapot in I set them aside to create the background. I masked off part of the card to stamp the rose wall paper in the background. Once I had all the roses stamped I removed the post it tape and was able to color both the wall paper and the table. I started by coloring all the roses with Rococo Rose Blends, and Mint Macaron. I colored the background with So Saffron blends with a couple layers of color. I colored one layer of each color let it dry and then added another layer of color and blended it all out. I then started to work on the table.

For the table I used Crumb Cake, Soft Suede, and Bronze blends. I added a little color lifter here and there to add a little texture. To achieve the wood grain look it's a matter of keep layering and not stopping when you think it's not looking good, keep going and you will get the look you want. Once I had everything colored I took the matching dies and cut out the tea cup and the teapot. I then stamped the sentiment on to the card front. I added the finished panel to a whisper white mat. Everything was added to a Rococo Rose Card base.

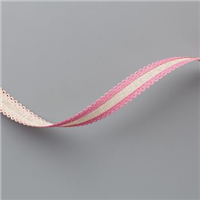
Once everything was cut out and added to the card front it was time to finish building the card. I added a little of the Rococo Rose Scalloped Linen Ribbon between the wall and table to give the look of a trim. I popped up the teapot with dimensionals as well as the tea cup. I finished off the card by adding a few of the So Saffron Sequins from the Iridescent Sequins Assortment. You can play along with use this week and check out what the other design team members came up with by clicking here. Thanks for dropping by today, If you need any of the products you've seen today you can order them in my online store. Some of the items are on the Last Chance List so don't wait to long.

Happy Stampin'
Rick Adkins


0 Comments:
Post a Comment
Thanks for taking the time to leave a comment.
Much Love,
Rick