Showing posts with label Stampin' Blends. Show all posts

Friday, January 28, 2022

I'm Nuts & Bolts About You Double Opening Fun Fold - Nuts & Bolts

Hello and welcome to my blog; today I have a fun fold card that I have not seen anywhere else online.  I am calling it a Double Opening Fun Fold.  I used the Nuts & Bolts Stamp Set to create my card today.  Here's a look at the card.  

I have a fun fold to share with you today using the Nuts & Bolts Stamp Set.  I call this fold a Double Opening Fun Fold Card.

The other supplies that I used for today's card are the same supplies that I used for my January Creative Corner Online Card Club.  My club members get anywhere from $20 - 25 in brand new Stampin' Up! Supplies in their kits each month.  So, my club members will be able to use their leftover supplies to create a similar card design.  

Saturday, January 22, 2022

Happy Valentine's Day - Awesome Otters Coffee & A Card with Rick Replay

Hello and welcome to my blog; today I am going to share with you the card that I made and the card that I showcased yesterday day for my Coffee & a Card with Rick video.  In this week's video, I shared how to make a Valentine's Day Card.  To make the card I used Awesome Otters Stamp Set and the Sweet Converfsatons Stamp Set along with some other fun products.  Here's a look at one version of the card.  

I have a fun Awesome Otters Happy Valentine's Day Card to share with you for this weeks Coffee & A Card with Rick Episode.

Tuesday, January 18, 2022

Otterly Awesome & Marbleous - Awesome Otters

Hello and welcome to my blog; today I am going to share with you a card using the Awesome Otters Stamp Set and the Simply Marbleous Designer Series Paper. Both of which are level one Sale-A-Bration items.   I am also going to share with you in today's post how to create a Basic Gray blend with some Stampin' Blends.  Here's a look at today's card.  

I have a otterly awesome card using the Simply Marbleous DSP and the Awesome Otters Stamp Set both of which are Sale-A-Bration items1/4/22-2/28/22

Thursday, July 22, 2021

Turtle-y Loved Easel Card - Facebook Live Replay

Hello and welcome to my blog; today I am going to share w with you the project that I made last night during my Facebook Live.  I used one of my favorite bundles from the 2021-2022 Stampin' Up! Annual Catalog.  I feel head over shell for this one when I saw it and had to have the Turtle & Friends Bundle.  So, I had to create a fun little easel card to share with you today.  Here's a look at my card.  

You're Turtle-y loved by everyone why not share the love with this cute easel card using the Turtle & Friends Bundle.  Learn more here

Sunday, May 30, 2021

We Belong Together - United Through Creativity Simple Sunday Card

 Hello and welcome to my blog;  today I am going to share a super cute little card with you using the new United Through Creativity Digital Download from Stampin' Up! for todays Simple Sunday Card.  Here's a look at today's project. 

I have a super simple card for Simple Sunday today using the United Through Creativity Digital Download and some Simple Stampin' Blends coloring

Tuesday, April 6, 2021

Wrapped Bouquet Mother's Day Card - Video Tutorial

 Hello and welcome to my blog; today I am going to share a card that you can make for Mother's Day and I did a little no line coloring just for fun.  I used the Wrapped Bouquet Bundle to create the focal point for my card today.  Yes, it's been awhile since I shared a post; that's a whole other topic for another day.  Here's a look at my card.  

Ever wonder how to make and color a Mother's Day Card?  I have you covered Click here to learn more

Monday, March 8, 2021

How to Create A Stampin Bends Color Chart - And Why You Want To!

 Hello and welcome to my blog; today I am going to share with you how to create a color swatch chart for your Stampin' Blends and why you will want to!  There are many reasons why artists create color swatch charts for their supplies; so, I am going to share with you some of those today.  

Learn why you want to create a Stampin' Blends Color Swatch Chart plus get my free color chart PDF to make your own.  Click here to learn more

Color swatching is basically the process of laying out your coloring media in a grid so you can see it.  This also allows you to actually see the true color of the media.  Because we all know that the caps or tip on the media my not look the same as the ink, paint, or marker.  

Saturday, March 28, 2020

Thanks for Being You - Free As A Bird - Stampin' Up! Simple Stamping Saturday

Hello and welcome to my blog; today I have another Simple Stamping Card for you.  Today's card is a simple one layer card.  I used the Free As A Bird Stamp Set from the 2019 Annual Catalog, along with some a little simple coloring.  Simple stamping is all about going back to the basics for people that may not have a lot of experience stamping or that are just learning.  Here's a look at today's Simple Stamping Card.


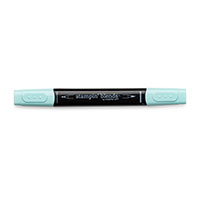
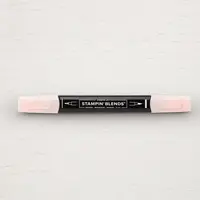
I started out by taking a 4 1/4 x 11 piece of Thick Whisper White Cardstock and stamping the image of the very cute little birds on the branch in Soft Suede Ink and colored them very loosely with a few stampin' blends.  I used the following colors (all the dark blends) no blending for some very simple coloring; Calypso Coral, Daffodil Delight, Pool Party, and Petal Pink.  I colored in the branch with the Soft Suede Dark Blend, and the leaves with Mossy Meadow.  The flowers were done with Calypso Coral. 


I then stamped the smaller branch from the set with Mossy Meadow Ink at the top along with the small bloom.  I added a few of the small flower image from the stamp set to fill in some areas and add a little extra color to the card with Calypso Coral Classic Ink.  I then added just a little more color to the leaves at the top with my Mossy Meadow blends.  Just roughly coloring them in and not adding a ton of color to not over saturate the cardstock.


To finish off my simple card I added the sentiment in Mossy Meadow above the branch with the birds perched on it on the left-hand side.  Simple stamping cards would be great to create a bunch right now during the Covid-19 pandemic to give to people that are out working.  They would be great to send to send to first responders, your mail person, people working at the grocery store or someone you may encounter or know that may need a little pick me up.
Happy Stampin' 
Rick Adkins 

If you live in the US.  I would love you to choose me as your demonstrator.  If you would like to purchase any of these products you can click on the Shop Now Button or by clicking on any of the images below.  Alternatively, you can also contact me by email to place your order.  Please be sure to use the monthly host code and I’ll send a little something out to you the following month to say Thank You!


Use the March Host Code on any order of $50 (before taxes & shipping) or more during the month and receive a gift from me in April as a Thank You.  If your order is $150 or more, please don't use the host code.  You will forfeit your Stampin' Rewards if you do; and I want you to get those rewards.

If you place any size order with me during the month of March, you will receive the March Creative Stampers Tutorial Bundle from me as a little thank you.  This month's tutorial bundle features fourteen floral themed tutorials.  The Creative Stampers Tutorial Bundle can either be earned for FREE with any size order or Can be purchased for $20 from me.

Stampin' Up! Shopping List: 


Friday, March 27, 2020

Grace's Garden Window Card

Hello and welcome to my blog; today I am going to share with you a fun little card that I CASEd from the January-June Mini Catalog from Stampin' Up!. I was searching for a little inspiration yesterday, because I just wasn't feeling crafty at all.  One of our cats passed yesterday which actually all started on late Wednesday afternoon.  So needless to say I was not feeling it yesterday or Wednesday, this little event threw us for a whirlwind.  So I went to what I do to start feeling creative again.  I looked through the catalogs to try and find a little inspiration.  And I came across this bundle and knew that I hadn't even touched it yet so I thought why not recreate one of the cards here.  So that's how this came about.  The card in the catalog is more of a square card and I made it into a regular old A2 size card.  Here's a look at the card.   You will find the A4 metric measurements for my card in ()'s for each piece of cardstock through out the post.

Tips & Tricks: 

I started off my card by die cutting the with arbor opening in my Sahara Sand Cardstock.  I just centered it on the 4 x 5 1/4 (14.4 cm x 10 cm) Sahara Sand cardstock and ran it through my die cutting machine.  Next I took my Sahara Sand layer and layered it on my 5 1/2 x 8 1/2 Thick Whisper White Card Base (14.9 cm x 21 cm) and lined up the die again and ran it back through to cut the window.  After that die cutting was complete I used the Brick and Mortar 3D Embossing Folder and ran the Sahara Sand piece back through with the 3D Embossing Plate to emboss the wall.  If you run it through before die cutting you will flatten out your embossing.  

Next I took some Whisper White and cut the arbor and gate out using the die and my die cutting machine.  I added that to the front of the card using Liquid Glue.  I then cut the gate open with my Paper Snips so that it could be open just a little.  I then stamped the images I had planned to use in Tuxedo Black Ink and colored them with my Highland Heather and Mossy Meadow (Light and Dark) Stampin' Blends.  I then die cut those out with the matching dies.  I also cut out one of each vine dies from some scrap of Mossy Meadow Cardstock. 


I started adhering the vines down first after I arranged everything on my card front.  To do this I used a mixture of Multipurpose Liquid Glue and Fine Tip Glue mixed in my Fine Tip Glue Bottle.  The combination of glues add the best of both for maximum adhesion.  Once the vines were attached I then started add the flowers with Stampin' Dimensionals on some and Liquid Glue on one.  I wanted a few different layers on the card so this was the best option.

Next I took a 3 x 5 1/2 (7 cm x 14.9 cm) piece of Whisper White Cardstock and did a little ink blending over it using just Highland Heather Ink.  I used the ink blending technique to create a Ombre look to this piece of cardstock.  I then placed it where I wanted it to go inside the card and closed my card.  I used Gorgeous Grape Ink (because I was to lazy to put the sentiment in my Stamparatus and double stamp it with Highland Heather Ink to get a dark color) and stamped the sentiment in the window opening.  

Video Tutorial: 


If you are viewing this post by email you may have to click here to view the video.  Not all mail servers will show the embedded video tutorial.  You can also click on the image below to watch.

  
Happy Stampin' 
Rick Adkins 

If you live in the US.  I would love you to choose me as your demonstrator.  If you would like to purchase any of these products you can click on the Shop Now Button or by clicking on any of the images below.  Alternatively, you can also contact me by email to place your order.  Please be sure to use the monthly host code and I’ll send a little something out to you the following month to say Thank You!  

Use the March Host Code on any order of $50 (before taxes & shipping) or more during the month and receive a gift from me in April as a Thank You.  If your order is $150 or more, please don't use the host code.  You will forfeit your Stampin' Rewards if you do; and I want you to get those rewards.


If you place any size order with me during the month of March, you will receive the March Creative Stampers Tutorial Bundle from me as a little thank you.  This month's tutorial bundle features fourteen floral themed tutorials.  The Creative Stampers Tutorial Bundle can either be earned for FREE with any size order or Can be purchased for $20 from me.

Stampin' Up! Shopping List:

Template Designed by creativeworkerbee