Showing posts with label treat holder. Show all posts

Friday, November 5, 2021

November Blogging Friends Blog Hop - Last Minute Christmas & Unboxing Day Gifts

Hello and welcome to my blog; today is the Blogging Friends Blog Hop for November.  This month's theme was Last Minute Christmas & Unboxing Day Gift Ideas.  And  I am sure you will find all kinds of fun ideas for creative holiday needs.  Here's a little look at my project for this month's hop.  

Check out the last minute Christmas Gift & Unboxing Day Gift Ideas with this months Blogging Friends Blog Hop for November.

Thursday, October 28, 2021

Pretty Pillow Box Ghirardelli Treat Holder - 3D Thursday Project & FREE PDF Tutorial


Hello and welcome to my blog!  I hope that you are doing well today and I am glad that you are visiting with me.  Debbie from http://www.debbiehendersondesigns.com is our team designer this week.  Check out her a wonderful project below.  

Thursday, September 2, 2021

Cutest Halloween Mini Jam Jar Treat Carrier - 3D Thursday Blog Hop


Hello and welcome to my blog; today I am excited to announced that I am a New Design Team Member for the 3D Thursday Group.  We are doing a blog hop to kick off the new season.  Each one of use used the Mini Jam Jars to create a project for you for the hop.  You will be able to check out some fabulous designs during the hop today.  Here's a look at my project.  

Cutest Halloween Mini Jam Jar Treat Holder by Rick Adkins

Saturday, February 13, 2021

Snailed It Sour Patch Kids Treat Box - Treat Week 2021 Day 6

 Hello and welcome to my blog; today is day sixth of Treat Week 2021, and I have a super cute project for you today.  Today's project features products from the Snail Mail Suite in the Stampin' Up! January-June Mini Catalog.  

Day 6 of Treat Week 2021 - Snailed It Sour Patch Kids Treat Box Click here to learn more!

This cute little treat holder features one of my favorite suites in the January-June Mini Catalog.  

Tuesday, February 9, 2021

Valentines Flip Top Russel Stover Treat Box - Kangaroo and Company

 Hello and welcome to my blog; today I have a super cute treat holder for you featuring the Kangaroo & Company Bundle from the January-June Mini Catalog.  This is also Day Two of Treat Week 2021.  

Treat Week 2021 day 2 project featuring the Kangaroo & Company Bundle Russel Stovers Treat Box Click here to learn more

Today's project is also for this week's creative challenge over at the Spot Weekly Challenge Blog.  We have a super fun sketch challenge for you to play along with this week.  I will link the challenge image below.  

Monday, January 27, 2020

Treat Week 2020 #1 - WITTY-CISMS Gift Bag

Hello and welcome to my blog; today I am going to share with the first project for my Treat Week 2020!  I am going to be sharing a new treat project with you everyday this week using new products from Stampin' Up!.  Today, I am going to share with you a super cute project using the Witty-cisms stamp set (inspired by Million Dollar Sales Achiever Lisa Fast), the super cute Printed Gusseted Bags, along with the Tags & More Accessories Kit to make a super quick & easy Treat Bag.  Here's a look at my treat bag.


You can make a a ton of these with the everything that I listed above.  I picked the Witty-cisms stamp set for it's fun little play on words and super cute images that could be easily colored.  I `started out by picking my designer series paper and cutting it in half.  Which was super easy since the Brights Paper stack is 6 x6.  I scored both pieces at 1 1/4" and 1/2".  The 1/2" piece was attached to the 1 1/4" section.  When inserted the other 1 1/4" piece becomes the folded over topper.    I then picked one of the coordinating tags and label from the Tags & More Accessory Kit.
Once I had the designer series paper inserted into the gusseted bag and added the candy I folded over the excess of the bag and then closed it with one of the copper clips from the kit and added a tag.  I then stamped the sentiment with Tuxedo Black ink and colored it.  The Lookin' Sharp image I colored with Granny Apple Green Blends.  For the Thanks Berry Much image I colored it with Granny Apple Green and Calypso Coral stampin' blends.   The dark Calypso Coral marker is very close to Terracotta Tile, so it matches great.

Video Tutorial: 


If you are viewing this post by email you may have to click here or click on the image below to view the video.  Not all email servers will show the embedded video. 

Thanks for dropping by today for the first project in this week's Treat Week.  You can find a full list of all the supplies in the Shopping List below.  Remember to check back each day for each new project.  
Happy Stampin' 
Rick Adkins 


Join my team during Saleabration and you will get the super cute Mini Cutter and the DSP Sampler Pack free in your Starter Kit along with a Free Paper Pumpkin, Business Pack, a FREE Stamp Set of your Choice in addition to the $125 of product of your choice for $99.00 with Free Shipping.  That's $277.75 of products and supplies for only $99.00 (Price includes the Well Said Stamp Set (most expensive in catalog) plus 9% sales tax) 

Receive the January Creative Stampers Tutorial Bundle with any size order!


Stampin' Up! Shopping List: 


Friday, September 20, 2019

Boo to You Werewolf Gusseted Treat Bag by Rick Adkins

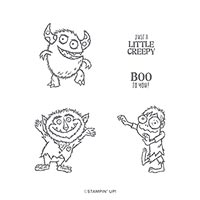
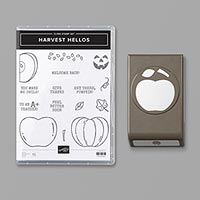
Hello and welcome to my blog; today Halloween is just around the corner and it's time to start making super easy and quick but cute treats; I am going to share with you one that I made and it's super easy to recreate.   Halloween is one of my favorite times of the year and I love to get ready for  them.  I was thinking the other day I may actually get organized and make some treat boxes and bags this year super early and actually fill them with candy.  It helps that I got my September Paper Pumpkin since I know that makes 20 treat boxes, so I was feeling inspired and came up with this little cutie using the Boo To You Stamp Set.  Here's a look at my project.

Tips & Tricks: 

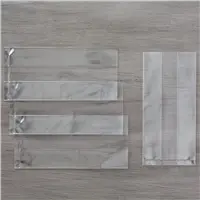
The first thing I did was cut a piece of the Monster Bash Designer Series Paper (#150447) down to 
3" x 10".  This designer series paper was roughly scored at 2" & 6 1/2" on my Simply Score Scoring Tool.  So, you can get 4 inserts for your bags from one sheet of /designer series paper.  Which means if you used the entire pack of DSP for this project you would get 48 treat bag inserts.  Once I had the treat insert folded and scored it was time to put it into my 
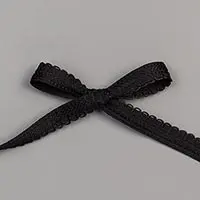
3" x 6" Gusseted Treat Bag (#141704).  Just a little side note if you don't have a scoring tool you can totally just measure it out with a ruler and fold the paper on those measurements, the papers so easy to fold it's not a big deal.  This is the method I prefer.  The 2" part of the designer series paper is the bottom of the bag.  You can place it in and put it on the bottom you may have to do a little work to get the gussets to sit down or you could add a little tape to the bottom.  I found that once it sat for a little while the bottom flaps were just fine.  The top flap folds over; you will want to fill the treat bag and then press in the gusseted sides flip the top part of the Designer Series paper over that and punch two holes.  You are punching through the gusseted bag and the designer series paper.  Make sure that your holes line up with the folded sides of the treat bag and then secure close with your ribbon.
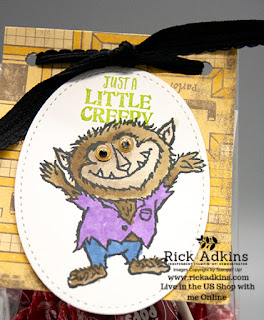
Once I had the Designer Series Paper inserted into the bag I could then fill it with treats.  It was time to dress it up just a little.  So I stamped the werewolf from the 
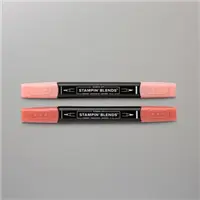
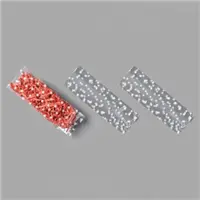
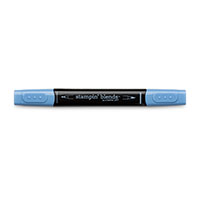
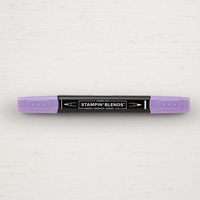
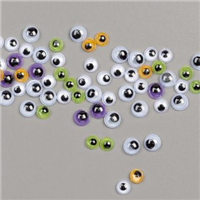
Boo To You Stamp Set (#150550) in Memento Tuxedo Black ink on a piece of whisper white cardstock that I cut out using the largest stitched oval die from the Stitched Shapes Die set.  I then colored him using my Stampin' Blends.  You can find a full list of the colors that I used in the Stampin' Up! Shopping List below.  I then stamped my greeting at the top in Old Olive and added a couple of the Googly Eyes from the Assorted Googly Eyes pack using just a little Liquid Glue.  I then popped the oval up on the front flap with a couple dimensionals.  And, that my friends finished off my cute little treat bag.

Wonderfully Wicked Online Class: 


I have a Online Class going on right now that you can purchase the products form using the monthly Host code to get enrolled in.  You simply purchase the items listed here and use the host code for this month.  In this class we are making six boxes, Cards with matching envelopes and six tags.  If you're not into Halloween you can substitute products of equal or greater value to meet your needs.  This class looks beautiful with any of our Designer Series Papers.  I will tell you that you have to use 12 x 12 paper for this class 6 x 6  will not work.  But I have everything you need listed in the class Shopping Cart for you all you have to do is follow the instructions to order.  
Happy Stampin' 
Rick

If you live in the US.  I would love you to choose me as your demonstrator.  If you would like to purchase any of these products you can click on the Shop Now Button or by clicking on any of the images below.  Alternatively, you can also contact me by email to place your order.  Please be sure to use the monthly host code and I’ll send a little something out to you the following month to say Thank You! 

Stampin' Up! Shopping List: 

Thursday, September 12, 2019

OSAT September Blog Hop: welcome to Our Holiday


Hello and welcome to my blog; today I am going to share with you the projects I've created for this months One Stamp At a Time Blog Hop.  This month we are featuring products from the Holiday Catalog.  For my projects I created a really cute card and treat holder featuring the Harvest Hello Bundle.  The Harvest Hello bundle features a both an apple and a pumpkin in it and they both match the Apple builder punch.  Here's a look at my projects.
The changing the apples into both candy apples and caramel apples was really really easy.  It was done with the addition of a little more cardstock.   I used Cajun Craze cardstock for the caramel ones and real red for the Candy Apple on the card.  I also used the Shimmery Crystal Effects that's on page 41 of the Holiday Catalog.  This is not the same as Crystal Effects that we used the have a long time ago by the way.  This has small participial of glitter in it; that add extra shine to your projects.  You see the little bit of glitter in this photo here.  For the sticks in the apples I used a bamboo skew and cut them off and attached to the card and to the apples with mini glue dots.
For my treat holder I used the same elements I did on the card with a few additions anyway.  I added a little bit of granny apple green ribbon to the top of the sucker stick that's coming out of the treat holder.  The treat holder actually is made up of all scrap cardstock.  You can see exactly how I made the treat holder in the video below.

Video Tutorial: 

If you are viewing this post via email you may have to click here to see the video.  

Thanks for dropping by today, I hope that you have enjoyed my Harvest Hello Projects.  If you need any of the supplies you can pick them up in my online store by clicking on the item in the Stampin' Up! Shopping List Below the blog roll.  If you are on my wordpress site you will need to click here to see the blog roll.  

Happy Stampin' 
Rick 

Blog Roll: 


Stampin' Up! Shopping List: 


Template Designed by creativeworkerbee