Hello and welcome to my blog and Day 3 of my 25 Days of Christmas (Holiday Card Series for 2019). I am going to share with you another card an video for this years Holiday Card Series and today's card is also a Simple Stamping Card as well. With the 25 Days of Christmas Series I have new Christmas/Holiday projects coming out every Tuesday, Thursday, and Saturday until December 21, 2019. For today's card I used the stamp set Tiny Keepsake and created a Clean and Simple Christmas Card for you today. Here's a look at my card.
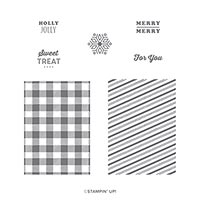
As I mentioned above this card was also designed for the beginner in mind. It only uses stamps, ink , paper, and a embellishment. Today I chose to use the Red Rhinestones from the Annual Catalog as the embellishment on my card. I thought that the simplicity of the card didn't need a lot of extra stuff. I wanted to use the Tiny Keepsake stamp set from the Holiday Catalog but in a different way than what it was designed for. This stamp set was designed to decorate the Tiny Curvy Keepsake box. But, I used one of the design images as the focal image of my card today. I just adore the simple striped image; it reminds me of candy canes and I thought it was perfect for a clean and simple one layer card.
I stamped the stripped image in the center of my thick Whisper White Card base in Real Red ink. I thought that this was a perfect attention grabber for a clean and simple card design. It still reads Christmas without being overpowering. This design is perfect for mass production and a new stamper at the same time. Because you can set it up in the Stamparatus and stamp all the card bases at one time or use a clear block and do the same.
Once I had the center stamped I stamped one of the greetings from the stamp set on the outside in Old Olive ink. I did add a inside sentiment with the Host Set Greatest Part of Christmas (which is one of my favorite Christmas sentiments sets ever). I love the mix of inside and outside sentiments in this set and it has all kids of different fonts that I am sure you will find something to work on your cards.
As I mentioned before once I had the outside and inside finished I just added a few of the red rhinestones to embellish the card. If you have missed any of the projects in my 25 Days of Christmas Holiday Card Series you can click here to view them all or just do a simple search on my blog and find them.
Video Tutorial:
If you are viewing this post by email you may need to click here or on the image below to view the video. Not all mail servers will show the embedded video.
Thanks for dropping by today I hope that you have enjoyed this little look at my clean and simple Christmas card today.
Happy Stampin'
Rick Adkins
If you live in the
US. I would love you to choose me as your demonstrator. If you
would like to purchase any of these products you can click on the Shop Now
Button or by clicking on any of the images below. Alternatively, you can
also contact me by email to place your order. Please be sure to use the
monthly host code and I’ll send a little something out to you the following
month to say Thank You!
November HOST CODE: QU2TJBJN
1.Spend any
amount with me this month and receive the Creative Stampers Tutorial
Bundle. Plus get a gift from me in December.
Please remember that if you use the host code you cannot use that
order towards my KCRP’s (Kinmon Crafty Reward Points) that would be double
dipping and is not allowed. For more information on KCRP’s click here.
Three
main reasons to Join!
1.You Get at least a 20% discount
on all your orders while you are a demo.
2.You get to join my fun Kinsmon
Crafters Team and Private Facebook Group.
Hello and welcome to my blog today, and the November Blogging Friends Blog Hop! This month our theme is Celebrate with Some Christmas Cheer. When I came up with this month's theme I had something different in mind than what I came up with for this month's project. I didn't know at the time I came up with the theme that Stampin' Up! would be releasing a limited time suite that was just perfect for this theme. But, they says things happen for a reason and this was so true with this theme and the limited time Christmastime is Here Suite of products that went live in my online store today. Here's a look at my projects.
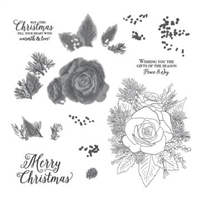
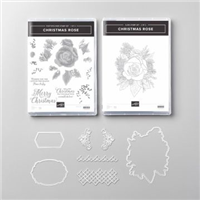
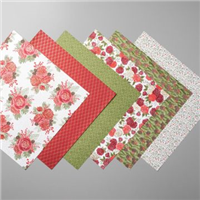
Yes, I did say projects; I really love this suite of products and created an entire gift set with the products from this suite. I started out by creating a card using the Christmas Rose Stamp Sets, matching dies, Christmastime is Here Designer Series Paper and other products in this suite.
The Christmas Rose Stamp set is a dual configuration set; meaning one stamp set is clear mount red rubber and the other is Photopolymer. The Red rubber cling stamp is the outline of the rose bouquet. The photopolymer set is the layering set to fill in your outlined images. This set works best with the stamparatus, so that you can get perfect placement with your stamped layers. I used a piece of the designer series paper in the background of my card.
Next for the gift set I made a bow using the designer series paper. I used the bow to decorate my little gift bag. I also created a matching tag to go along with the bow and gift bag. I love the look of brown paper mixed with pretty paper at Christmas Time. I did a video on how to create paper bows a few weeks ago I will share that with you as well so that you can make your own.
Paper Bow Video:
If you are viewing my post by email today you can click here to view the bow making tutorial.
To me there's not a better way to celebrate Christmas Cheer than with a gift set. Because after all isn't this truly a time to share the joy of giving during the holiday season, so why not have a few gift sets made and ready to go. Plus with the limited time Christmastime is Here Suite (available while supplies last) you will be totally ready to go during the holiday season. Thanks for dropping by I hope that you have a wonderful day.
If you are viewing this post on my wordpress site you will need to click here to view the blog roll.
Blog Roll:
Happy Stampin'
Rick Adkins
If you live in the
US. I would love you to choose me as your demonstrator. If you
would like to purchase any of these products you can click on the Shop Now
Button or by clicking on any of the images below. Alternatively, you can
also contact me by email to place your order. Please be sure to use the
monthly host code and I’ll send a little something out to you the following
month to say Thank You!
November HOST CODE: QU2TJBJN
1.Spend any
amount with me this month and receive the Creative Stampers Tutorial
Bundle. Plus get a gift from me in December.
Please remember that if you use the host code you cannot use that
order towards my KCRP’s (Kinmon Crafty Reward Points) that would be double
dipping and is not allowed. For more information on KCRP’s click here.
Three
main reasons to Join!
1.You Get at least a 20% discount
on all your orders while you are a demo.
2.You get to join my fun Kinsmon
Crafters Team and Private Facebook Group.
Hello and welcome back to my blog today; this is my second post for today, but I am back with you to share my alternative projects for this month's Paper Pumpkin Kit (Winter Woods). I had so much fun playing with this month's kit. Here's a look at my Projects.
For my alternative projects this month I created a bag/box with a card and alternative card that's just super simple to do. So we are going to jump into the card first. Let's have a closer look at the card shall we.
For my alternative card I used a 4 1/4 x 11 piece of Thick Whisper White Cardstock for my card base. I simply scored it in half at 5 1/2". Next, I took the left over part of the tree die cut that came in this month's kit and laid it onto my card base. I taped it down to my desk and started doing some ink blending. I started with Balmy Blue ink. I untaped it and then shifted it over just a little and retaped it back to the desk and did a little more ink blending for a second row of trees with Night of Navy Ink. I then removed the home made makeshift stencil and took the original die cut piece that came out from the opening and stamped my sentiment at the bottom and added it to the card base to create my third layer of trees. With the ink blending I also got a second mound of snow in the background. Bonus! I finished off the card by adding just a single cardinal die cut to the front.
For my 3d project I created a smaller version of the Bag/box & Card combo that I made last year. I wanted to create a smaller version of that project and the items in this months Paper Pumpkin Kit was just perfect. I started out with two pieces of 6 x 6 cardstock and scored each piece on three sides at 1" on my New Stampin' Up! Trimmer. Once I had all the scoring down I cut up the scorelines for the two smaller squares and notched them in just a little, glued everything up. Once dried I glued both parts together using a liquid glue (you could use tear & tape but I wanted a little more wiggle room with the glue).
For the card on the front of the box/bag I used a piece of 3 1/2 x 8 Night of Navy cardstock and scored it in half at 4". I added a piece of whisper white cardstock to the front and inside of the card that measures 3 1/4 x 3 3/4". I took one of the cards from this month's kit and cut it down to 3 x 3 1/2" for the front of the card. I added my sentiment to one of the banners from the kit with dimensionals. I fished it off with one of the cardinals. I did stamp my sentiment and some of the large snowflakes from this months Paper Pumpkin exclusive stamp set on the piece of whisper white that went on the inside of the card. Before adding it to the bag/box I took some Poppy Parade texture ribbon wrapped it around the box and tied it into a pretty knot on one side. I then took the card and added it to the front of the bag/box with a few Stampin' Dimensionals. The final measurements of the bag/box once complete is 4" w x 5" h x 1" d.
Video Tutorial:
If you are viewing this post by email you will need to click here to view the video tutorial.
If you are viewing this post on my wordpress site you will have to click here to view the blog roll.
Blog Roll:
Happy Stampin'
Rick Adkins
If you live in the
US. I would love you to choose me as your demonstrator. If you
would like to purchase any of these products you can click on the Shop Now
Button or by clicking on any of the images below. Alternatively, you can
also contact me by email to place your order. Please be sure to use the
monthly host code and I’ll send a little something out to you the following
month to say Thank You!
November HOST CODE: QU2TJBJN
1.Spend any
amount with me this month and receive the Creative Stampers Tutorial
Bundle. Plus get a gift from me in December.
Please remember that if you use the host code you cannot use that
order towards my KCRP’s (Kinmon Crafty Reward Points) that would be double
dipping and is not allowed. For more information on KCRP’s click here.
Three
main reasons to Join!
1.You Get at least a 20% discount
on all your orders while you are a demo.
2.You get to join my fun Kinsmon
Crafters Team and Private Facebook Group.