Hello and welcome to my blog; today I am going to share with you the projects from the August Paper Pumpkin Kit The Gift of Fall. This was a super fun kit that made gift bags and tags for the Fall season. There was an additional add-on kit offered for those that wanted to make cards but I kept forgetting to order the add-on kit. Yes, that's the story of my life, I would mean to everytime I placed an order and then I would get side tracked by all the other pretty things and forget to do so. I think if you are still a subscriber there are some left, I am okay with not ordering it because I created my own alternative projects that you will see in another post later today. This post is all about the kit itself and the projects that it made. Here's a look at the projects from the August Kit.

I actually enjoyed making the tags and the gift bags from this month's kit way more than I thought I would. I am not big on making projects like this and would prefer to make cards instead, but again I had a fun time crafting away the other night and made all the bags and tags from the this month's kit. I used the tissue paper that comes in the box each month for the bags. I have them all folded up ready to use when I need a little gift bag this Fall.
Bag & Tag #1:
This was the first bag and tag set that I made using the kit. I tired very hard to follow the instructions as written, but I am pretty sure I ended up skipping the directions and just following the picture on the front of the instructions instead.
I laid out everything and got it ready in two different stacks for each set of projects. I find this to be the most useful tip when I do any of the Stampin' Up! kits. If I leave everything in the box and try to do one project at a time I get overwhelmed. It's much more comforting to me to just go ahead and lay everything out into groups before I get started. But, you have to find the system that works for you.
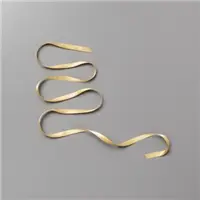
This little bag and tag used the multicolored tag, the Merry Merlot stitched circle (yes, its' stitched) I never would have noticed that unless I had seen it in real life. You can't really tell in any of the photos I've seen. The Blackberry Bliss leaves, the crumb cake leaf, some of the twine and the ribbon plus my punched sentiment piece once i had all that laid out I was ready to go. I stamped the sentiment part of the tag first and then started layering everything else up together. These went really quick which are what must Paper Pumpkin projects are designed to do; to give you about a thirty minute crafting break each month. Plus, they are great for people that don't have or want a lot of supplies.
Bag & Tag #2:
The second design was just as much fun as the first. This tag used the white banner, the Crushed Curry Circle with the gorgeous wreath pattern on it, the Pretty Peacock leaf the vellum pieces, and some of the twine and ribbon. I was suppose to use a few of the crumb cake leaves but I ended up forgetting to use them so it was totally okay. Remember I wasn't reading the instructions and didn't pay close enough attention to the picture. But, it worked out fine and it's just as cute as the intended tag. So no harm no foul right.
I love the vellum pieces on this tag, they are so pretty, and they make such an impact on your project. I also like instead of a bow on this bag it was designed with just a nice little knot tied to the bag handle with long ribbon streamers. I love this look and would not have thought of it without the picture from the August Kit I wouldn't have do it. It's just such a super simple technique and adds such an interesting look; I think it's so simple that you just wouldn't think about doing the ribbon that way. Mind Blown!
So What Came In This Month's Kit:
So what all came in this month's kit you may be asking, well I am going to share all that with you also. Here's a look at all the supplies that came in this month's $22 monthly
subscription kit.
The kit came with all the little gift bags and the tag bases, the die cut pieces needed to make the tags, the beautiful Fall themed printed vellum die cuts, all the labels, die cut circles, the leaf punch outs two packs of different sized adhesive backed gold sequins, adhesive, a Merry Merlot Stampin' Spot, and the exclusive Photopolymer stamp set that you can continue to use. Yes all that came in this super inexpensive kit. I know right what a great deal.
Here's a little look at the stamp set from this month's kit. You can see you have a great selection of sentiments for the Fall gift giving season as well as that cute little leaf/berry stamp. I had so much fun playing with this sent on my alternative projects for the A Paper Pumpkin Thing Blog Hop that goes live at 8 am today, so you're going to want to check back and see all the great alternative projects that have been created.
So What's Coming Next Month:
Well, all we know is that the September Kit is a Halloween themed kit and will make 20 frightfully festive food safe treat boxes. As far as what they look like or what the kit it self looks like we don't have a clue. We also know that it's in a super fun designed Halloween themed box. If you are not a
Paper Pumpkin Subscriber and you have kids or grand kids in school and you want to make treats for their Halloween party at school I would totally suggest
signing up. If you need 32 treats you may want to sign up for two. After you get this kit and make the projects there's no commitment to keep your subscription. But, why not get everything you need for those frightful treats for one low cost.
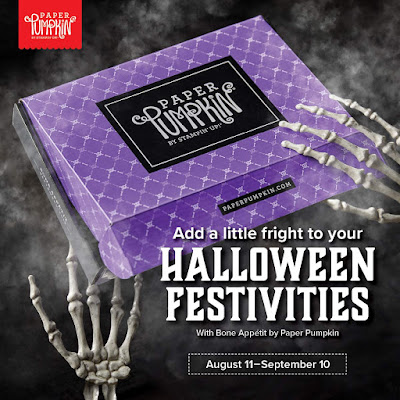
In the same respect I would suggest that if you don't like making treat boxes and you're a subscriber you may want to skip the September kit, so far there has been mention of another add-on kit to change the projects to cards as we had with this month's kit. Remember you control your subscription, you can cancel and skip any month you choice.
If you do want to
subscribe and get the September kit you will want to do so by September 10th. You can
click here and go to the subscription page. Each kit costs $22 plus tax and comes straight to your mail box with all the crafty fun ready to go. If you're a new subscriber you will get a clear block in your first kit to get you started stamping. You really can not beat the price, for super fun projects ready to assemble right in your mail box. You do have to live in the United States to subscribe so there is that.
If you don't want to do the monthly subscription there are also prepaid subscriptions that you can give as gifts to your crafty friends as well. You will find those links below in the Stampin' Up! Shopping List. Thanks for dropping by remember to check back at 8 am CST for my alternative project post with the A Paper Pumpkin Thing Blog Hop where you will find a ton of alternative ideas.
Happy Stampin'
Rick
Stampin' Up! Shopping List: