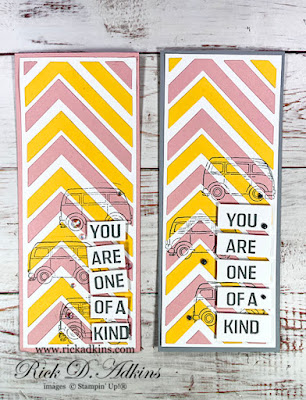
Hello and welcome to my blog; today I am going to share with you the cards that I shared on this week's Coffee & a Card with Rick Epsoside. In this week's video, I shared some tips on how to draw inspirations from the Stampin' Up! catalogs to CASE a card. Here's a look at the two versions of the card I shared.
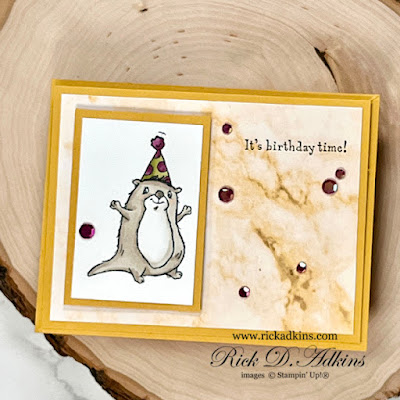
Hello and welcome to my blog; today I am going to share with you the card that I made during my weekly YouTube Live. Last night I shared how to make a Diagonal Fold Easel Card with the Awesome Otters Stamp Set.
Hello and welcome to my blog; today I am going to share with you the card that I made last night during my weekly YouTube Live. During my live I introduced the new Eden's Garden Collection which will be releasing soon. Here's a look at the card I made during the Live using the products in the collection.
Hello and welcome to my blog; today I have a fun video tutorial for you showing you how to create a Double Dutch Door Fun Fold Card from only one sheet of cardstock. I made this card last night during my weekly YouTube Live. I used the Little Delights Stamp Set from the July-December Mini Catalog. Here's a look at the card we made during the Live.
Hello and welcome to my blog; today I am going to share with you the cards that I made last night during my weekly Facebook Live. Last night I made 11 cards using two sheets of 6" x 12" pieces, some matching cardstock, a little ribbon and a few more supplies. Here's a look at the cards I made.
Hello and welcome to my blog; today I have a showstopper card for you and I do mean a show stopper. This is a definite WOW card. When I showed it to Charles last night his first word was "wow!" He never has a reaction like that. He most of the time just says that they are nice and pretty, but never a wow. So, I know that it's differently a wow card. Any way you can decided your self here's a look at the front of the card.
Hello and welcome to my blog; today I am going to share the card that I made yesterday during my YouTube Live. I had designed this card back in December but had not gotten around to sharing it yet. So, I thought yesterday was a great day to do that. I shared how to make a stand up easel calendar card if you are wondering. You will find all the sizes and dimensions below. Here's a look at my card.
Hello and welcome to my blog; today I am going to share with you a card that I made for the Creative Stampers Tutorial Bundle Blog Hop. The Creative Stampers are a group of Stampin' Up! Demonstrators that I have pulled together for one purpose. And that purpose was to team up and help each other and out customers create by creating a set of tutorials around one suite, theme, or product. This way we could inspire everyone with creative ideas. This month the featured item for the Creative Stampers Tutorial Bundle for April is the Fine Art Floral Suite from the January - June Mini Catalog. Each month we share even more ideas using the featured products with you as alternative projects to our project for that month's tutorial bundle.
Hello and welcome to my blog; today I am going to share a card that you can make for Mother's Day and I did a little no line coloring just for fun. I used the Wrapped Bouquet Bundle to create the focal point for my card today. Yes, it's been awhile since I shared a post; that's a whole other topic for another day. Here's a look at my card.
Hello and welcome to my blog; today I am going to share with you the card that I made last night on my Facebook Live. Every so often on my Facebook Live, I do a Customer Choice. This is where everyone watching gets to help pick out the products that I use to create that night's project. This time I actually already had a kit cut with some of the supplies and ready to do. This was a kit I had made up a few weeks back to do a different Live with but did another project instead. I thought this would be a great way to use that kit. Here's a look at the card that we came up with last night.
Hello and welcome to my blog; today I am going to share with you a card I made last night during my weekly Facebook Live. I mentioned on Monday that you would want to join me today. I mention that I would share a card with the same layout and supplies from Monday. But instead of another feminine Valentine's Day Card, we are going to make a masculine Valentine's Day. If you missed my post from Monday you can find it here. Here's a look at my card.
Hello and welcome to my blog; today I am going to share with you the card that I made for a presentation on World Card Making Day 2020. I am going to share with you how to make a Designer Series Paper Gift Card Holder - using the Heartwarming Hugs Designer Series Paper and the Wrapped in Christmas Stamp Set from Stampin' Up!.
Using your Designer Series Paper to make a Gift Card Holder will allow you to showcase both sides of that beautiful Designer Series Paper that we love to hold on to and store for that special project that never happens.
Hello and welcome to my blog; today I am going to share my YouTube Live video with you that I just did a little while ago on my YouTube Channel introducing the Curvy Christmas Stamp Set and other products in the Curvey Celebrations Early Release that will go live on November 3, 2020.
The products in this early release are part of the Quite Curvy Variety Bundle. The Quite Curvy Variety Bundle can be used for Christmas, New Year’s, and Valentine’s Day crafts. The products can be bought separately, or you can save 10% by purchasing them all! The Quite Curvy Variety Bundle includes everything you need to create cards for a variety of upcoming special occasions. You will want to act quickly and grab these exclusive, early-release products once they are available to the public or you could add them to your Starter Kit Today! The Stampin' Up! Starter kit is always the best deal!
For my Card today I used the Curvy Christmas Stamp Set, the Curvy Dies and the Classic Christmas 6 x 6 Designer Series Paper that are part of the Quite Curvy Release. The Curvy Christmas Stamp Set will allow you to create one-of-a-kind Christmas crafts! I love the how the sentiments and the some of the imagery has the curves to match the Curvy Dies. Plus there are so many other images in inside that will allow you to create anything that you would like. The curviness of these images will make for a fun little holiday element on any project.
I used the the Dainty Diamond 3D Embossing Folder as an accent on my card today; it was the perfect texture to add to the card without taking away from the curvy flow going on. I embossed a 4" x 5 1/4" piece of Shaded Spruce with the Dainty Diamond 3D Folder and added it to the card base with just a little Stampin' Seal Adhesive.
Next I used my Stamparatus to stamp both the sentiment and the star border from the Curvy Christmas Stamp Set onto a 2 1/4" x 5 1/4" piece of Whisper White Cardstock. I stamped the sentiment in Shaded Spruce Ink and the Stars in Crushed Curry Ink. I picked my colors not only from the Classic Christmas Designer Series Paper but I through in the Crushed Curry because it's a great compliment to the festive colors going on with my card today.
After stamping the sentiment and star border I cut a 2" x 5 1/4" strip of the Classic Christmas 6 x 6 Designer Series Paper and ran it through my Stampin' Cut & Emboss Machine with the stitched Curvy Die from the Curvy Die Set. I attached this layer to the Whisper White layer with some Stampin' Seal and popped the entire panel up on my card with a lot of Stampin' Dimensionals.
To finish off my card I added a few of the Star Designer Elements to the star border going along the side of the Whisper White layer. This added a little more texture to the card and a nice metallic element.
Video Tutorial: Curvy Christmas Stamp Set Stampin' Up!
If you are viewing this post by email you may not be able to to see the embedded video. If that is the case click here to go to the Live Replay on my YouTube Channel. I will be live every Friday on there at 11 am CST with a new project. So make sure you subscribe to my channel and hit the little bell icon to be notified when I go live.
Thanks for dropping by today I have listed all the items that are currently available in my online store in the shopping list below. To help you plan your shopping of the Quite Curvy Products when they release on November 3, 2020 you can download the PDF Flyer below.
New Year New Customer Rewards Program. It's a new Stampin' Up! Year and it's time to update a few things and I have started with my Customer Loyalty Program. You can read all about the new program by clicking here. You will also find the new Crafty Rewards Tracker Sheet there as well. All past rewards points have now expired for previous years with this new program.
If you place any size order with me during the month of October you will receive the October Creative Stampers Tutorial Bundle from me as a little thank you. This month's tutorial bundle is a Mega Tutorial Bundle featuring projects for both Fall & Halloween. There are 20 tutorials featured this month. The Creative Stampers Tutorial Bundle can either be earned for FREE with any size order or Can be purchased for $22 from me. As a bonus for ordering during the month of October you will also get the Coming Home Tutorial Bundle as well.
The month of October Stampin' Up! has a Designer Series Paper Sale going on on 15 select Designer Series Papers. Each pack of paper is 15% off so it's a perfect time to stock up. You can find out all the details and my ordering special for this sale by clicking here. This wonderful sale ends on October 31, 2020 so don't miss out!
Ordering Special:
I have a must have Ordering Special for you this week. You can order my Adhesive Bundle this week to stay stocked up on your favorite adhesives. There's nothing worse then running out of your favorite adhesives in the middle of a project. My Adhesive Bundle contains all the adhesives you will need in the month. With the Holidays coming up we use more of our favorite adhesives than normal so this is a great way for you to stock up. And it even comes tied with a bow and cute little tag which makes it perfect for gifts as well.
Included in the Bundle is a Stampin' Seal, Stampin' Seal Refill, Stampin' Dimensionals, Mini Glue Dots, and a Multipurpose Liquid Glue
Order my Adhesive Bundle for only $41.00 which includes all shipping and taxes
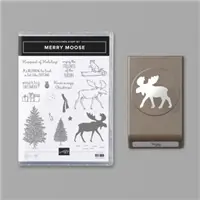
Hello and welcome to my blog; today I am going to share with you the card that I made during my Facebook Live last night. My card features the Merry Moose Bundle from Stampin' Up!. This was one of the hardest to get bundes last year during the Holiday Season. The Moose Punch Sold out so fast and kept selling out that it could not be keep in stock. And looking at my card you can see why.
This stamp Set and punch bundle is just so stinking cute! I loved this set so much and didn't get a chance last year to showcase it because it kept selling out. I am so excited that Stampin' Up! brought it back this year as a Returning Favorite in the August - December Mini Catalog. I am also featuring this set in my Online monthly card club for October. I will link to my club page here so you can find out all the details and to sign up. Here's a look at the card I made last night during my Weekly Facebook Live.
I started out my card by cutting some Pear Pizzazz Cardstock down to 5 1/2" x 8 1/2" and scored it at 4 1/4" to make my card base. Most card bases are always a half a sheet of cardstock just cut in half either on the long side or the shorter side. Next I added a piece of Real Red Cardstock cut at 3 3/4" x 5".
To my Real Red mat layer I added a piece of the Heartwarming Hugs Designer Series Paper (which by the way is on sale during the month of October as part of the Designer Series Paper Sale.) The Heartwarming Hugs Designer Series Paper was cut at 3 1/2" x 4 3/4". You can click here to take advantage of the Designer Series Paper Sale.
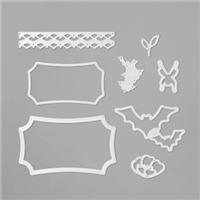
Next I took some scraps of Whisper White and Mossy Meadow Cardstocks to do the rest of the card. I stamped the moose outline in Soft Suede Ink and then stamped the fill image off once and added it to the outline. Then I used the matching Moose Punch to punch out my Moose. I used another Scrap of Whisper White and my Mossy Meadow Scrap to create the labels. The labels came from the Halloween Magic Dies, so you can totally use them for other projects other than Halloween; don't get caught up on the title and think you only have to use them for Halloween, they are perfect on other projects as well. I ran the small and large label dies through my Stampin' Cut & Emboss Machine. I then stamped the large Pine Tree in Pear Pizzazz Ink onto the Whisper White Label. I stamped it once full strength and then two more times reinking it and stamping off on my scratch paper to create a lighter shade and to make them look as if they are further away.
Next I added the Mossy Meadow label die cut to the front of my card with Stampin' Seal. Before adding the Whisper White label I stamped my sentiment at the bottom in Real Red Ink and added a couple Red Basic Rhinestones. I popped the label up onto the Mossy Meadow one with Stampin' Dimensionals. I added a Stampin' Dimensional behind the moose's butt and add some Stampin' Seal to his head. I placed him on the card front where his cute little butt was on the card base and the head was on the Whisper White label. This adds even dimension to the card front.
Video Tutorial:
If you are viewing this post by email you may have to click here to see the video. Not all mail servers will show the embedded Video. Thanks for dropping by today I hope that you enjoy this cute little card. If you want to join my Crafty Corner Monthly Card Club you still have time to join this month. You can do so by clicking here. If you need any of the supplies that you have seen today you can pick them up in the shopping list below.
Happy Stampin'
Rick Adkins
Out with the Old and In with the New!
New Year New Customer Rewards Program. It's a new Stampin' Up! Year and it's time to update a few things and I have started with my Customer Loyalty Program. You can read all about the new program by clicking here. You will also find the new Crafty Rewards Tracker Sheet there as well. All past rewards points have now expired for previous years with this new program.
If you place any size order with me during the month of October you will receive the October Creative Stampers Tutorial Bundle from me as a little thank you. This month's tutorial bundle is a Mega Tutorial Bundle featuring projects for both Fall & Halloween. There are 20 tutorials featured this month. The Creative Stampers Tutorial Bundle can either be earned for FREE with any size order or Can be purchased for $22 from me. As a bonus for ordering during the month of October you will also get the Coming Home Tutorial Bundle as well.
The month of October Stampin' Up! has a Designer Series Paper Sale going on on 15 select Designer Series Papers. Each pack of paper is 15% off so it's a perfect time to stock up. You can find out all the details and my ordering special for this sale by clicking here. This wonderful sale ends on October 31, 2020 so don't miss out!
Ordering Special:
I have a must have Ordering Special for you this week. You can order my Adhesive Bundle this week to stay stocked up on your favorite adhesives. There's nothing worse then running out of your favorite adhesives in the middle of a project. My Adhesive Bundle contains all the adhesives you will need in the month. With the Holidays coming up we use more of our favorite adhesives than normal so this is a great way for you to stock up. And it even comes tied with a bow and cute little tag which makes it perfect for gifts as well.
Included in the Bundle is a Stampin' Seal, Stampin' Seal Refill, Stampin' Dimensionals, Mini Glue Dots, and a Multipurpose Liquid Glue
Order my Adhesive Bundle for only $41.00 which includes all shipping and taxes