
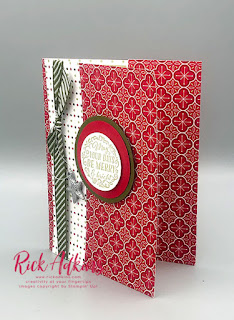
Hello and welcome to my blog; today I am going to share with you the card that I made for a presentation on World Card Making Day 2020. I am going to share with you how to make a Designer Series Paper Gift Card Holder - using the Heartwarming Hugs Designer Series Paper and the Wrapped in Christmas Stamp Set from Stampin' Up!.

I love using both sides of my Designer Series Paper no matter what pack I am using. I am just like the rest of you when it comes to picking out which side of the designer series paper to use. This project is a great one to use up your Designer Series Paper; you can always but another pack if you need it. Right now I know that most of you are looking for special ways to make gifts for the holidays and that a lot of people give gift cards during this time. This is a great easy way to dress up your gift cards and you can use both sides of your paper so no deciding on which side to use.
This is a super easy project as I mentioned above and you can make a lot of them at once if you need to. Plus you can make them coordinate to your the pack of Designer Series Paper that you pick. You can make them for the Holidays or for any other occasion. You simply need a piece of DSP that's cut at 5 1/2" x 12" to start out.

After you have cut the Heartwarming Hugs Designer Series Paper (or whichever pack you pick) down to size you are going to do a little scoring. You are going to score your DSP at 4 1/4" (stand side folding card) and 8 1/2". You are then going to fold over your 8 1/2" score line over to the inside of the card. Open it back up and add a strong adhesive to the top and bottom sections of the 2" flap. Close this and you now have your pocket to hold your gift card.
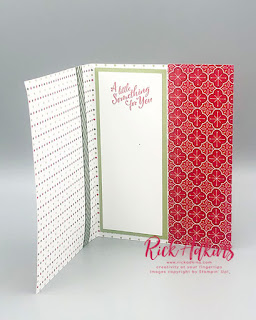
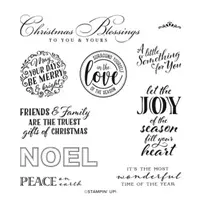
Fold over the other side of the card to make the card it's self. Now we need a place to write and stamp a message on the side so you will need a little cardstock. I used Pear Pizzazz (2" x 5 1/4") and a piece of Whisper White (1 3/4" x 5"). I stamped my sentiment on the inside of the card using Real Red Ink and the sentiment came from the Wrapped in Christmas Stamp Set. I think this is must have Holiday greeting stamp set. You will find most of the greetings you will need for the Holidays inside.
Thank you for dropping by today, I hope that you have a wonderful day and that you will give this project a try. I know that you will love using both sides of your Designer Series Papers to make gift card holders this Holiday Season. If you need any of the supplies that you have seen today you can pick them up in my online store by clicking on the items in the Stampin' Up! Shopping List below.


Tips & Tricks:

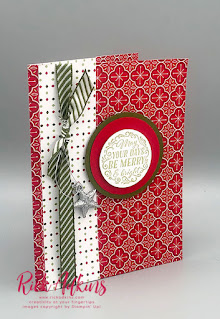
From this 5 1/2" x 12" piece of the Heartwarming Hugs Designer Series Paper I then cut it down to 5 1/2" x 11". Save that 1" x 5 1/2" strip we are going to use it for the front of the card. This adds to the decoration and again allows you to showcase both sides of that wonderful DSP.

After you have cut the Heartwarming Hugs Designer Series Paper (or whichever pack you pick) down to size you are going to do a little scoring. You are going to score your DSP at 4 1/4" (stand side folding card) and 8 1/2". You are then going to fold over your 8 1/2" score line over to the inside of the card. Open it back up and add a strong adhesive to the top and bottom sections of the 2" flap. Close this and you now have your pocket to hold your gift card.

 |
| Image by Stampin' Up! |
Video Tutorial:
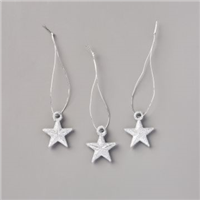
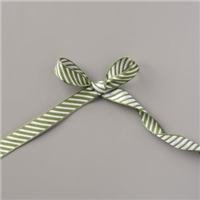
If you are viewing my post by email you may not see the video tutorial here. If that is the case you can click here to watch it. Now it's time to decorate the front of the card. Take the 1" strip of DSP that we cut off earlier and attach to the front of the card. Wrap the Mossy Meadow Diagonal Ribbon around the car and tie it into a flat knot. Stamp your sentiment in Pear Pizzazz Ink and punch it out or die cut it with a 1 1/2" circle. Attach that to a 2" circle in Real Red, and a 2 1/4" circle from Mossy Meadow cardstock. Add this to the front of your card. Now add one of the Glitter Star Ornaments to the card front with a Mini Glue Dot for a little added sparkle.

Happy Stampin'
Rick Adkins

Happy Stampin'
Rick Adkins

Poinsettia Petals Holiday Treat Packaging Class To Go!

Most Wonderful Time Holiday Card Class To Go!

Santa's Workshop Holiday Stamp Camp To Go!
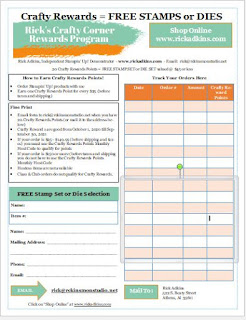
New Year New Customer Rewards Program. It's a new Stampin' Up! Year and it's time to update a few things and I have started with my Customer Loyalty Program. You can read all about the new program by clicking here. You will also find the new Crafty Rewards Tracker Sheet there as well. All past rewards points have now expired for previous years with this new program.

November 2020 Crafty Corner Rewards Host Code

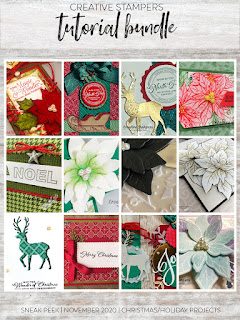
If you place any size order with me during the month of November you will receive the November Creative Stampers Tutorial Bundle from me as a little thank you. This month's tutorial bundle features 12 projects Holiday/Christmas Themed Projects. There are 20 tutorials featured this month. The Creative Stampers Tutorial Bundle can either be earned for FREE with any size order or Can be purchased for $22 from me.


I love this card! Will be making several of these today.
ReplyDelete