Saturday, March 26, 2022
Sunday, January 30, 2022
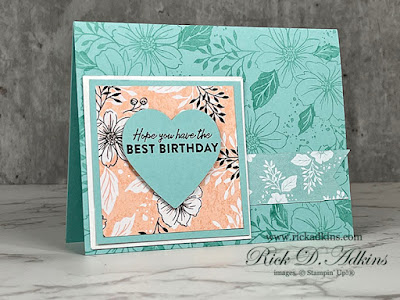
Hope You Have the Best Birthday - Friendly Hello Bundle
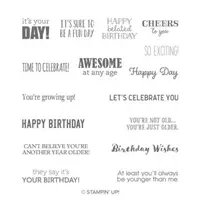
Hello and welcome to my blog for Simple Sunday! This week I have a simple birthday card to share with you using stamps ink and paper. This week I also used a punch out that I had on hand to use also. This card also serves another purpose as well; if you stick around you will find out what that surprise is.
January 30, 2022 & Paper, #simplestamping, Friendly Hello Bundle, gift card holder, Ink, sip card, Stamps Leave a Comment
Sunday, January 23, 2022
Awesome Otters SIP Card
Hello and welcome to my blog; today I have a Simple Sunday project for you. This is a project created using mostly Stamps, Ink, & Paper. Today's SIP (Stamps Ink & Paper) Card features the Awesome Otters Stamp Set. Here's a look at my Simple Sunday project.
Sunday, January 9, 2022
Sunday SIP (Stamps Ink Paper)Card 1/9/22 - Island Vibes
Hello and welcome to my blog; today is Sunday, and that means it's Simple Sunday. Which if you are new here this is the day I share cards designed for beginner crafters using only Stamps, Ink, and Paper. SIP cards (Stamps, Ink, and Paper) are a great way to learn how to create cards. Stamps, Ink, and Paper are the basic tools you need to create cards. So, I have designed this series to use those basic supplies. Here's a look at this weeks card.
January 09, 2022 #simplestamping, celebrating you stamp set, Ink, island vibes stamp set, paper, Simple Sunday, SIP, sip card, Stamps, Stamps Ink and Paper Leave a Comment
Sunday, October 10, 2021
Sweets & Treats SIP Card - Simple Sunday
Hello and welcome to my blog; I am working on getting back onto my schedule after the surgery. So I have a SIP Card for you today since this is Simple Sunday! If you are not sure what I mean by SIP card this is a simple stamped card that uses stamps, inks and paper. For this weeks card I crafted up a super sweet little birthday card to share using the Sweets & Treats Stamp Set from the July-December Mini Catalog. Here's a look at the card.
Sunday, May 31, 2020
My Meadow Happy Birthday Card
Hello and welcome to my blog; today I am sharing with you a card I made this week using the My Meadow Stamp Set. I can not believe that I've not played with this stamp set since I got it back in November at Centerstage. I think I was a little intimidated by it. I thought it would be a little harder to create with than it really was. But it was quite easy. Here's a look at today's card.
Stampin' Up! Shopping List:
May 31, 2020 #simplestamping, Card making, papercraft, papercrafting, papercrafts, sip card, Stampin' Up! Leave a Comment
Saturday, February 15, 2020
Stampin’ Up! Beautifully Braided Saturday Simple Stamping Card - Episode 46
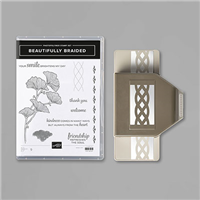
Hello and welcome to my blog and the next Episode of my Saturday Simple Stamping Card Series. Today's project marks forty-six project tutorials that I have shared with beginning stampers and crafters. This is a series that goes back to the basics and uses just stamps, ink, and paper (SIP Cards). You can see all the SIP cards by either doing a search in the search bar or click here and see the playlist. For my card today you I used the Beautifully Braided Stamp Set from the January-June Mini Catalog. Create elegant borders with flowers, scallops, and braided patterns in the Beautifully Braided Stamp Set. With the included phrases, you can make greeting cards for your friends. With the large images it makes for a perfect set to use on SIP Cards. Here's a look at my project for today.
Simple Stamping Tips & Tricks:
Simple Stampin' Video Tutorial:
Steppin It Up to Causal & Avid Cards:
The Beautifully Braided stamp set can be purchased as part of a Cost Saving Bundle along with the Braided Bolder Punch. When you purchase the bundle you save 10% off the cost of both items. Here's a look at the cards I designed using the Bundle for the Casual and Avid Crafters. For my Causal Crafters I used the Beautifully Braided Bundle along with some additional cardstock and a couple more punches to create the Causal style card that can be seen here on the left.
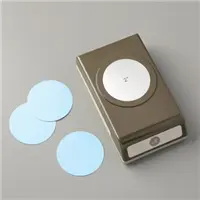
 I punched out a 2" Circle Punch from the center of my Purple Posy cardstock. I punched out from the center of the mat layer because no one will ever see it and know if you don't tell them. This is a great trick to save on cardstock and get the most use from your investment.
I then stamped my sentiment on the front panel and used a 1 3/4" Circle Punch from that. I then stamped the same image that we filled in the floral with the same way over the sentiment to create a little interest. I then layered this onto our Purple Posy Circle with a little liquid glue.
I used the Braided Bolder Punch and some scraps of Highland Heather Cardstock and punched out the border braid. I then attached it over the bottom third of the whisper white card front using liquid glue before matting it.
I then popped up the circle sentiment embellishment over the opening where I did the punch out to hide the hole in the card front. I popped this up using Stampin' Dimensionals. And that finishes how I made the Casual Crafter version of this card.
 For my Avid Crafter card I repeated the same steps as for the Casual Crafter with a few alterations and additions to the card.
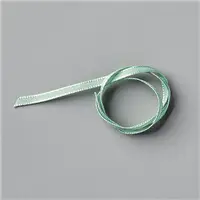
Once I had the braid punched out I decided to braid in some additional texture to the embellishment. I picked the 1/8" Mint Macaron Sheer Linen Ribbon and weaved it in and out of the openings on the braided cardstock until I got to one side. Then I cut it off and repeated it in the other openings creating a double braid. Once I was to the other side I tied the two loose ends of the ribbon into a bow. It took about 28 to 30" of ribbon to do this. I attached the double braided embellishment to my card front with liquid glue that I put behind it making sure to not only add the liquid glue behind the cardstock but the ribbon as well.
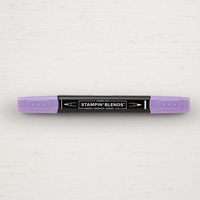
I then took some Basic Rhinestones Jewels and colored them with my dark Highland Heather Stampin' Blends. This is a great way to get a custom embellishment to match your projects without a lot of work. You do have to color them and then let them dry a little while. But, the look is stunning. To do this you are going to color them while they are still on the backing from the packaging and just use the darkest blend that matches your project and color them. Easy peasy! Once the newly colored rhinestones where dry I just popped them on my card. I added a couple on the sentiment piece, and then placed the others over the berries for a little extra bling.
All the items listed before the bundle on the shopping list is what I used for the SIP version of my card. Everything after that are for the two stepped up versions.
Stampin' Up! Shopping List:
Rick Adkins
BLOG ARCHIVES
-
►
2021
(222)
- December (16)
- November (17)
- October (21)
- September (23)
- August (13)
- July (18)
- June (26)
- May (26)
- April (15)
- March (6)
- February (19)
- January (22)
-
►
2020
(303)
- December (18)
- November (27)
- October (22)
- September (16)
- August (30)
- July (24)
- June (14)
- May (30)
- April (28)
- March (33)
- February (29)
- January (32)
-
►
2019
(318)
- December (23)
- November (31)
- October (37)
- September (26)
- August (28)
- July (28)
- June (32)
- May (20)
- April (28)
- March (34)
- February (26)
- January (5)

