Thursday, November 28, 2019

A Paper Pumpkin Thing Blog Hop: Winter Gifts


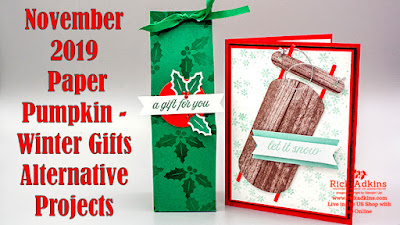
Hello and welcome to my blog; today I am going to share with you two alternative projects for the November Paper Pumpkin Kit Winter Gifts.  My post is also part of this month's A Paper Pumpkin Thing Blog Hop.  Each month we come up with a couple alternative projects using that month's kit.  This month I created both a card and a 3d project as my alternative projects.  Here's a look at my projects.

Tips & Tricks: 

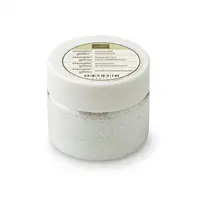
For my 3d project I created a tall milk carton.  I started out by stamping my 8 1/2 x 8 1/2 Shaded Spruce cardstock with the holly image from this months exclusive stamp set.  I stamped it all over the background cardstock to create my own designer series paper of sorts.  Once it was stamped I used my Simply Score to score the cardstock.  I scored it at 2, 4, 6, and 8 on one side.  Next I turned it on the other side and scored at 2" then I flipped it around and over and scored at 1/2".  Once all the scoring was done it was time to fold and burnish all the score lines.  I cut up the 2" score lines at the bottom and took off the two very small rectangles.  You are going to secure the carton together with tear and tape.  I used my crop a dile to punch holes in the top to weave ribbon through the holes to secure close.  I stamped a sentiment on one of the banners and added it to the poppy parade circle.  I then tucked some of the holly die cuts behind the sentiment and added some red rhinestones as the berries and to add a little bling.  
For the card I used a piece of Real Red Cardstock cut at 5 1/2 x 8 1/2 scored at 4 1/4.  I stamped the little snowflakes from the set onto my whisper white cardstock ( 3 3/4 x 5) all over the background.  I layered this piece onto a Real Red mat (3 7/8 x 5 1/8) which was placed on a 5 1/4 x 4 Early Espresso mat.  I then stamped the sentiment onto a one of the banners and added one of the pool party banners behind that one.  I added one of the sleds to the card front along with the sentiment.  I wanted to add just a little more bling to the card.  But how to do it, there are so many choices but I wanted to have a snow effect.  I decided to add some dots of the fine tip glue all over the background and then use my Dazzling Diamond glitter and sprinkle it over the glue.  

Video Tutorial: 

If you are viewing this post by email you may have to click here or on the image below to view the video.  
If you are viewing this post on my wordpress site you will have to click here to view the blog roll.  

Blog Roll: 


Happy Stampin' 
Rick Adkins 

If you live in the US.  I would love you to choose me as your demonstrator.  If you would like to purchase any of these products you can click on the Shop Now Button or by clicking on any of the images below.  Alternatively, you can also contact me by email to place your order.  Please be sure to use the monthly host code and I’ll send a little something out to you the following month to say Thank You!  


December HOST CODE:  CEUXJX6R
  1. Spend any amount with me this month and receive the Creative Stampers Tutorial Bundle.  Plus get a gift from me in January.
Please remember that if you use the host code you cannot use that order towards my KCRP’s (Kinmon Crafty Reward Points) that would be double dipping and is not allowed.  For more information on KCRP’s click here.  


Three main reasons to Join!  
1.     You Get at least a 20% discount on all your orders while you are a demo.   
2.     You get to join my fun Kinsmon Crafters Team and Private Facebook Group.
3.     Access to directions to all my online classes 

Stampin' Up! Shopping List: 

Price: $10.00

Wednesday, November 27, 2019

Rick's Black Friday & Cyber Monday Ordering Special

Black Friday through Cyber Monday Order Special    

*|FNAME|**|LNAME|*
Hello and welcome to my blog!  I wanted to pop on with this really quick post  and tell you about my Black Friday - Cyber Monday Ordering Special!  This is not a special offered from Stampin' Up! but through me!
Details:
From today November 27, 2019 through December 2, 2019 with every $25 (before shipping and taxes) that you spend in my online store using the HOST CODE: CEUXJX6R  I will send you a special little extra gift from my prize buckets.
You must use the host code to receive the free gift!  This is offer is only valid in the United States and is not a Stampin Up! Offer.  This is a offer that I am hosting myself and has no affiliation with anything Stampin' Up! my offer.  This offer is only while supplies last!

Order in my online store at http://bit.ly/buystampinup
Just to Sweeten the Deal:  
  • Not only will you get a extra free gift for every $25 (before shipping and taxes) you place.l
  • I will also send you my Creative Stampers Tutorial Bundle Free 
  • Get my monthly Free ordering gift as well. .  

Happy Stampin' & Shopping

Day of Thanks Feather Card

Hello and welcome to my blog; today I am going to share a card using the Day of Thanks Stamp Set.  I used the feather image from the stamp set to create the major part of my card.  This is a super simple and easy card to make and fast to reproduce.  Here's a look at my card.

Don't be a turkey. Express your thanks with the Day of Thanks Stamp Set. The realistic images and heartfelt sentiments radiate gratitude.  Our cling stamps features premium rubber stamp that have been deeply etched with the images so you get a superior stamped impression each time.  They are  precut so you don't have to trim.  Cling stamps are repositionable; temporarily mount them on clear blocks for stamping, then remove them for storage.  The Day of Thanks stamp set features five cling stamps featuring wonderful Thanksgiving imagery.

I repeatedly stamped the feather from the stamp set onto my Whisper White Thick Cardstock in Soft Suede Ink.  I stamped the sentiment onto a stitched whisper white circle.  I popped the circle up on Stampin' Dimensionals.  And this my friends finished my card.  Thanks for dropping by today I hope that you have a wonderful and safe Thanksgiving day tomorrow.

Happy Stampin' 
Rick Adkins 

If you live in the US.  I would love you to choose me as your demonstrator.  If you would like to purchase any of these products you can click on the Shop Now Button or by clicking on any of the images below.  Alternatively, you can also contact me by email to place your order.  Please be sure to use the monthly host code and I’ll send a little something out to you the following month to say Thank You!  

December HOST CODE:  CEUXJX6R
  1. Spend any amount with me this month and receive the Creative Stampers Tutorial Bundle.  Plus get a gift from me in January.
Please remember that if you use the host code you cannot use that order towards my KCRP’s (Kinmon Crafty Reward Points) that would be double dipping and is not allowed.  For more information on KCRP’s click here.  

Three main reasons to Join!  
1.     You Get at least a 20% discount on all your orders while you are a demo.   
2.     You get to join my fun Kinsmon Crafters Team and Private Facebook Group.
3.     Access to directions to all my online classes 

Stampin' Up! Shopping List: 


Tuesday, November 26, 2019

How to make Star of David Shaped Hanukkah Card Video Tutorial

Hello and welcome to my blog; today I am going to share with you a super cute fun fold card.  Today, I am going to share another project in my 25 Days of Christmas Holiday Card Series 2019.  I am going to share with you a Star card, and yes I did say this was a fun fold.  Which I know if you follow me (and if you don't why would you not :)) you know that I don't do them a lot.  My rule is if something is to many steps I am probably not going to do it.  And, I know must of you are the same way.  I also designed this card to be a Hanukkah card for my Jewish friends out there.  Here's a look at my project.

Tips & Tricks: 

I used the Brightly Gleaming Designer Series Paper for my card today, and it is cut at 8 3/4 x 10".  You going to line it up at 5 on the 10" side and make a center mark.  Then you are going to turn the designer series paper in the trimmer from the center point to the bottom corner and make cut it to make a triangle.   Then you are going to pull in the Simply Score and score at 4 3/8 and 5 7/8 on all three sides.  When you are lining up make sure that you are keeping the point in the corner slightly away from the top of the score board so you don't damage you points.  You will want to fold and burnish your score lines into a mountain and valley fold.  


You are going to need a piece of 5 x 5 piece of Very Vanilla cardstock and you are going to line up the cardstock with your folded card and trace around.  Then cut inside the lines to get the insert for your card.  At this point you can stamp your sentiment on the inside.  I used the candles from I say Hello Photopolymer Stamp Set and stamped them in Tuxedo Black ink because I colored them using my stampin blends.   The other set I used was the A Wish For Everything bundle since it has great sentiments and matching dies that you create the prefect sentiment for any project.

I stamped my candles three times but masked off the ones that I wanted.  I wanted to create a little menorah so the candles were the easiest way to do this.  I then colored them candles with my Night of Navy light stampin' blend and the Light Mango Melody one for the tops.  I just did simple coloring to fill in the candles.  I then stamped the sentiment at the top and bottom of the candles in Night of Navy ink.  I used snail adhesive to adhere it to the inside of the card.
Once you get the sentiment in it's time to fold up your card.  And, it's just a simple mountain valley fold starting in one corner, and you are going to do go around until you get to the last side and you are going to tuck the last one in to the first one.  Basically you are tucking each inside corner under the other.  It makes more sense when you watch the tutorial.
The die cut HAPPY will be attached to the oval with liquid glue, and the hanukkah is stamped.  I finished off the card with some of the star designer elements.  

Video Tutorial: 

If you are viewing this post by email you will need to click here or the image below to view the video.  
Thanks for dropping by today, I hope that you have enjoyed today's little project.  I will see you again tomorrow for another cut little card.  
Happy Stampin' 
Rick Adkins 

If you live in the US.  I would love you to choose me as your demonstrator.  If you would like to purchase any of these products you can click on the Shop Now Button or by clicking on any of the images below.  Alternatively, you can also contact me by email to place your order.  Please be sure to use the monthly host code and I’ll send a little something out to you the following month to say Thank You!  


Three main reasons to Join!  
1.     You Get at least a 20% discount on all your orders while you are a demo.   
2.     You get to join my fun Kinsmon Crafters Team and Private Facebook Group.
3.     Access to directions to all my online classes 

Stamin' Up! Shopping List: 


Price: $7.00

Template Designed by creativeworkerbee