Hello and welcome to my blog; today I am going to share with you a card I made featuring the Lovely Lilly Pad stamp set, matching dies and a little bit of the matching designer series paper. All of which are part of this years Sale-a-bration offerings. This year Sale-a-bration starts on January 3, 2020 and there are a lot of great FREE items that you can earn starting right off the bat. I wanted to take a little time today and showcase some of those items along with some items you can order to qualify for some freebies. Here's a look at my card.
I picked my colors for my card from the Lilly Impressions Designer Series Paper: Impressionistic images in rich colors make the Lily Impressions Designer Series Paper an excellent choice for elegant backgrounds and accents on handmade cards and scrapbook pages. I used the following colors for my card; Lovely Lipstick, Gorgeous Grape, and Granny Apple Green as the main colors for my card.
Stamp beautiful water lilies, lily pads, and more with the Lovely Lily Pad Stamp Set. This stamp set is a Reversibles** set, so stamps are two sided with an image on each side of the stamp for more creative options. Earn this stamp set FREE with a qualifying purchase January 3–March 31, 2020, during our Sale-A-Bration promotion! Ask your demonstrator about other coordinating products you can also get FREE. **Patent Pending. I cut the lilies and the detailed die cut with the matching Lily Pad Dies which allows you to create custom die-cut water lilies, lily pads, and other fun paper cut outs for card making and scrapbooking.
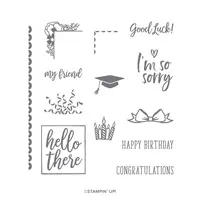
My sentiment came from the I Say Hello Stamp Set from the 2019 Annual Catalog. I thought it was just the perfect little sentiment for my bright and cheery card. I did mat the designer series paper in Very Vanilla cardstock which mixed with the Whisper White are actually a fun little mix on the card. I embossed the Granny Apple Green cardstock with the Beads and Baubles Embossing Folder. I thought that the use of this embossing folder and the lilies was a perfect match.
Size & Dimensions:
Gorgeous Grape Cardstock: 5 1/2 x 8 1/2
Granny Apple Green Cardstock: 4 x 5 1/4
Whisper White Cardstock: 4 x 5 1/4 (inside) scrap for the lilies, pad, and sentiment
Very Vanilla Cardstock: 3 1/4 x 4
Lily Impressions Designer Series Paper: 3" x 4"
Noble Peacock Foil: scrap
Thanks for dropping by I hope that you have enjoyed this little sneak peek of some of the new Saleabration items that are coming very soon. Remember that Saleabration items can only be earned with qualifying orders. I will see you again soon
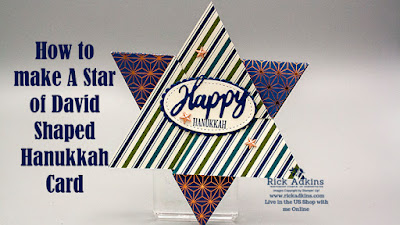
Hello and welcome to my blog; today I am going to share with you a super cute fun fold card. Today, I am going to share another project in my 25 Days of Christmas Holiday Card Series 2019. I am going to share with you a Star card, and yes I did say this was a fun fold. Which I know if you follow me (and if you don't why would you not :)) you know that I don't do them a lot. My rule is if something is to many steps I am probably not going to do it. And, I know must of you are the same way. I also designed this card to be a Hanukkah card for my Jewish friends out there. Here's a look at my project.
Tips & Tricks:
I used the Brightly Gleaming Designer Series Paper for my card today, and it is cut at 8 3/4 x 10". You going to line it up at 5 on the 10" side and make a center mark. Then you are going to turn the designer series paper in the trimmer from the center point to the bottom corner and make cut it to make a triangle. Then you are going to pull in the Simply Score and score at 4 3/8 and 5 7/8 on all three sides. When you are lining up make sure that you are keeping the point in the corner slightly away from the top of the score board so you don't damage you points. You will want to fold and burnish your score lines into a mountain and valley fold.
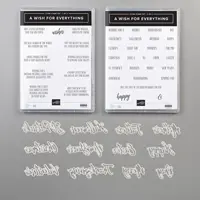
You are going to need a piece of 5 x 5 piece of Very Vanilla cardstock and you are going to line up the cardstock with your folded card and trace around. Then cut inside the lines to get the insert for your card. At this point you can stamp your sentiment on the inside. I used the candles from I say Hello Photopolymer Stamp Set and stamped them in Tuxedo Black ink because I colored them using my stampin blends. The other set I used was the A Wish For Everything bundle since it has great sentiments and matching dies that you create the prefect sentiment for any project.
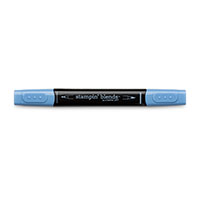
I stamped my candles three times but masked off the ones that I wanted. I wanted to create a little menorah so the candles were the easiest way to do this. I then colored them candles with my Night of Navy light stampin' blend and the Light Mango Melody one for the tops. I just did simple coloring to fill in the candles. I then stamped the sentiment at the top and bottom of the candles in Night of Navy ink. I used snail adhesive to adhere it to the inside of the card.
Once you get the sentiment in it's time to fold up your card. And, it's just a simple mountain valley fold starting in one corner, and you are going to do go around until you get to the last side and you are going to tuck the last one in to the first one. Basically you are tucking each inside corner under the other. It makes more sense when you watch the tutorial.
The die cut HAPPY will be attached to the oval with liquid glue, and the hanukkah is stamped. I finished off the card with some of the star designer elements.
Video Tutorial:
If you are viewing this post by email you will need to click here or the image below to view the video.
Thanks for dropping by today, I hope that you have enjoyed today's little project. I will see you again tomorrow for another cut little card.
Happy Stampin'
Rick Adkins
If you live in the US. I would love you to choose me as your demonstrator. If you would like to purchase any of these products you can click on the Shop Now Button or by clicking on any of the images below. Alternatively, you can also contact me by email to place your order. Please be sure to use the monthly host code and I’ll send a little something out to you the following month to say Thank You!
Three
main reasons to Join!
1. You Get at least a 20% discount on all your orders
while you are a demo.
2. You get to join my fun Kinsmon Crafters Team and
Private Facebook Group.