Friday, September 20, 2019

Boo to You Werewolf Gusseted Treat Bag by Rick Adkins

Hello and welcome to my blog; today Halloween is just around the corner and it's time to start making super easy and quick but cute treats; I am going to share with you one that I made and it's super easy to recreate.   Halloween is one of my favorite times of the year and I love to get ready for  them.  I was thinking the other day I may actually get organized and make some treat boxes and bags this year super early and actually fill them with candy.  It helps that I got my September Paper Pumpkin since I know that makes 20 treat boxes, so I was feeling inspired and came up with this little cutie using the Boo To You Stamp Set.  Here's a look at my project.

Tips & Tricks: 

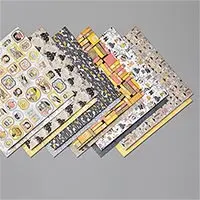
The first thing I did was cut a piece of the Monster Bash Designer Series Paper (#150447) down to 
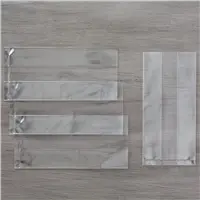
3" x 10".  This designer series paper was roughly scored at 2" & 6 1/2" on my Simply Score Scoring Tool.  So, you can get 4 inserts for your bags from one sheet of /designer series paper.  Which means if you used the entire pack of DSP for this project you would get 48 treat bag inserts.  Once I had the treat insert folded and scored it was time to put it into my 3" x 6" Gusseted Treat Bag (#141704).  Just a little side note if you don't have a scoring tool you can totally just measure it out with a ruler and fold the paper on those measurements, the papers so easy to fold it's not a big deal.  This is the method I prefer.  The 2" part of the designer series paper is the bottom of the bag.  You can place it in and put it on the bottom you may have to do a little work to get the gussets to sit down or you could add a little tape to the bottom.  I found that once it sat for a little while the bottom flaps were just fine.  The top flap folds over; you will want to fill the treat bag and then press in the gusseted sides flip the top part of the Designer Series paper over that and punch two holes.  You are punching through the gusseted bag and the designer series paper.  Make sure that your holes line up with the folded sides of the treat bag and then secure close with your ribbon.
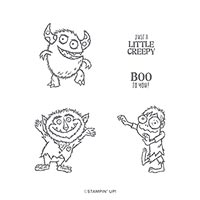
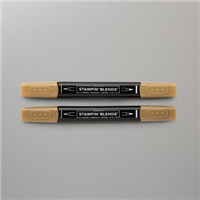
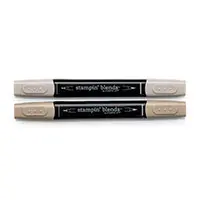
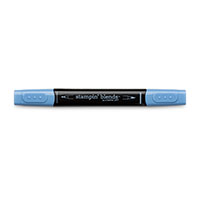
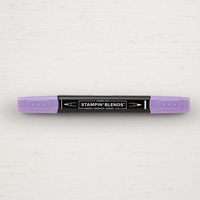
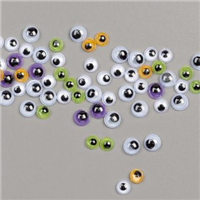
Once I had the Designer Series Paper inserted into the bag I could then fill it with treats.  It was time to dress it up just a little.  So I stamped the werewolf from the Boo To You Stamp Set (#150550) in Memento Tuxedo Black ink on a piece of whisper white cardstock that I cut out using the largest stitched oval die from the Stitched Shapes Die set.  I then colored him using my Stampin' Blends.  You can find a full list of the colors that I used in the Stampin' Up! Shopping List below.  I then stamped my greeting at the top in Old Olive and added a couple of the Googly Eyes from the Assorted Googly Eyes pack using just a little Liquid Glue.  I then popped the oval up on the front flap with a couple dimensionals.  And, that my friends finished off my cute little treat bag.

Wonderfully Wicked Online Class: 


I have a Online Class going on right now that you can purchase the products form using the monthly Host code to get enrolled in.  You simply purchase the items listed here and use the host code for this month.  In this class we are making six boxes, Cards with matching envelopes and six tags.  If you're not into Halloween you can substitute products of equal or greater value to meet your needs.  This class looks beautiful with any of our Designer Series Papers.  I will tell you that you have to use 12 x 12 paper for this class 6 x 6  will not work.  But I have everything you need listed in the class Shopping Cart for you all you have to do is follow the instructions to order.  
Happy Stampin' 
Rick

If you live in the US.  I would love you to choose me as your demonstrator.  If you would like to purchase any of these products you can click on the Shop Now Button or by clicking on any of the images below.  Alternatively, you can also contact me by email to place your order.  Please be sure to use the monthly host code and I’ll send a little something out to you the following month to say Thank You! 

Stampin' Up! Shopping List: 

Thursday, September 19, 2019

How to Create a Forest Scene Card Video Tutorial featuring Ride With Me Stamp Set

Hello and welcome to my blog; today I am going to share with you the card that I made last night during my Facebook Live.  I shared in the video how to create a one layer scene card using my Stampin' Blends and the Ride with Me Stamp Set.  I had been asked a few times how I created a snow man scene card last year that I shared on my page.  I never got around to creating a video for that card but I decided to create a new card using the same process that I used to create that one.  Let's look at the card shall we.

I created the card on the left first so that I could show everyone what I was going to be showing that last night.  I did change shape of the trees on the second one.  I wanted to show how to make the trees look like they were in the distance and in the foreground as well as creating a road scene for the truck to be one.  I mean after all it has to have some place to sit.  I enjoy creating these types of cards there's something relaxing about the coloring process.

The largest tip I can give you when creating a scene card is start with the focal image since it will be in the forefront and then work your way back.  When working on the background start with the lightest color of trees because they are in the distance.  So, the reason for this is that anything in the distance will appear lighter because of atmospheric perspective.  As things get closer the will appear darker and darker in color.  For my tree layering I started with Light Shaded Spruce and then worked my way up to Dark Pretty Peacock.  The actual order of the blends for the trees was Light Shaded Spruce, Dark shaded spruce, Light Night of Navy to Dark Pretty Peacock.  

Let's go back a step and talk about the coloring of the truck.  I started with Light Sea Side Spray stampin' blends to create a base coat.  I then added in the dark Sea Side Spray and moved to the light night of navy and then to the dark in the darkest part of the shadows.  I colored the pumpkins in just light and dark Pumpkin Pie.
I put the sky in after everything was complete.  I started with Dark Sea Side Spray and then blended it out using the Light Sea Side Spray.  If you want to add in some clouds the Color Lifter is great to do just that.  If you want more details I recommend watching the video tutorial to see the entire process.  This a longer process video but I show you exactly what I did.  If you are viewing this post by email you may have to click here to view the video.  Some email servers will not show the video.

Video Tutorial: 

Thanks for dropping by today, I hope that you have enjoyed the card and the process.  
If you live in the US.  I would love you to choose me as your demonstrator.  If you would like to purchase any of these products you can click on the Shop Now Button or by clicking on any of the images below.  Alternatively, you can also contact me by email to place your order.  Please be sure to use the monthly host code and I’ll send a little something out to you the following month to say Thank You! 
Happy Stampin'
Rick 

Stampin' Up! Shopping List

Wednesday, September 18, 2019

Season of Smiles & Love

Hello and welcome to my blog; today I am going to share with you this sweet little card for my 12 Days of Fall mini series.  The card that I created today features the Gather Together Stamp Set from the 2019 Holiday Catalog.  This is the accentual Fall stamp set and is part of the Come to Gather Suite, which is geared all around Fall.  I just love Fall; all two days of it when we get one in Alabama.  The title of this post came from the beautiful sentiment that is part of this stamp set that reads "May this season bring your smiles and love that will last all year" I just think that this is just the most beautiful sentiment, and I think it would be perfect for a Christmas Card as well.  Here's a look at my card.

My card base is a piece of Pear Pizzazz cardstock cut at 4 1/4 x 11 scored at 5 1/2.  After cutting the card base I ran it through my die cutting and embossing machine with the Hammered Metal 3D Embossing Folder.  This added such wonderful texture to the card.  This embossing folder is one of the most striking ones we have had in awhile and just FYI it's extremely popular.  So much so that it was one of the first things to go on back order the first week the Holiday catalog went live.  And looking at the impression it makes I am not surprised at all.  Next I cut a piece of the Come to Gather Designer Series Paper to 2 1/2 x 5 1/2 and a mat from Crushed Curry Cardstock that was cut 2 3/4 x 5 1/2 and layered both of them on the right-hand side of my card using Multipurpose Liquid Glue.  Any time you have an embossed area you have to have a strong glue to adhere them together.  I prefer the liquid glue because it gets in all those little craves on the embossed piece.
Next I did my stamping; and I stamped the large leaf image from the stamp set in Cajun Craze and used the matching die to cut it out.  While I was cutting the large leaf out I threw on some scraps of Crushed Curry and Cajun Craze Cardstock and cut out a few of the smaller leaves as well.  The small leaves dies not only cut the leaves out but they emboss the vines of the leaves as well.  Which by the way are very very striking.  
At this point I stamped the three pumpkins from the stamp set in Cajun Craze ink and the sentiment (which I mentioned above) and ran it through the die cutting machine with a large stitched oval from the Stitched Shapes Dies.
At this point it was time to start putting everything together.  So I started out with my sentiment and placed it where I wanted it and attached it with a few Stampin' Dimensionals.  Then I started arranging my leaves around it.  Once I had the arrangement I wanted nailed down I snapped a photo of it with my phone so that I could remember where everything goes.  Yes, I am that person that would forget in just that short amount of time where things where going.
 After the  quick little photo shoot I started attaching the leaves.  Some where attached with Multipurpose liquid glue and some was attached with dimensionals and some with both.  For example the Crushed Curry leaf coming off the sentiment it was attached with a little liquid glue where it hits the sentiment and a dimensional under where it came off so that it would be the same height.  Same thing with the little Cajun Craze leaf.  The large leaf is just attached with liquid glue.  I bet the stem of the leaf up over the sentiment and tucked the other part of the leaf under.
That finished my card for today, I hope that you have enjoyed this little series of Fall themed projects over the last few weeks.  I will see you tomorrow with another project and a video tutorial.  See you soon.
Happy Stampin' 
Rick 

If you live in the US.  I would love you to choose me as your demonstrator.  If you would like to purchase any of these products you can click on the Shop Now Button or by clicking on any of the images below.  Alternatively, you can also contact me by email to place your order.  Please be sure to use the monthly host code and I’ll send a little something out to you the following month to say Thank You! 


Stampin' Up! Shopping List


Template Designed by creativeworkerbee