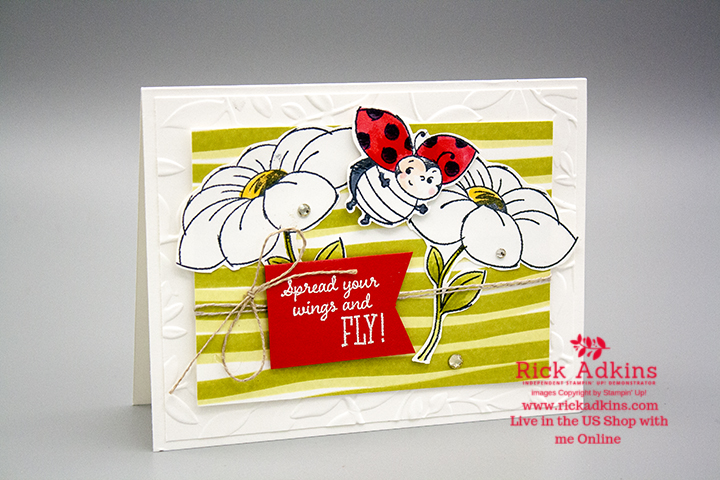
Hello and welcome to my blog; today I am going to share with you this super cute card that I CASEd from the Saleabration brochure. I used this card as part of a CASE the Catalog Swap my friend Kay Cogbill of Arkansas did a few months back. This was a fun and different swap that I had never taken part in before. I will be sharing the cards that I received as part of the swap during the next few months. I was assigned one of my favorite sets Little Ladybug so I was very excited. I picked this card to CASE (Copy and Share Everything). Here's a look at my card.
Tips & Tricks:
I went through the Little Ladybug section of the Saleabration brochure trying to decide which card I wanted to do as my CASE. I finally decided on this fun little card.
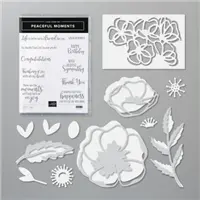
 |
| Image by Stampin' Up! |
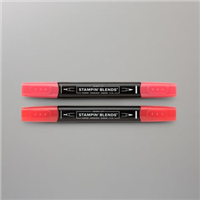
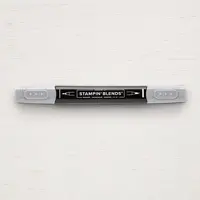
I started out by stamping all the images I needed to color for my card. I needed to stamp 36 of the flowers, and 16 of the ladybugs. I stamped them all at one time in tuxedo black ink. Once I had them all stamped I colored them all with my Stampin' Blends. I used Poppy Parade (light & dark), Petal Pink (light & dark) and Basic Black (light) to color the ladybug. I used Old Olive (light & dark) and Daffodil Delight (dark) for the flowers. Once I had all the coloring done on the ladybugs and flowers it was time to cut them all out. I had to fussy cut all of them out by hand, at the time there are no dies to do that. But, I will tell you that there are matching dies coming out in February for this die set and a few more coordinating items. I will share more about that later on in another blog post.
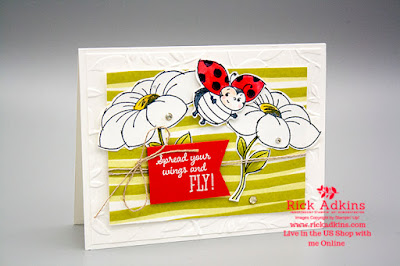
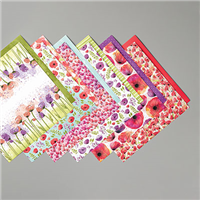
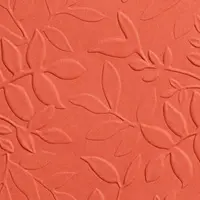
Next, I had to do the striped paper in the background. I didn't know at the time that the stripped paper in the background was in the Peaceful Poppies Designer Series Paper. So you can use the designer series paper or make your own like I did. I used Whisper White and my Old Olive (light & dark) blends to create my own version of this paper. I cut my handmade paper down to 4 1/2 x 3 3/4. My next layer for my card was a piece of whisper white cardstock cut to 5 1/4 x 4 that I embossed with the Layered Leaves 3d Embossing Folder. My card base is a piece of Thick Whisper White cut at 5 1/2 x 8 1/2 scored at 4 1/4.
 |
| Image by Stampin' Up! |
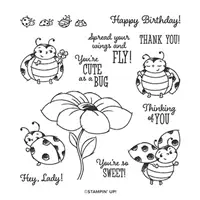
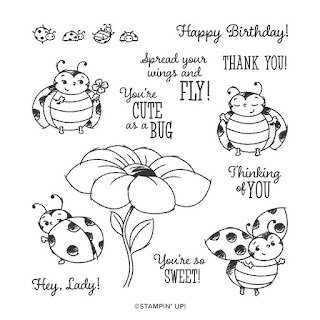
Get the adorable Little Ladybug Host Stamp Set FREE when you host a qualifying party or place a personal order totaling $300 or more during our Sale-A-Bration promotion (January 3–March 31, 2020). These cute little ladybugs are eager to help you spread some love with fun handmade cards for birthdays, thank you, thinking of you, encouragement, and more!

To finish of my card it was now time to put everything together. So I layered the embossed leaf cardstock on to each card base using Multipurpose Liquid Glue. Next I wrapped some Linen Thread around the handmade DSP and tied a bow on the left hand side. I popped this layer up on Stampin' Dimensionals onto the card front. I then added the two flowers that I had made, using liquid glue and on the one on the right I added a couple dimensionals behind the bloom. I then added my little ladybug with a dimensional. To finish off my card I stamped the sentiment on a Poppy Parade banner in versamark and added white stampin' emboss powder and heat it it. I made the banner with just some scrap cardstock. I popped the sentiment up on dimensionals also. This is a very layered card. To add the finishing touches I added a few Basic Rhinestone Jewels.
Thanks for dropping by today, I hope that you like my little card and that it has inspired you to give coloring and fussy cutting a try. The Little Ladybug stamp set is by far one of my favorites from the Saleabration Brochure. You can order all the supplies that I used today in my online store in the Stampin' Up! Shopping List below. Remember that the Little Ladybug Stamp Set is a Host/Hostess Saleabration set and can only be earned with a qualifying order of $300.
Happy Stampin'
Rick Adkins
***Remember, if you put in an order ($35 minimum) by
Tuesday, January 14th, 2020 at midnight,
I'll send you all three make and takes from this weeks Facebook Live Mini Class for free!
But, your order MUST be in by Tuesday at midnight!!
You must use Host/Hostess Code 3PN3UVRP.
Join my NEW Online Technique & Fancy Fold Club! You can find out all the details by
clicking here!
Receive the January Creative Stampers Tutorial Bundle with any size order!
Stampin' Up! Shopping List: