Wednesday, March 11, 2020

Have a Wonderful Easter - Welcome Easter Stampin' Up!

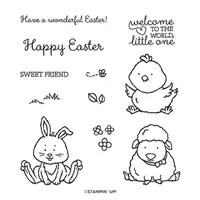
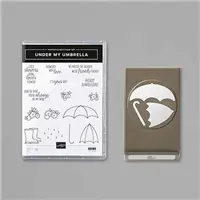
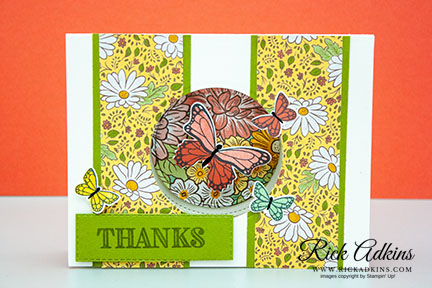
Hello and welcome to my blog; today I am going to share with you a super cute card using the Under My Umbrella and Welcome Easter Stamp Sets.  I created a super cute Easter Card for today's project and I made it rain in the background.  Basically because it seems to rain every Easter here where I live.  At least for part of the day anyways.  Here's a look at my card.

Tips & Tricks:  

To start off I stamped all the images in Tuxedo Black ink and heat set the ink so that I could do a little coloring with my watercolor pencils.  I used both sets of watercolor pencils for the coloring, and once I had everything colored I used my blender pen to moisten the pigment of the pencils to give it a watercolor look.  Once the watercoloring was complete I cut out all the little animals and used the Umbrella Punch to punch out the Umbrellas.  


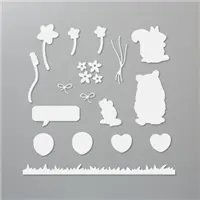
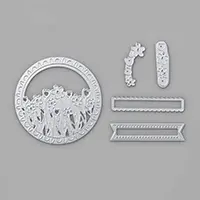
Next I used the grass die from the Special Day Die Set and the flowers from the Sending Flowers Dies (both are part of the Coordinating Product Release) to cut out the grass and the flowers for my cards.  After that I took a piece of Whisper White and did a little ink blending for the background sky.  After that I took the Basic Pattern Stencils (the Clouds pattern) and stenciled on some darker blue at the bottom of each cloud and whisper white craft ink on the top to add a little variation.  Then I stamped some rain drops in Balmy Blue ink and attached the grass die cut.  I added a little grass that that I stamped to this area to add a little extra to it.   


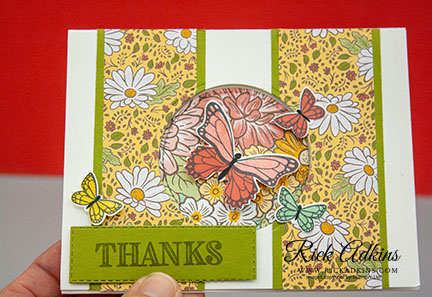
To finish off my card I added the cut out animals and umberas along with the flowers to the card front.  To make it so the tulips were not floating in air I added stems to each with my granny apple green stampin' write marker, and some of the Happiness Blooms Enamel Dots to the center of the flowers.   I added the sentiment on a piece of whisper white cardstock stamped in Balmy Blue and cut it out with \the banner die from the Sending Flowers Dies.  

Thanks for dropping by today, I hope that you have a wonderful day.  If you need any of the supplies I used to create this card you can pick them up in my online store by clicking on the item in the supply list below.  Make sure you join my this afternoon on my Facebook page for this weeks Facebook Live mini Class featuring the Welcome Easter Stamp Set.  
Happy Stampin' 
Rick Adkins 

Stampin' Up! Shopping List:


Tuesday, March 10, 2020

Timeless Tulips Bundle Class Announcement

Image by Stampin' Up! 

Spring is here and it's time for flowers, fun, and bright cheerful colors, and my Timeless Tulips Bundle Class is filled with all the above and a lot of fun!

Each month I offer a online class that's designed around a bundle from one of the current Stampin' Up! Catalogs, this month I am featuring the beautiful Spring filled Timeless Tulips Bundle from the January-June Mini Catalog.  
Image by Stampin' Up! 

For each bundle class you will make five different projects:  We make four cards ranging from Simple to Avid, plus a 3D project.  All the projects are designed around the featured bundle.  You will need the bundle to complete the class.

Cost:  Depends on the budget friendly Option you pick


·         Option 1: I Want It All Bundle $73.00 
o   Includes (Based on Availability)
o   Timeless Tulip Bundle
o   Wink of Stella Brush Pen
o   Frosted & Clear Epoxy Droplets
o   (FREE GIFT) Whisper White Baker’s Twine
o   FREE Printable PDF Instructions & Video Tutorial emailed to you
o   Card Kit with all the consumable supplies ready for you to put together
·         Option 2:  Medium Size Bundle $52.00
o   Includes (Based on Availability)
o   Timeless Tulip Bundle
o   Card Kit with all the consumable supplies ready for you to put together
o   Free Printable PDF Instructions & Video Tutorial emailed to you
·         Option 3:  Small Size Bundle $38.00
o   Includes (Based on Availability)
o   Card Kit with all the consumable Supplies ready for you to put together
o   Free Printable PDF Instructions and Video Tutorial emailed to you
o   Wink of Stella Brush Pen
o   Frosted & Clear Epoxy Droplets
o   Whisper White Baker’s Twine

Deadline to Register: 

Deadline to Register is March 17, 2020.  Once all the orders are in, I will place the orders on the 18th.  And, then have all the orders sent to me and I will cut and get everything ready and repackage it and get it sent out to you by March 26, 2020. 

Register by Clicking Here!  

Once you have emailed me saying you want to register I will email you the payment and registration link.  Please include your full name, along with your mailing address in the email please.  This allows me to order your supplies.  

Ornate Garden Inside Out Card - The Spot #101

Hello and welcome to my blog; and the second challenge for The Spot Weekly Creative Challenge.  This week we have a fun sketch challenge for you to play along with.  I also have a little sneak peek of some new products from the 2020 Stampin' Up! Annual Catalog.  Yes, I said new products!  These products are part of a Early Release Suite from the upcoming Annual Catalog and it's called Ornate Garden Suite and I just love the products in this suite.  Here's a look at my card.


Here's a look at the challenge image that inspired my card today.  You can click on the challenge image or here to go to the challenge blog and see what the design team came up with.

Tips & Tricks: 

Inside Out cards are actually easier to do than you may think it just takes a little planning.  And, when I got my little box of new goodies the other day it was perfect to try.  The Butterfly Gala stamp set is currently in the 2019 Annual Catalog along with the Butterfly Duet Punch.  But it was the perfect match to this fun vintage floral patterned paper.  The inside out card takes two card bases.  I started with the first one and cut a opening in the front once I had my designer series paper on it.  


Part of the inside out card's focal point can be seen from the outside of the card.  While other parts are on the outside.  I have some of the butterflies on the outer must part of the card while others are in the second panel of the card.  


This is a look at the second panel of the card.  This is the panel right under the front of the card, and you can see their is layer through this one as well.  


Once all three panels are open you reveal the inside sentiment.  And you can see how each layer builds on top of the other.  Pretty neat right!  Thanks for dropping by today, and I hope you will play along with us this week.  The Ornate Garden Early Release Suite is available for Demonstrators to order now, but will be orderable for everyone starting in April.  So if you want to get your hands on it now it's a great time to join my team of Kinsmon Crafters.  
Happy Stampin' 
Rick Adkins 

Stampin' Up! Shopping List: 


Monday, March 9, 2020

Flowering Foils Blooming Tag Thank You Card

Hello and welcome to my blog again today!  I have another card to share with you today featuring the Flowering Foils Speciality Designer Series Paper and Tags In Bloom Stamp Set Saleabration items.  I wanted to share with you the fun thank you card that i created for Kylie's International Blog Highlights today.  Please make sure you vote for my card.  Here's a look at my card.

Tips & Tricks: 

I started out my card by coloring the designer series paper.  I find that this paper colors in so many ways; I've used blends, stampin' write markers, and ink to color it.  Get this high-quality patterned paper featuring various floral designs and a checker design. This printed paper is great for card making, scrapbooking, and other paper crafts. The rose gold and silver foil designs will make any project shine. You can even color the white areas using your favorite coloring tools. Earn this fancy paper FREE March 3–March 31, 2020, during part two of our Sale-A-Bration promotion!  After coloring I cut mine down to 4 x 5 1/4.  For my metric friends you will cut your DSP to 14.2cm x 9.8cm.  

I then matted my dsp to a piece of Soft Seafoam Cardstock cut at 4 1/8 x 5 3/8 (metric will do 14.4 cm x 10 cm).  I then took some of the Silver Metallic Edge Ribbon and colored it with my Soft Seafoam Stampin' Blends.  I love to color white ribbon with my blends to get a custom ribbon that will match all my projects.  This is so easy to do since Stampin' Up! has perfect color coordination.  

After attaching the ribbon and tie a bow with the extra I added it to my layer and secured the bow on with a Mini Glue Dot.  I stamped my outside sentiment on a scrap of Whisper White Cardstock using the Tags in Bloom Saleabration Stamp Set.  I stamped the outside image in Flirty Flamingo Ink and the sentiment in Soft Seafoam.  Then I used the Label Me Fancy Punch and punched it out.  I attached the sentiment with Stampin' Dimensionals.  

At this point it was time to attach everything to my Sahara Sand card base which was cut at 4 1/4 x 11.  For my metric friends you will do 10.5 cm x 29.8 cm and score in half.  


For the inside of my card I added a strip of the Flowering Foil Speciality Designer Series paper and my Thank you Sentiment from the So Sentimental Stamp Set (in Flirty Flamingo ink) onto a piece of Whisper White Cardstock cut at 4 x 5 1/4 (or 10 cm x 14.4 cm).  


Thanks for dropping by again today, I hope that you have enjoyed my card and that you will give it a try.  Make sure to pop over to Kylie's International Blog Highlights and check out all the wonderful projects that have been created for this month's Highlights.  Also don't forget to vote for your favorite and my card you can do so by clicking here.  If you need any of the supplies I have used today you can pick them up in my online store by clicking on the shopping list below.  Remember that the Flowering Foil Speciality Designer Series Paper and Tags in Bloom Stamp Set are Sale-A-Bration items and can only be earned FREE with qualifying orders until March 31, 2020 or while supplies last.  
Happy Stampin' 
Rick Adkins 


Use the March Host Code on any order of $50 (before taxes & shipping) or more during the month and receive a free gift from me in April as a Thank You.  If your order is $150 or more please don't use the host code.  You will forfeit your Stampin' Rewards if you do; and I want you to get those rewards.  


If you place any size order with me during the month of March you will receive the March Creative Stampers Tutorial Bundle from me as a little thank you.  This month's tutorial bundle features fourteen floral themed tutorials.  The Creative Stampers Tutorial Bundle can either be earned for FREE with any size order or Can be purchased for $20 from me.  

Stampin' Up! Shopping List: 


Template Designed by creativeworkerbee