Friday, March 13, 2020

Well Dressed Masculine Birthday Card

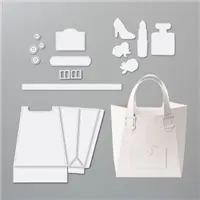
Hello and welcome to my blog; today I am going to share with you a simple stamping card using stamps ink paper and a few extra products that I will use to support the the Well Dressed Sale-A-Bration Stamp Set.  The majority of my card was all created with just stamps ink and paper!   I did use a punch and a little cardstock that I embossed to add a little texture to the card.  Customers are always asking for masculine products they can use to make cards for men and boys. Well, here you go! Create snazzy cards for the men in your life using the Well Dressed Stamp Set. Earn this debonair stamp set FREE with a qualifying purchase March 3–March 31, 2020, during part two of our Sale-A-Bration promotion!  Here's a look at the card.

Tips & Tricks: 

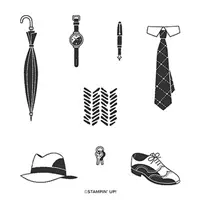
When I sat down to create this card I wanted to use most of the images from the set.  This stamp set reminds me of styles from the 1920s to the 50s.  It has a very Mad Men feel.  It also reminds me of my grandfather.  He always wore a fordoa.  Especially when he went out in public, and to any event or just to the store.  Often times he wore it just around the house the only time I remember him not wearing it was when he took a afternoon nap, sleeping at night, and while eating dinner.  So I thought it would be fun to use that as a main image for my card.  You will see it and all the other images repeated on my homemade designer series paper.  

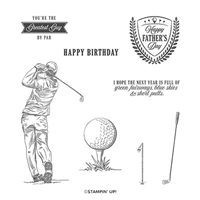
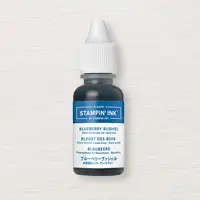
I started out with a piece of Very Vanilla Cardstock and stamped the images from the stamp set in Blueberry Bushel Classic Ink.  I stamped each image starting with the hat in repeated patterns but each time I would stamp it I would turn the paper or the stamp to face a different way.  When stamping your own designer series paper you don't want the images to go the same direction and you want some to go off the page.  Once I had it all stamped I cut it down to 5 1/4" x 4" then added it to a piece of Gray Granite Cardstock cut at 5 3/8" x 4 1/8".  I then took a little scrap piece of Very Vanilla and stamped the Happy Birthday sentiment from the Clubhouse Stamp Set in Blueberry Bushel ink and then stamped the same pattern as on the card front but in Gray Granite Classic Ink.  I then used the Label Me Lovely Punch and punched it out and did the same with a piece of Blueberry Bushel Cardstock.  


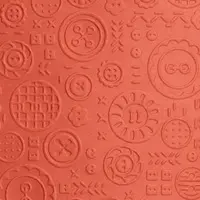
After I punched out the two pieces I took the Blueberry Bushel one and cut it in half down the middle and added it behind the sentiment piece.  I used a little liquid glue to attach it to the sentiment.  I then took two scrap pieces of Gray Granite Cardstock and ran them through my die cutting and embossing machine with the Button Button Embossing Folder.  I added this to the card front and then added the sentiment piece above with dimensionals to finish off the card.  


Thank you for dropping by today, If you need any of the supplies to make this card you can order them from my online store.  Remember that the Well Dressed Stamp Set can be earned for FREE until the end of the month or while supplies last.  
Happy Stampin'
Rick Adkins


Use the March Host Code on any order of $50 (before taxes & shipping) or more during the month and receive a gift from me in April as a Thank You.  If your order is $150 or more, please don't use the host code.  You will forfeit your Stampin' Rewards if you do; and I want you to get those rewards.


If you place any size order with me during the month of March, you will receive the March Creative Stampers Tutorial Bundle from me as a little thank you.  This month's tutorial bundle features fourteen floral themed tutorials.  The Creative Stampers Tutorial Bundle can either be earned for FREE with any size order or Can be purchased for $20 from me.

Stampin' Up! Shopping List: 


Thursday, March 12, 2020

OSAT Blog Hop - Chick Ewe Out!


Hello and welcome to my blog; today I am sharing my projects with you from this months One Stamp At A Time (OSAT) Blog Hop.  This month our theme is Chick Ewe Out!  This is proved to be a super fun theme to play with, and I had a lot of fun creating my two projects for you this month.  I used the Welcome Easter Stamp Set from the 2020 January-June Mini Catalog.  I also used some "uneggpected" products as well.  Plus my card for this months hop has an eggcellent surprise.   Here's a look at my projects this month.  

Tips & Tricks: 

To start I designed my card before I figured out my dimensional project.  I started out with a piece of Thick Whisper White Cardstock (5 1/2 x 8 1/2 scored at 4 1/4).  I then added a piece of the Dinoroar Designer Series paper; the one with the eggs on it.  I then added a super skinny mat of Whisper White and then another mat of Pretty Peacock cardstock on the outside.  I then added it the card base.  I then added a strip of the Woven Thread Designer series paper to a piece of Pretty Peacock cardstock.  On top of this I added some of the Pretty Peacock Scalloped Ribbon along this piece before adding it to the card base.


Next I stamped the chick and the sheep from the stamp set and colored them in with my watercolor pencils and used the blender pen to smooth out the color.  I then cut out two of the eggs using the egg die from the dino die set.  I added a little color around the edges with my Pineapple Punch Blends.  I stamped the Sweet Friend sentiment on the front of one of the eggs.  I then joined the two eggs with a brad to secure the two pieces together.  Add by doing that it allows the egg to do this.  


Cute right!  Well, I think the 3d project is as cute as the card.  I used the purse die from the Dress to Impress Dies and some Pineapple Punch Cardstock to cut out the purse.  I then cut out one from the same pattern as the card and cut out along the inside of the stitched lines and trimmed it down just a little from the top so that it would fit on the side of the front.  I added a couple of the 2019-2021 In Color Faceted Dots to look as a closer.  Then added the little bunny to the front for a fun unexpected touch.  


Thanks for dropping by today I hope that you have enjoyed my project today and I hope that you have a fun time hopping along.  If you need any of the products you have seen today, you can pick them up in my online store by clicking on the shopping list below.  

Blog Roll: 


Happy Stampin' 
Rick Adkins 


Use the March Host Code on any order of $50 (before taxes & shipping) or more during the month and receive a free gift from me in April as a Thank You.  If your order is $150 or more please don't use the host code.  You will forfeit your Stampin' Rewards if you do; and I want you to get those rewards.


If you place any size order with me during the month of March you will receive the March Creative Stampers Tutorial Bundle from me as a little thank you.  This month's tutorial bundle features fourteen floral themed tutorials.  The Creative Stampers Tutorial Bundle can either be earned for FREE with any size order or Can be purchased for $20 from me.

Shopping List: 

Wednesday, March 11, 2020

Welcome Easter Facebook Live Mini Class

Hello everyone I hope that you are having a wonderful week so far!  Remember this is hump day and the middle of the work week so not much longer.  I am here with you to share this weeks Facebook Live Mini Class with you and a few tips and tricks along the way.  This week I am featuring the Welcome Easter Stamp Set and will be sharing with you a three different ways to color images.  I actually shared one tip with your earlier today if you missed my post from this morning you can click here and check it out.  


Saleabration is Stampin' Up!'s biggest Sale of the year; where you get rewarded with free items based on your orders.  There are two different levels as the last few year.
During this weeks Facebook Live Mini Class I am going to be making three projects with you to get you ready for  Easter and I am going to share with you three ways to add color to your projects. I based today's class off of the card I shared this morning.  On my post this morning I shared a card using my watercolor pencils and a blender pen to color in the images.  Here's a look at that card.  

 In case you've never joined me for Facebook Live, I go live every week, (typically on Wednesday at 8:00 pm CST) on my Facebook business page with one to three projects.  On the second Wednesday of the month I will be doing my Facebook Live mini Class at 4 pm CST due to scheduling conflict.  Everyone is welcome to join!

If you were unable to join me live I will have uploaded the video here afterwards.  If you are not able to see the embedded video you may have to click here.  


This Week's Projects: 

For my first project tonight I tried to come up with a way to add color to an image without really having to color.  So I thought about using another stamp set to fill in the color or using one of the Best Dressed Note Cards.


For my next project I made a regular A2 size card using the bunny from the stamp set.  I used the Easter Blessings stamp from Itty Bitty Greetings for the sentiment.  I watercolored the main image of this card with ink and a blender pen.  I thought it was a fun little card and quick way to add some color.  You can go as simple or use as much coloring you would like.  


My finial project for the night was this cute little easter box using the sheep image from the Welcome Easter Stamp Set.  To color my little Ewe I used stampin' blends in Flirty Flamingo, Gray Granite, and Highland Heather.  This is a really easy box to put together and is a quick project to make to fill with Easter Treats.  


  You can check the PDF for the measurements.  
**All of the details for today's three 

projects can be found on the 
project sheets here. ** 

They have all the products I used and measurements for each project.
***Remember, if you put in an order ($40 minimum before taxes and shipping) by 
Monday, March 16th, 2020 at midnight, 
I'll send you all three make and takes for free! 
But, your order MUST be in by Monday at midnight!! 
You must use Host/Hostess Code 3GMWAD27 .

You can shop in my online store here. 

Join my NEW Online Technique & Fancy Fold Club!  You can find out all the details by clicking here!

Last day to sign up for my Monthly Card Club by March 20, 2020!  Sign up and learn more about Card club by clicking here!  March's featured stamp set is the Memorable Mosaic; and we will be poppin like mad with a great time learning something new.  Stamps sets are not included in the club but may be purchased using the host code as an add on.  Or you may use something you already own.

Receive the March Creative Stampers Tutorial Bundle with any size order!  Features 14 projects designed by Stampin' Up! demonstrators from around the world.  This month we all featuring different floral themed projects.


Do you have a blog? Do you love to create fun projects?  Do you love to take part in creative challenges?  Join me over at The Spot for my weekly Creative Challenges.  You never know your project my just hit the spot and be picked as this weeks winner.  There's still time to join in the fun.  Click here and check out this weeks creative challenge.  


Have you thought about joining my monthly card club.  Learn more about this fun budget friendly way to create fun projects for all occasions.

Template Designed by creativeworkerbee