Showing posts with label thanks. Show all posts

Monday, March 9, 2020

Flowering Foils Blooming Tag Thank You Card

Hello and welcome to my blog again today!  I have another card to share with you today featuring the Flowering Foils Speciality Designer Series Paper and Tags In Bloom Stamp Set Saleabration items.  I wanted to share with you the fun thank you card that i created for Kylie's International Blog Highlights today.  Please make sure you vote for my card.  Here's a look at my card.

Tips & Tricks: 

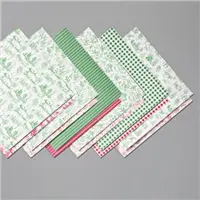
I started out my card by coloring the designer series paper.  I find that this paper colors in so many ways; I've used blends, stampin' write markers, and ink to color it.  Get this high-quality patterned paper featuring various floral designs and a checker design. This printed paper is great for card making, scrapbooking, and other paper crafts. The rose gold and silver foil designs will make any project shine. You can even color the white areas using your favorite coloring tools. Earn this fancy paper FREE March 3–March 31, 2020, during part two of our Sale-A-Bration promotion!  After coloring I cut mine down to 4 x 5 1/4.  For my metric friends you will cut your DSP to 14.2cm x 9.8cm.  

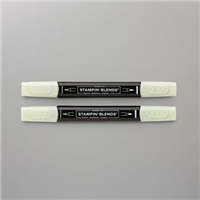
I then matted my dsp to a piece of Soft Seafoam Cardstock cut at 4 1/8 x 5 3/8 (metric will do 14.4 cm x 10 cm).  I then took some of the Silver Metallic Edge Ribbon and colored it with my Soft Seafoam Stampin' Blends.  I love to color white ribbon with my blends to get a custom ribbon that will match all my projects.  This is so easy to do since Stampin' Up! has perfect color coordination.  

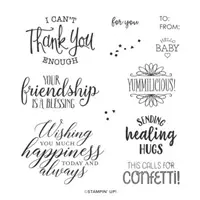
After attaching the ribbon and tie a bow with the extra I added it to my layer and secured the bow on with a Mini Glue Dot.  I stamped my outside sentiment on a scrap of Whisper White Cardstock using the Tags in Bloom Saleabration Stamp Set.  I stamped the outside image in Flirty Flamingo Ink and the sentiment in Soft Seafoam.  Then I used the Label Me Fancy Punch and punched it out.  I attached the sentiment with Stampin' Dimensionals.  

At this point it was time to attach everything to my Sahara Sand card base which was cut at 4 1/4 x 11.  For my metric friends you will do 10.5 cm x 29.8 cm and score in half.  


For the inside of my card I added a strip of the Flowering Foil Speciality Designer Series paper and my Thank you Sentiment from the So Sentimental Stamp Set (in Flirty Flamingo ink) onto a piece of Whisper White Cardstock cut at 4 x 5 1/4 (or 10 cm x 14.4 cm).  


Thanks for dropping by again today, I hope that you have enjoyed my card and that you will give it a try.  Make sure to pop over to Kylie's International Blog Highlights and check out all the wonderful projects that have been created for this month's Highlights.  Also don't forget to vote for your favorite and my card you can do so by clicking here.  If you need any of the supplies I have used today you can pick them up in my online store by clicking on the shopping list below.  Remember that the Flowering Foil Speciality Designer Series Paper and Tags in Bloom Stamp Set are Sale-A-Bration items and can only be earned FREE with qualifying orders until March 31, 2020 or while supplies last.  
Happy Stampin' 
Rick Adkins 


Use the March Host Code on any order of $50 (before taxes & shipping) or more during the month and receive a free gift from me in April as a Thank You.  If your order is $150 or more please don't use the host code.  You will forfeit your Stampin' Rewards if you do; and I want you to get those rewards.  


If you place any size order with me during the month of March you will receive the March Creative Stampers Tutorial Bundle from me as a little thank you.  This month's tutorial bundle features fourteen floral themed tutorials.  The Creative Stampers Tutorial Bundle can either be earned for FREE with any size order or Can be purchased for $20 from me.  

Stampin' Up! Shopping List: 


Friday, November 15, 2019

Paper Pumpkin Thank You Cards & December's Kit Details

Hello and welcome to my blog; today I am going to share with you my Thank you card that will be going out to all my Pumpkin Pumpkin Subscribers from last month.  I used a fun demonstrator only stamp set designed just for this purpose.  I used the One Stop Box stamp set which again is a demonstrator only stamp set.  But, I love to show my customers and my Paper Pumpkin Subscribers how much I appreciate them.  Here's a look at my card.

Tips & Tricks: 

I started out with a piece of Terracotta Tile Cardstock and stamped the Paper Pumpkin box all over the background.  I then added a piece of whisper white stamped with the same box and my thank you sentiment.  I used Balmy Blue ink and cardstock for this.  I layered the whisper white image and then matted it with Balmy Blue.  This was popped up on the front of the card. 
You can receive a card like this when you become one of my Paper Pumpkin Subscribers.  Why, should you subscribe?  Well, if you love to craft but don't think that you have time to craft.  Paper Pumpkin is for you, because it they usually take about 30 to 45 minutes to create.   If you love to craft but don't want to have a large craft room or a lot of supplies on hand.  Then Paper Pumpkin is great for you!  Everything comes shipped to you in a cute little box.  Everything in the box is cut prepped and ready to go.  You also get a ink spot (which coordinates with the monthly craft kit) and a exclusive stamp set.  In your very first kit if you are a new subscriber you also get a reusable clear block to use with your stamp set each month.  Another great thing about Paper Pumpkin is you control your subscription.  If you don't want to receive that month's kit you can choice to skip that month.  

December Kit: 

December’s Something for Everything kit includes a super-versatile stamp set complete with 13 sentiments that can be used for occasions ranging from wedding, to get well, birthdays, and more! Plus, the three full-sized card designs (four of each) are gorgeous AND multiuse—making this kit super fun.  The December Paper Pumpkin kit makes it easier than ever to give a handmade card to a friend—no matter what the occasion!  Start the new year right with cute, fun, and easy cards for 2020.
Before I go I also want to mention that Paper Pumpkin makes a perfect gift for this Holiday Season.  If you have a crafter or someone that loves to do arts and crafts no matter what the age Paper Pumpkin is the perfect gift for them.  You can pick a gift subscription for them.  Just contact me and let me know this is what your are wanting to do.  To get the December kit you have until December 10th to subscribe.  If you choice the gift subscription there are a few options for you, and they do not start until the person you gift them to redeems them.  If you would like to take advantage of a gift subscription for someone I have a gift certificate for you to give them.  Thanks for dropping today. 

Happy Stampin' 
Rick Adkins 

If you live in the US.  I would love you to choose me as your demonstrator.  If you would like to purchase any of these products you can click on the Shop Now Button or by clicking on any of the images below.  Alternatively, you can also contact me by email to place your order.  Please be sure to use the monthly host code and I’ll send a little something out to you the following month to say Thank You!  

November HOST CODE:  QU2TJBJN
  1. Spend any amount with me this month and receive the Creative Stampers Tutorial Bundle.  Plus get a gift from me in December.
Please remember that if you use the host code you cannot use that order towards my KCRP’s (Kinmon Crafty Reward Points) that would be double dipping and is not allowed.  For more information on KCRP’s click here.  


Three main reasons to Join!  
1.     You Get at least a 20% discount on all your orders while you are a demo.   
2.     You get to join my fun Kinsmon Crafters Team and Private Facebook Group.
3.     Access to directions to all my online classes 

Stampin' Up! Shopping List: 

Saturday, October 12, 2019

Toile Christmas Simple Saturday Stamping Card

Hello and welcome to my blog and this week's episode of Saturday Simple Stamping.  This week we are making a Thank you card using the Toile Christmas Stamp Set.  Even with the holidays approaching we still need things like Birthday, Thinking of you, and Thank you Cards.  So this is not the time of the year to stop making those types of cards, why not when you're using those Christmas and Holiday Stamps not make a few cards for these occasions as well.  That's just what I did with today's Simple Stamping Card.  Here's a look at today's project.

Tips & Tricks: 

Most of you know that Simple Stamping was started last November by Stampin' Up! as a way to help crafters that are just getting started or have never stamped before to learn.  It's back to the basics with just stamps, ink, and paper, and maybe sometimes a punch or something else thrown in for fun.  I try to keep my versions of #simplestamping just at the basics.  I like to share cards that can be easily recreated by someone just starting out.  
For this weeks card I started out with a piece of Thick Very Vanilla Cardstock cut in half at 4 1/4 x 11 scored at 5 1/2.  I stamped the cardinal from the Toile Christmas Stamp Set in Real Red ink on the front of the card.  And then added a scrap of the matching Toile Tidings Designer Series Paper I had left over from my Facebook Live project from Wednesday night.  I just attached that with a little snail adhesive and trimmed it to size afterwards.  
For the sentiment I used a scrap of Very Vanilla cardstock also left over from Wednesday nights Facebook Live, and stamped the thanks from one of my favorite sentiment sets Here's a Card in Garden Green ink.  I then used the Timeless Label Punch and punched it out.  At this point it was looking a little plain so I added some of the small scrolls from the Toile Christmas Stamp Set to dress the punch out up just a little bit.  I added the label to my card with a couple stampin' dimensionals to finish it off.  
To finish the presentation of my cards I always like to dress up the envelopes.  And with my simple stamping cards it's no different.  For this weeks envelope I just stamped the top half of the cardinal on the flap of the envelope in Real Red Ink.  

Video Tutorial:


Happy Stampin' 
Rick Adkins 
If you live in the US.  I would love you to choose me as your demonstrator.  If you would like to purchase any of these products you can click on the Shop Now Button or by clicking on any of the images below.  Alternatively, you can also contact me by email to place your order.  Please be sure to use the monthly host code and I’ll send a little something out to you the following month to say Thank You!  

October HOST CODE:  SQ2WWJZN

  1. Spend any amount with me this month and receive the Creative Stampers Tutorial Bundle featuring Fall & Halloween Projects.  Plus get a gift from me in November. 


Please remember that if you use the host code you cannot use that order towards my KCRP’s (Kinmon Crafty Reward Points) that would be double dipping and is not allowed.  For more information on KCRP’s click here.  


Three main reasons to Join!  

1.     You Get at least a 20% discount on all your orders while you are a demo.   
2.     You get to join my fun Kinsmon Crafters Team and Private Facebook Group.
3.     Access to directions to all my online classes 

I All Ready Know I Want to Join!  Sign Me UP!

Stampin' Up! Shopping List: 


Template Designed by creativeworkerbee