Showing posts with label card making technique. Show all posts

Monday, October 11, 2021

So Smart So Fun So Sweet 3D Magnolia Card - A Grand Kid

Hello and welcome to my blog; today I have a fun technique to share with you that I used on my card today.  Have you ever wanted to get more use out of your embossing folders but wasn't sure just how?  Well today's little technique that I am going to share will give you just that with my So Smart So Fun, So Sweet 3D Magnolia Card.  Here's a look at the card.  

I have a fun way for you to get more use and depth out of your 3d embossing folders with the technique I used on my card today!

Tuesday, June 15, 2021

Dry Embossed Sunflower You Are Loved Card - Spot Challenge #166

Hello and welcome to my blog; today I have a fun card using a technique that is from way back but in the card making world is making a comeback.  You may be wondering what I am talking about.  Well I am talking about dry embossing on vellum.  Which is how I created my card today for this weeks creative challenge over at The Spot.  

Check out my fun You Are loved card featuring a dry emboss sunflower using the Celebrate Sunflower Stamp Set from Stampin' Up!  Click here for details

Saturday, May 8, 2021

Love is What Makes us Family - Magic Inking Technique Card

 Hello and welcome to my blog; today I have a super cute card to share with you using the Magic Inking Technique, the Butterfly Brilliance Bundle, and the Lovely You Stamp Set.  This is a super fun technique and actually really easy.  Plus it uses one of the most under used tools in our crafting stash.  Here's a look at my card.  

Love is What Makes Us Family card using the Magic Inking Technique click here to learn more

Wednesday, July 15, 2020

You're Seriously the Best - Ornate Styles Stamp Set

Hello and welcome to my blog; today I am going to share with you a fun little card that doesn't take a lot of supplies and has a technique that everyone should learn so that you can beautiful cards relatively quickly.  My card today features the Emboss Resist Technique.  Which is a fun and easy technique to know how to do because you can make it look clean and simple, more elebrate, or bright and fun.  All depending on how you layer the colors.  I went with bright and fun today.  Here's a look at my card.  


I used the Ornate Styles Stamp Set from the 2020-2021 Stampin' Up! Annual Catalog as the main focus on my card.  I stamped the large floral image in Versamark ink and then added White Stampin' Emboss Powder to it.  I then heat set the embossing powder using my Heat Tool set on the high setting.  Which is the setting you want to use when heat embossing.  Another tip is to let it heat up for a few minutes before putting the heat to your cardstock.  By doing this it helps the embossing powder melt a little faster and prevents your paper from wrapping.  


I then masked off (using low tack tape) the area I didn't want ink to be.  I started with this card by adding a piece of tape down the center of the card to make a plus sign.  I then masked off from corner to corner of the little rectangle I created  I used the Brights Family of Ink Pads and a blending blush to apply the colors.  I started Poppy Parade and did my ink blending in that area.  Next, I removed the tape that was masking of the other side of that rectangle and placed it over the Poppy Parade side.  I then ink blended in the bottom part with Gorgeous Grape Classic Ink.  I repeated the process in each rectangle and alternated the colors between on of the Brights Ink Pads to create a nice pretty Rainbow of color all the way around my card front.  


After all the ink blending was complete I removed all the low tack tape (which by the way I use Post it Tape) I was left with this fun colorful pattern.  I love the play of the geometric shapes with the floral image.  I can not remember what stamp set the sentiment came from but I stamped it in Versamark and covered it in White Stampin' Emboss powder and trimmed it down to a very thin banner to add t the front of the card.  When I made this card the Adhesive Backed Sequins where still a current item but they have been retired and replaced by the even better Artistry Blooms Sequins (which have no hole in the middle of them).  
After adding the sentiment strip and the sequins I added the card front to a Basic Black Mat cut at 4 1/8 x 5 3/8 and attached this entire piece to my Thick Whisper White card base that was cut at 4 1/4 x 11 and scored at 5 1/2.  Thanks for dropping by today I hope that you will give this masking ink blending and emboss resist style of card I try.  I know that you will love doing it.  You will find a full list of the available products in the shopping list below.  

Happy Stampin' 
Rick Adkins 


Use the Host Code on any order of $50 (before taxes & shipping) or more during the month and receive a gift from me in June as a Thank You. If your order is $150 or more, please do not use the host code.  You will forfeit your Stampin' Rewards if you do; and I want you to get those rewards.


If you place any size order with me during the month of July, you will receive the July Creative Stampers Tutorial Bundle from me as a little thank you.  This month's tutorial bundle has ten project tutorials that feature our favorite new products from the 2020-2021 Stampin’ Up! Annual Catalog.  The Creative Stampers Tutorial Bundle can either be earned for FREE with any size order or Can be purchased for $22 from me.


Don't forget about Bonus Days are going on now!  You get reward for shopping now with every $50 qualifying order. and you get to spend the $5.00 coupon codes when you shop in August.  

Join me on Tuesday July 20th for a fun crafting night together.  Bring a Stampin' Up! Kit and let's beat the summer heat with a little indoor crafting in my Zoom Craftroom.  


Join me in my July Monthly Card Class.  It's $25 or free with qualifying order  of $35 (before shipping and taxes) in my online store with this month's host Code  Deadline to get in is July 17th.  


Last day to join the july Card Club is July 17th.  Click on the Club Tab at the top to join.  

The deadline for my Christmas in July Card Class is coming up soon not miss out.  


Stampin' Up! Shopping List: 

Sunday, May 24, 2020

Forever Fern - Split Stamping Note Cards

Hello and welcome back to my blog; I have a project for you this time instead of a tip.  If you missed my post of refilling your ink pads you can click here to view it.  A week or so ago I saw Jennifer McGuire share a technique video on her channel and I just had to try it.  Her technique just spoke to me and it made perfect sense.  I had an Ah Ha moment, so my cards today are using her technique well kind of anyway.  She and stamped and die cut the images and did it but I just stamped my images.  I will share the ink to her blog so you can watch the video here.  Which will all make scene a little later if you do not know what I am talking about.  Anyway here is a look at the note cards I made.  

Forever Fern Stamp Set, Just Jade Cardstock, Whisper White Cardstock, Whisper White Note Cards & Envelopes, Stampin' Up!, Rick Adkins

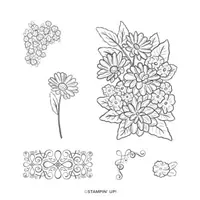
I used the Forever Fern Stamp Set that is in the New 2020-2021 Stampin’ Up! Annual Catalog that is going live next week on June 3.  I like this set because it is not flowers, but it is still foliage.  And can be used for anyone male female it does not matter.  The Forever Fern Stamp Set allows you to create cards and accents with the detailed leaves of different foliage imagery.  It has versatile sentiments perfect on any project which is also a plus.  

Forever Fern Stamp Set, Just Jade Cardstock, Whisper White Cardstock, Whisper White Note Cards & Envelopes, Stampin' Up!, Rick Adkins

Tips & Tricks: 

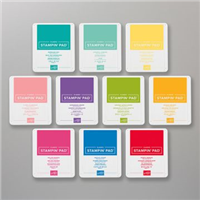
Before I started stamping, I took a piece of 5” x 7” piece of Whisper White Cardstock, a pencil, and a T-ruler and marked the center, which was at 3 ½” on my cardstock size.  Next, I stamped the images from the stamp set in Soft Seafoam, Pear Pizzazz, Old Olive, Garden Green, Shaded Spruce and Pretty Peacock Classic Inks onto my Whisper White Cardstock right down the center line that I created.  I let some of the images overlap just a little in each of the colors.  I could not let them overlap to much because this is a distinktive stamp and it loses its details if the images overlap too much.  

Forever Fern Stamp Set, Just Jade Cardstock, Whisper White Cardstock, Whisper White Note Cards & Envelopes, Stampin' Up!, Rick Adkins

After that I took my whisper white piece to the Paper Trimmer and lined it up at the middle point and cut it in half.  I then cut it down to the size I needed for my note cards.  But I decided I wanted to tie in the Just Jade color (by the way if you are wondering where I picked all these colors they are in the new Forever Greenery Designer Series Paper) so I cut them down just a little bit more to 3 ¼” x 4 ¾”.  

Forever Fern Stamp Set, Just Jade Cardstock, Whisper White Cardstock, Whisper White Note Cards & Envelopes, Stampin' Up!, Rick Adkins

I layered up my stamped cardstock onto a piece of Just Jade cardstock that I cut at 3 3/8” x 4 7/8”.  And then layered that onto my Whisper White Note Cards.  I then stamped my sentiment onto another piece of Just Jade Cardstock that I cut at 7/8” x 3 3/8”.  I stamped the Hello sentiment in Shaded Spruce Classic Ink in the center of this piece.  I attached it to the note card with a little Multipurpose Liquid Glue.  

Forever Fern Stamp Set, Just Jade Cardstock, Whisper White Cardstock, Whisper White Note Cards & Envelopes, Stampin' Up!, Rick Adkins

That finished off two note cards with just one piece of cardstock.  Again, I said it was an Ah Ha moment.  I am sure you are slapping your head the way I did when I first saw this done.   This technique is a great way to make a lot of cards in a smaller amount of time.  Thanks for dropping back by today, I hope you have a wonderful Memorial Day Holiday.  Remember to think about those that have passed that have served the tomorrow and say a little prayer in their honor. 

joining special r c kinsmon studio

If you need any of the supplies that you have seen today you can order them in my online store, and the new products will be available June 3.  Now if you can not wait until the catalog goes live next week you can still add the new items to the Ultimate Bundle and join my team.  You can get $125 in products for only $99 with free shipping.  It is always the best deal in any catalog!  Plus, you get all the perks of being on my team of Kinsmon Crafters along with your 20% discount and the ability to order from new catalogs before everyone else and actually get your catalog early as well.  

Three main reasons to Join!  

  1. You Get at least a 20% discount on all your orders while you are a demo.   
  2. You get to join my fun Kinsmon Crafters Team and Private Facebook Group.
  3. Access to directions to all my online classes 

Happy Stampin' 
Rick Adkins 


Use the Host Code on any order of $50 (before taxes & shipping) or more during the month and receive a gift from me in May as a Thank You. If your order is $150 or more, please do not use the host code.  You will forfeit your Stampin' Rewards if you do; and I want you to get those rewards.


If you place any size order with me during the month of May, you will receive the May Creative Stampers Tutorial Bundle from me as a little thank you.  This month's tutorial bundle features Birthday Bonanza Suite of Products from the January-June Mini Catalog.  The Creative Stampers Tutorial Bundle can either be earned for FREE with any size order or Can be purchased for $20 from me.

Stampin' Up! Shopping List: 

Template Designed by creativeworkerbee