
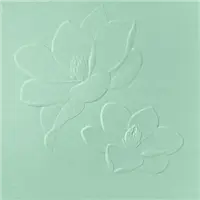
Hello and welcome to my blog; today I have a fun technique to share with you that I used on my card today. Have you ever wanted to get more use out of your embossing folders but wasn't sure just how? Well today's little technique that I am going to share will give you just that with my So Smart So Fun, So Sweet 3D Magnolia Card. Here's a look at the card.

A Grand Sentiment:
 |
| Image by Stampin' Up! |
This is actually a super easy technique to do but it does take a little patience and time to complete. But before we get into the technique let me tell you where the sentiment came from. The sentiment on my card which I thought was perfect to help encourage someone came from the stamp set A Grand Kid. I know that some my over look this stamp set just because of the name, but it's way more to it than the name! The A Grand Kid Stamp Set allows you to create greeting cards for not only grandkids (if you have them) but for other loved ones as well. It has some fun and celebratory sentiments that are perfect for any occasion. You all know I always say get a good sentiment set, and this is one you will want to have in your stash.

The Technique:
Now onto the technique. To do this technique as I mentioned it's not hard, but you will have to be patience with it. Because you are going to run the embossing folder through your Stampin' Cut & Emboss Machine many times. So this is how it works I started with a piece of 6" x 6" So Saffron Cardstock. And you are going to selectively ink up your 3D embossing Folder each time to create more depth and dimension in the embossed images. This technique isn't designed to work with all embossing folders, but really the ones that have a stand alone image like the Magnolia 3D Embossing Folder. These soft and subtle flowers are gorgeous enough to stand as a focal point on your DIY crafts or as a beautiful background, but I am pushing it to make them the focal image of the project with this technique.

Each time I ran the embossing folder through my machine I would use my range of selected inks and a Sponge Dauber to selectively ink up a portion of the embossing folder to create more depth in the embossed image. Mainly where the shadows of the petals would hit when the other petals overlapped the other flower, petals or where something needed to be brought forward like the center. I started out my just embossing the plain cardstock first. Then I placed the cardstock back in the folder and lined it up so that it was perfectly aligned, and inked up where I needed more depth. Once the ink was in place and I cleaned up any stray ink with a baby wipe or paper towel I ran it through my machine again.

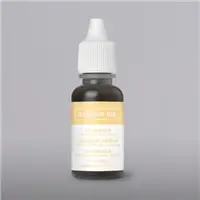
I started out with my lightest color ink which was So Saffron, then build up each shade with the next ink color in the series. So for this card went as followed with each pass, So Saffron Ink, Daffodil Delight Ink, Mango Melody Ink, Bumblebee Ink, Early Espresso Ink. Each time I changed ink colors it was embossed again, and the ink was brought closer and closer to the shadow area. For example in this card my darkest shadows are around the center of the Magnolia. After all the ink was applied and dried between each application I used my Paper Snips and cut each of the embossed Magnolias out.

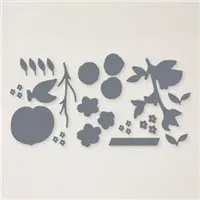
I then arranged them on the card where I wanted them without sticking them down. I stamped the sentiment in Memento Tuxedo Black Ink in the bottom right-hand corner. I then removed the embossed flowers, and used my Water Painters and splattered on some Early Espresso Ink and So Saffron Ink. I then took a little Multipurpose Liquid Glue and watered it down to a heavy cream consistency and splattered it on the card base as well. Once the watered down glue was dry I added some of the Gilded Leafing to the card. Then I cut two stems from the Peach Dies from Early Espresso Cardstock and attached them where my floral arrangement would be. I popped them two magnolias up on some pieces of Foam Adhesive Sheets that I cut into squares to add them to the card base.

Thanks for dropping by and make sure that if you want to get your hands on this fun little stamp set or embossing folder you will want to order it ASAP with shipping issues the way they are if they go on backorder it may be awhile before they are back in stock. I will have a link below to order all the supplies that I used to created this card in the Stampin' Up! Shopping List posted below. If your order is over $50 (before shipping and taxes) and you use the host code this month I will send you a little gift as a thank you. You can always find the latest host code in the side bar to the right on my blog. Click here to shop with the September 18th - October 15th 2021 Host Code FTY4RRSR


October Monthly Card Class:

 \
\Join me for the October Crafty Corner Monthly Online Card Club/Class. You can join the card club as a member for $39.00 a month and get all the perks of being a member or take the class for only $44.00 a month with no commitment. The featured Stamp Set for the October Club is the Great Tidings Bundle. Click here to find out all the details and to register by October 20th to get this month's kit.


0 Comments:
Post a Comment
Thanks for taking the time to leave a comment.
Much Love,
Rick