Hello and welcome to my blog; today I have a fun little Halloween Card to share with you with a little surprise. I used the Frightfully Cute Bundle from the July-December Mini Catalog along with the Cat Punch from the Annual Catalog to create the card. Here's a look at the card.
Hello and welcome to my blog; today I am going to share with you a fun spring/summer easel card using the Pansy Patch Bundle from Stampin' Up!. This is a card that you make the person that receives it say WOW and they will love to display it all year round with all the beautiful handmade pansies. Here's a look at todays card.
Hello and welcome to my blog & YouTube channel; today I am going to share with you another Graduation Gift Card/Money Holder option. If you are like us you are differently going to be needing these right now. We have gotten a few Graduation invitations from both friends and family. So that means we will be sending out either gift cards or a little cash; I mean what graduate wouldn't like cash or a gift card right now. I shared a very super quick and easy card with you yesterday that was a gift card/money holder featuring the Beautiful Promenade Stamp set and matching designer series paper. I will link to that here so you can check that out. My card today is actually very easy but looks more complicated. it can also be customized to match any schools colors. Here's a look at today's card.
Tips & Tricks:
Like I said this is a super easy card but looks way more complicated than it really is. It's just a couple score lines, a little stamping, and a little die cutting. To start off you will need a piece of 4 1/4 x 11 cardstock in what ever color you need for the school of the graduate. I did a couple different colors because we have to send them to people in different schools. So the one in the video tutorial that you will find below in just the Merry Merlot version. I found it super easy to find matching Stampin' Up! cardstock to each schools colors. I did two of these types cards and the one I shared yesterday, plus one more that I will share later this week.
I designed the card so that it could be folded up like a normal card and be placed in one of our medium envelopes, so there's no extra postage. I also designed it so that when it opens up you can not only have a place to put a gift card or a little cash but it would act like a easel card as well.
The Celebrate die cuts act as the stopper for the easel but it also helps as my inside sentiment. Plus I made a place to write a message on the inside as well. So I think I have all the bases covered so to speak. Here's a little look at the inside.
The basic black version is done the exact same way except I changed up a couple of the elements and the dies. Instead of the basic black mat I used pumpkin pie, and instead of the Celebrate You Dies (Which are retiring, sadly. So if you want them you need to get them now) I used the Well Written Dies from the Occasions Catalog as well as the Well Said Stamp Set. On the Merry Merlot version I used Ittly Bitty Greetings. If you are looking for a stamp set that has almost everything you will need you can find them with both these sets.
Video Tutorial:
If you are viewing this post via email you may have to click here to see the video. For some reason some mail servers will not show the embedded video.
Sizes & Dimensions:
Supplies:
Merry Merlot Cardstock - 4 1/4 x 11 scored at 2 3/4 & 5 1/2
Merry Merlot Cardstock - 3 x 3 square, sliver of cardstock, 3/4" x 1" & scrap for die cutting words
Basic Black Cardstock - 4 1/8 x 2 5/8 you will need two of these
Whisper White Cardstock - 4 x 2 1/2 you need three of these
I gave you the cardstock that I used in the video but like I said before you can change the color as you need. All the sizes are the same for each version.
Thanks for dropping by today I hope that you have a wonderful day and that you have enjoyed this video and look at my Graduation Cap Easel Card Gift Card/Money holder. If you need any of the supplies you can pick them up in my online store 24/7. If you want the Beautiful Promenade Stamp and Die bundle I would suggest getting them now before they are no longer at the bundle price. Save that extra 10% on the bundle, it will no longer be a bundle after June 3, 2019.
Join me for my Daisy Lane Online Class Click the image to learn more.
Purchase Rooted in Nature Stamp Set (using host code CC2HECY2) from me now until June 3 and get a pack of the Leaves Trinkets Free. Must use host code to receive this offer.
Host Code and Free Gift:
May Host Code:UMR2NHW7
Spend
$50.00 (before taxes & shipping) in my Online Store using the current
host code during May and get my May Creative Stampers Tutorial Bundle. Tutorial Bundles will be sent to you starting the 20th of the month.
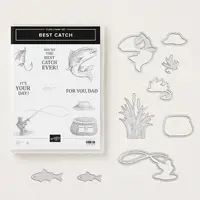
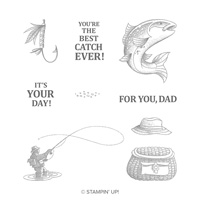
Hello and welcome to my blog; today I am going to share with you a fun masculine card that has a little secret! The recipient will love this card that is filled with masculine charm. If you have a fisher man in your life you will differently want to grab this bundle before it's gone. I came up with fun colored card for you today, it actually is my favorite types of cards, looks very impressive but actually pretty easy to put together once you have seen it one time. I will be sharing with you this afternoon on my YouTube Live at 4:00 pm CST how to create this very card. So you will want to catch me there to see just how I created this card.
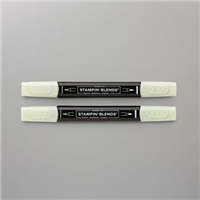
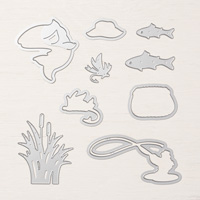
This was actually a very fun card to do; it is a little time consuming with all the die cutting and coloring. I started out my stamping all the images that I was planning on coloring in tuxedo black ink. I then stamped a few images in early espresso ink including both sentiments. This I found spread up the process. Another little trick to speed things up is instead of cutting all the cattails out of different colors and paper piecing them together, why not just color them out of whisper white cardstock and just color them all with your stampin' blends. This way you can have whatever card stock you want with having to cut each color and then cut out each little piece and piece them back together to get the look that I got here.
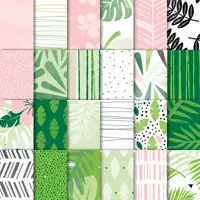
Once I had everything cut out and ready to go it was time to start putting everything together. I used a piece of the Tropical Escape designer series paper as the background. I picked a simple pattern. I am so glad that I did the piece that I picked reminds me of water flowing. You will be able to see later today how I did just that either on my YouTube channel during my live or you can check back here later on this evening I will upload the live replay here so you can watch.
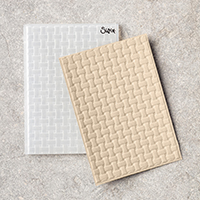
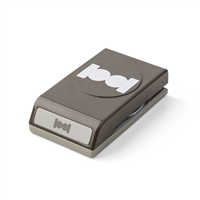
See I told you that this card had a little surprise to it. When you pull the little tab up you get to see another sentiment and a fish jumping from the water behind that cattails while the fisher man is casting his line. On the pull tab I used the circle tab punch to create the pull. The piece of cardstock that is under the pull tab was a small piece of crumb cake that I pulled from my scrap pieces and ran through the Big Shot with the Basket Weave Dynamic Textured Impression Embossing Folder. Once this was done I sponged the pull handle with a little early espresso ink to give it a little something something.
Video Tutorial:
I stamped the Happy Birthday Sentiment in Early Espresso on a piece of whisper white cardstock. The sentiment came from the Picture Perfect Birthday Stamp Set from the Annual Catalog. I then used the stitched rectangle dies to cut it out. I then added another fish to the front along with the hat from the stamp set (which was colored with stampin' blends) and the fishing fly. This finished off the card lovely.
Thanks for dropping bye today, You will find a full list of supplies in the shopping list below. I hope that you have enjoyed my card today. I also hope that you will join my this afternoon for my YouTube Live. Again I will go live at 4:00 pm CST on my channel.