Showing posts with label graduation card. Show all posts

Thursday, April 9, 2020

Graduation Card for my Niece - I Say Hello Stamp Set

Hello and welcome to my blog; today I am going to share with you my card that was supposed to be part of a Blog Hop today but I had computer issues last night and couldn't get the post done.  After letting the laptop do it's thing everything seems to be working fine.    Since my post was messed up last night I thought I would share my card with you again. I made this card with my oldest niece in mind; she will be graduating as part of the class 2020.  Her graduation has been pushed back from May until sometime in August due to the pandemic.  So I thought I would make her a nice card, because you know there's nothing better than a piece a cardstock with a fold in the middle.  Here's a look at my card.  


I Say Hello Stamp Set, Graduation Card, Rick Adkins, Stampin' Up!, Ornate Layers Dies, Stitched Rectangle Dies

Tips & Tricks: 

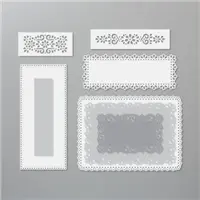
So the first thing I did when I made the decision to make her a graduation card I went online and found her schools colors.  Once I found the school's colors I was like oh lord how am I going to make this card for a girl.  Her school colors were Red, White, & Blue.   Not the easiest color combo to work with without making it look very patriotic.  I then thought of using the Ornate Layers dies from the Ornate Garden Suite; which would be perfect to add a feminine touch to the card.  But, first I needed something graduationish.  So I happened to remember that the I Say Hello Stamp Set had a graduation hat in the set.  So I pulled my colors; I went with Real Red, Blueberry Bushel, and Whisper White.  And I went to town making my own designer series paper for my card.  

I Say Hello Stamp Set, Graduation Card, Rick Adkins, Stampin' Up!, Ornate Layers Dies, Stitched Rectangle Dies

So I stamped the graduation hat in Real Red Classic Ink and Blueberry Bushel Classic Inks onto a piece of Whisper White Cardstock and tried to make them look like they had all been tossed in the air.  It turned out really nice.  So since I was happy with the way the stamping turned out I then took the next to largest frame from the Ornate Layers Dies and die cut the whisper white piece.  I thought with all the little scrolls, and floral border it added a nice feminine look to the card.  I then took the largest frame from the set and die cut my piece of Blueberry Bushel Cardstock to make an outside frame.  I added the two together popping up the whisper white layer on Stampin' Dimensionals.  

I Say Hello Stamp Set, Graduation Card, Rick Adkins, Stampin' Up!, Ornate Layers Dies, Stitched Rectangle Dies

I then added the card front to a Real Red card base cut at 4 1/4 x 11 scored at 5 1/2.  I stamped the sentiment in Blueberry Bushel Classic Ink and the Graduation hat one more time on the sentiment strip in Real Red Classic Ink and die cut it out with my Stitched Rectangle Dies.  I popped the sentiment up on Dimensionals on the center of the card and added a few Red Rhinestone Basic Jewels around the card to finish it off and add a little bling to the card.  I hope that she likes her card when she gets it in the mail.  Thanks for dropping in today I hope you have a wonderful day.  

Happy Stampin' 
Rick Adkins 

If you live in the US.  I would love you to choose me as your demonstrator.  If you would like to purchase any of these products you can click on the Shop Now Button or by clicking on any of the images below.  Alternatively, you can also contact me by email to place your order.  Please be sure to use the monthly host code and I’ll send a little something out to you the following month to say Thank You!  


Use the April Host Code on any order of $50 (before taxes & shipping) or more during the month and receive a gift from me in May as a Thank You.  If your order is $150 or more, please don't use the host code.  You will forfeit your Stampin' Rewards if you do; and I want you to get those rewards.


If you place any size order with me during the month of April, you will receive the April Creative Stampers Tutorial Bundle from me as a little thank you.  This month's tutorial bundle features eleven tutorials that use the outgoing 2018-2020 In Colors.  The Creative Stampers Tutorial Bundle can either be earned for FREE with any size order or Can be purchased for $20 from me.


Order $50 (before shipping and taxes) of products from the Ornate Garden Suite of Products in my Online Store in April using the Host Code:  ZPBUDHR7 and I will send you’re the Ornate Garden Mega Tutorial Bundle for FREE as a thank you gift.  That’s 90 tutorials featuring products from the Ornate Garden Suite (a $21 value) free for purchasing products from the Ornate Garden Suite from me this month free.  


Don’t want to order but still would like to get the Ornate Garden Mega Tutorial Bundle featuring 90 projects with both metric and Imperial measurements for each project!  You can purchase it from me for $21.00 US anywhere in the world in my online store by clicking here.  


Stampin' Up! Shopping List: 


Tuesday, May 28, 2019

Graduation Hat Easel and Gift/Money Holder Card Video Tutorial

Hello and welcome to my blog & YouTube channel; today I am going to share with you another Graduation Gift Card/Money Holder option.  If you are like us you are differently going to be needing these right now.  We have gotten a few Graduation invitations from both friends and family.  So that means we will be sending out either gift cards or a little cash; I mean what graduate wouldn't like cash or a gift card right now.   I shared a very super quick and easy card with you yesterday that was a gift card/money holder featuring the Beautiful Promenade Stamp set and matching designer series paper.  I will link to that here so you can check that out.  My card today is actually very easy but looks more complicated.  it can also be customized to match any schools colors.  Here's a look at today's card.

Tips & Tricks: 

Like I said this is a super easy card but looks way more complicated than it really is.  It's just a couple score lines, a little stamping, and a little die cutting.  To start off you will need a piece of 4 1/4 x 11 cardstock in what ever color you need for the school of the graduate.  I did a couple different colors because we have to send them to people in different schools.  So the one in the video tutorial that you will find below in just the Merry Merlot version.  I found it super easy to find matching Stampin' Up! cardstock to each schools colors.  I did two of these types cards and the one I shared yesterday, plus one more that I will share later this week.  
I designed the card so that it could be folded up like a normal card and be placed in one of our medium envelopes, so there's no extra postage.  I also designed it so that when it opens up you can not only have a place to put a gift card or a little cash but it would act like a easel card as well.  
The Celebrate die cuts act as the stopper for the easel but it also helps as my inside sentiment.  Plus I made a place to write a message on the inside as well.  So I think I have all the bases covered so to speak.  Here's a little look at the inside.  
The basic black version is done the exact same way except I changed up a couple of the elements and the dies.  Instead of the basic black mat I used pumpkin pie, and instead of the Celebrate You Dies (Which are retiring, sadly.  So if you want them you need to get them now) I used the Well Written Dies from the Occasions Catalog as well as the Well Said Stamp Set.  On the Merry Merlot version I used Ittly Bitty Greetings.  If you are looking for a stamp set that has almost everything you will need you can find them with both these sets.  

Video Tutorial: 

If you are viewing this post via email you may have to click here to see the video.  For some reason some mail servers will not show the embedded video. 

Sizes & Dimensions: 

 Supplies: 

  • Merry Merlot Cardstock  - 4 1/4 x 11 scored at 2 3/4 & 5 1/2
  • Merry Merlot Cardstock - 3 x 3 square, sliver of cardstock, 3/4" x 1" & scrap for die cutting words
  • Basic Black Cardstock - 4 1/8 x 2 5/8 you will need two of these
  • Whisper White Cardstock - 4 x 2 1/2 you need three of these 
I gave you the cardstock that I used in the video but like I said before you can change the color as you need.   All the sizes are the same for each version.  

Thanks for dropping by today I hope that you have a wonderful day and that you have enjoyed this video and look at my Graduation Cap Easel Card Gift Card/Money holder.  If you need any of the supplies you can pick them up in my online store 24/7.  If you want the Beautiful Promenade Stamp and Die bundle I would suggest getting them now before they are no longer at the bundle price.  Save that extra 10% on the bundle, it will no longer be a bundle after June 3, 2019.  
Happy Stampin' 
Rick Adkins


Stampin' Up! Shopping List

Join me for my Daisy Lane Online Class Click the image to learn more.
Purchase Rooted in Nature Stamp Set (using host code CC2HECY2) from me now until June 3 and get a pack of the Leaves Trinkets Free.  Must use host code to receive this offer.

Host Code and Free Gift:

May Host Code:  UMR2NHW7
Spend $50.00 (before taxes & shipping) in my Online Store using the current host code during May and get my May Creative Stampers Tutorial Bundle.  Tutorial Bundles will be sent to you starting the 20th of the month. 

Template Designed by creativeworkerbee