Showing posts with label baby. Show all posts

Monday, February 10, 2020

Welcome To the World Little One - Welcome Easter

Hello and welcome to my blog; today I am going to share with you the card I made for Charles to send to a relative that me made a baby blanket for.  She's going to have a baby girl very very soon and he knitted her a super cute blanket.  So, he needed a super cute baby card to go along with it.  I used the Welcome Easter stamp set to create my card today.  Here's a look at my card.

I picked the Welcome Easter stamp set because it has such super cute images that can be used for not only Easter but for baby cards as well.  It also has a sentiment that's just perfect for a new baby.  I punched out three circles from the plaid pattern designer series paper from the Pleased as Punch Designer Series Paper.  I used a 2" circle punch for the top two and a 1 3/4" circle punch.  I layered the designer series paper on top of the whisper white cut 5 3/8 x 4 1/8.   I then traced the circles with a pencil lightly.  So that I knew where to stamp the super little creatures.
I stamped the three little creatures in tuxedo black.  I then colored each of them with my selected Stampin' Blends.  I started out by coloring the bunny with Crumb Cake, and I then colored the background of the circle with So Saffron.  I then colored the little lamb with Purple Posey and colored the background circle with Flirty Flamingo.  I added just a touch of the Rococo Rose blend to the bow tie, and crumb cake to the nose.  For the little chick I colored her in So Saffron, and Rococo Rose on the comb and pumpkin pie for the beak.  I colored the background of the circle in Purple Posey.  After that I added the designer series paper over the whisper white colored layered with a little liquid glue.
I added the card front to a Whisper White Thick Card base cut at 4 1/4 x 11 scored at 5 1/2.  I added the panel to the card front with Stampin' Dimensionals.  I then stamped the sentiment to the inside of the card with Petal Pink ink to match the outside.  I added a few Champagne Rhinestones to add just a little bling to the card.

Card Recipe: 

You can save this image to your Pinterest boards to remember the key items I used to make today's card.  Thanks for dropping bye today I will see you a little later today with another blog post for Kylie's Training blog hop.  If you need any of the supplies that I used today you can order them in my online store 24/7 by clicking on the items in the shopping list below. 
Happy Stampin' 
Rick Adkins 

Stampin' Up! Shopping List: 


Join my team during Saleabration and you will get the super cute Mini Cutter and the DSP Sampler Pack free in your Starter Kit along with a Free Paper Pumpkin, Business Pack, a FREE Stamp Set of your Choice in addition to the $125 of product of your choice for $99.00 with Free Shipping.  That's $277.75 of products and supplies for only $99.00 (Price includes the Well Said Stamp Set (most expensive in catalog) plus 9% sales tax) 


Receive the February Creative Stampers Tutorial Bundle with any size order!  This month our tutorial bundle has 17 tutorials  featuring projects using Sale-a-bration Items!  

Monday, August 26, 2019

Stampers Showcase Blog Hop: Babies & Kids


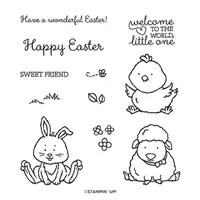
Hello and welcome to my blog; today I am going to share with you my card for this month's Stamper's Showcase Blog Hop.  This month the theme was  Babies and Kids so everyone came up with projects that represent that theme.  For my project I created a super cute card using one of my favorite  Babies & Kids stamp set from the Annual Catalog.  I loved this stamp set since it came out like I said it's one of my favorite sets and in reality it can be used for more than just babies and kids.  I am talking about the 
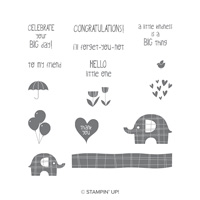
Little Elephant Stamp Set.  Here's a look at my card before we talk a little more about this stamp set.
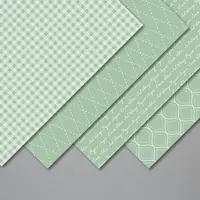
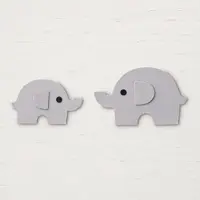
With the Little Elephant Stamp Set you have little Elephants, tulips, balloons, and more fun sentiments and other little images to complete fun cards for any age.  I started out my card today with a piece of whisper white and I used my Stampin' Write Markers in Poppy Parade, So Saffron, and Shaded Spruce to stamp the tulips around the bottom 1/3.  I then added a 1" x 5 1/4 piece of designer series paper from the Subtles Paper Pack.   I then stamped the two elephants in Gray Granite and used the Elephant Builder Punch to punch them both out.  I popped them up on the what will be the card front using a couple dimensionals.  But before I added the small elephant I stamped the balloons from the stamp set using the Stampin' Write markers that I used before but added a Mint Macaron one also.
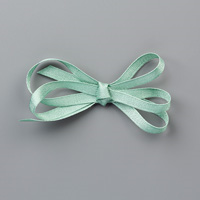
I then added the card front to a piece of Shaded Spruce Cardstock just slightly larger than the card base.  I then added a little Mint Macaron Textured Ribbon to the card and then popped it up on my So Saffron Card base.  I added a simple knot to the ribbon for more added interest. I stamped my Hello Little One sentiment on a scrap of Whisper White and punched it out with a 1" circle punch.  I then used the 1 1/8" scalloped circle punch to punch out a piece of so saffron cardstock. I then layered the two together with dimensionals and then popped it up on the card front with one more.
I added a piece of whisper white to the inside along with a 1/2" x 4 piece of matching designer series paper to tie everything together.  Next it was time to decorate the envelope to match the card.  I started out by using a matching piece of Mint Macaron Designer Series Paper.  I placed this on the envelope flap and cut it out.  I just added adhesive all around the flap and then added the paper, and again just cut around it.  Next I stamped a row of the elephants along the bottom of the envelope.
Thanks for dropping by today, I hope that you have a wonderful day hopping along.  You can click on the next bottom to go to the next blog.  You will find a full list of supplies below the next button.

Happy Stampin' 
Rick 


Template Designed by creativeworkerbee