Showing posts with label Stampin' Blends. Show all posts

Thursday, November 14, 2019

How to Create a Layered Look with the Making Christmas Bright Stamp Set and Stampin' Blends Video Tutorial

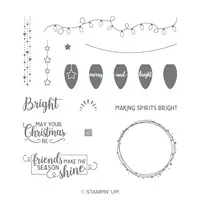
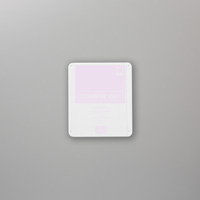
Hello and welcome to my blog; today I am going to share with you the card that I made during last night's Facebook Live.  I wanted to share with everyone how to create a layered look to a solid stamp.  I used the Making Christmas Bright Stamp Set and a few Stampin' Blends to do this.  This is a great technique to stretch the life of your stamps and give them a new look without to much work.  Here's a look at my card.

Tips & Tricks: 

I started out making a one layer card but my plans changed a little once I decided on which stamp set I wanted to use.  Once I made that choice I made a mask with some post it tape and one of the stamps from the set.  I stamped the curved line on the post it tape and cut it out.  I added this to my card front and did a little ink blending with Mossy Meadow Ink.  Once I had the ink on the top of my Whisper White Thick cardstock I flicked on some gold and white perfect pearls.  
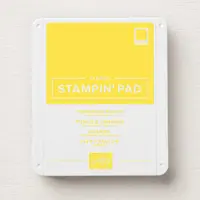
 Once I had the ink blending done I stamped the line that would hold the Christmas lights.  I then sat my card front aside and worked on the christmas bulbs.  I started out my stamping each colored bulb with the lightest color ink that I was going to use.  This is my base layer and also the next lightest color besides the highlights.  The highlight is added last with a white gel pen.  For the ink colors that I used for the bulbs are as followed; Call Me Clover, Flirty Flamingo, Mano Melody, Pineapple Punch, and Balmy Blue.  So once they were all stamped I let them sit for awhile to let the ink dry completely.  
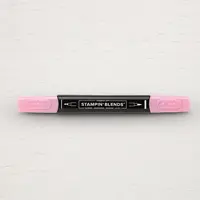
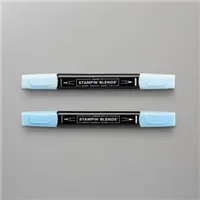
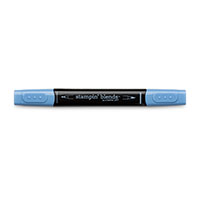
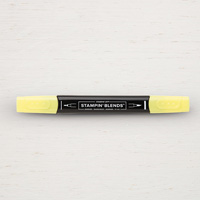
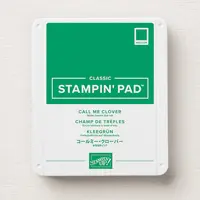
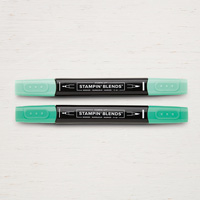
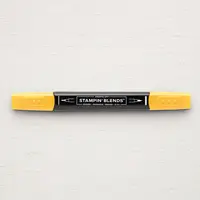
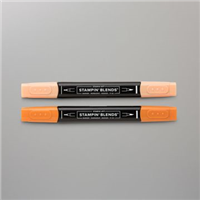
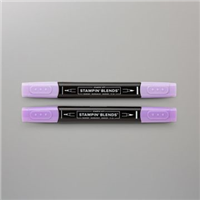
Once the ink had dried I then took my Stampin' Blends and added in multiple colors to enhance the color and this created a layer look to the bulbs.  I added three different colors to each bulb in most cases.  For the Call Me Clover bulb I only did a two color blend.  So since I mentioned that lets start there.  For the Call Me Clover one I added a layer of Call me Clover light stampin blend and dark.  This added more tones and a glow to the bulb.  For the rest I did a three layer blend.  I used the following blends on each bulb starting with the red.  Reb Bulb; Flirty Flamingo ink, Stampin' Blends in Dark Flirty Flamingo, and light and dark Real Red.  Orange Bulb; Mango Melody ink, Pumpkin Pie light and dark stampin' blend with a little Mango Melody Dark blend.  Yellow bulb; pineapple punch ink with dark Pineapple Punch blend and light and dark Daffodil Delight Blends.  The finial bulb was done in Balmy Blue ink with balmy blue light and dark blends with a little Night of Navy light stampin' blends.  You can see by adding the blends to the images it adds more layers to them.  

Video Tutorial: 

If you are viewing this post by email you will need to click here or click on the image below to view the video.  
Thanks for dropping by today, I hope that you have a wonderful day.  I will see you tomorrow for another project.   
Happy Stampin' 
Rick Adkins 

If you live in the US.  I would love you to choose me as your demonstrator.  If you would like to purchase any of these products you can click on the Shop Now Button or by clicking on any of the images below.  Alternatively, you can also contact me by email to place your order.  Please be sure to use the monthly host code and I’ll send a little something out to you the following month to say Thank You!  

November HOST CODE:  QU2TJBJN
  1. Spend any amount with me this month and receive the Creative Stampers Tutorial Bundle.  Plus get a gift from me in December.
Please remember that if you use the host code you cannot use that order towards my KCRP’s (Kinmon Crafty Reward Points) that would be double dipping and is not allowed.  For more information on KCRP’s click here.  


Three main reasons to Join!  
1.     You Get at least a 20% discount on all your orders while you are a demo.   
2.     You get to join my fun Kinsmon Crafters Team and Private Facebook Group.
3.     Access to directions to all my online classes 

Stampin' Up! Shopping List: 

Price: $49.00

Wednesday, October 23, 2019

Good Morning Magnolia for #PCC356

Hello and welcome to my blog; today I am going to share with you my project for this weeks Paper Craft Crew Sketch Challenge.  The sketch for this week is a great one that's open to so many possibilities.  For my Card today I used products from the Magnolia Lane Suite.  Here's a look at my card.

I decided to do a little no line stampin' blend coloring on my card today.  Here's a look at the sketch that inspired my card today.  You can click on the image below to visit the Paper Craft Crew Website and see what the other design team members created this week, and if you want to play along you can do that there as well.

Tips & Tricks: 

I started my card with a Purple Posy card base cut at 4 1/4 x 11 scored at 5 1/2.  I stamped the small magnolia from the Good Morning Magnolia Stamp Set around my card base in Purple Posy ink.  Yes, Purple Posy is officially out and able to be purchased.  The issue with the ink has been fixed and it's working great now.  Once I had that image stamped all out I stamped it on a scrap of Thick Whisper white cardstock so that I could do a little no line stampin' blend coloring.  
But, before I did my no line coloring I colored a piece of the Magnolia Lane Designer series paper with my Purple Posy Stampin' Blends.  This is a great way to alter your designer series paper to match your projects.  I used another pattern from the same pack of paper matted to a piece of Mossy Meadow Cardstock.  I have another piece of Mossy Meadow behind that as well.  I also added a small strip of basic black between the card base and the designer series paper.  
To do my no line coloring I stamped the image in Purple Posy Ink.  But, to get the shade light enough I stamped it on a scrap paper and then onto my thick whisper white cardstock.  Even with Purple Posy being a super light color I still wanted it to be just a little lighter.  I started my coloring with the stem and leaves.  For that I used my Mossy Meadow Stampin' Blends in both light and dark.  For the flower I used Purple Posy Light and dark and Highland Heather Light and Dark.  The flower took the longest time to color.  The thing with no line coloring is that you have to color the image dark enough so that you have a clear divide between each petal.  Basically you have to have a clear difference between your shadows and highlights, maybe that will make it more understandable.  
To finish off my card I popped up the magnolia bloom using a Stampin' Dimensional, and added the sentiment strip and a few basic Rhinestones.  I hope that you have enjoyed my little card today, and that you will give it a try.  Thanks for dropping by I am happy that you did.  Just a little side note today kicked off the 24 Hour Stamp Sale over at my online store.  You will find a select section of stamps there.  The sale ends tonight at 11:59 Mountain Time.  
Happy Stampin' 
Rick Adkins 

If you live in the US.  I would love you to choose me as your demonstrator.  If you would like to purchase any of these products you can click on the Shop Now Button or by clicking on any of the images below.  Alternatively, you can also contact me by email to place your order.  Please be sure to use the monthly host code and I’ll send a little something out to you the following month to say Thank You!  


October HOST CODE:   QU2TJBJN
1.     Spend any amount with me this month and receive the Creative Stampers Tutorial Bundle featuring Fall & Halloween Projects.  Plus get a gift from me in November.
Please remember that if you use the host code you cannot use that order towards my KCRP’s (Kinmon Crafty Reward Points) that would be double dipping and is not allowed.  For more information on KCRP’s click here.  


Three main reasons to Join!  
1.     You Get at least a 20% discount on all your orders while you are a demo.   
2.     You get to join my fun Kinsmon Crafters Team and Private Facebook Group.
3.     Access to directions to all my online classes 

Stamipin' Up! Shopping List: 


Template Designed by creativeworkerbee