Showing posts with label Sale-a-bration 2020. Show all posts

Sunday, March 22, 2020

Forever Blossoms CASE the Catalog

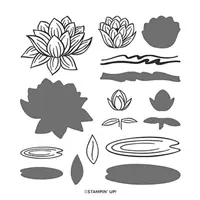
Hello and welcome to my blog; today I am going to share with you another CASE the Catalog Card.  Today we are going to use the Forever Blossoms Stamp Set and do a little watercoloring.  The greetings in the Forever Blossoms Stamp Set are designed for weddings, anniversaries, friendships, and more. Its detailed floral images can be used to make greeting cards for any occasion. This stamp set is also available in French. This is a Distinktive** stamp set; it has a special texture that gives added depth and dimension in a single step, creating photo-realistic images. **Patent pending

Here's a look at today's card.  

Tips & Tricks: 

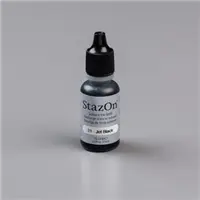
Casing means to Copy And Share Everything or to Copy And Selectively Edit.  Casing is a great way to learn something new or something you want to try, and the Stampin' Up! catalogs are not only a shopping list but a inspirational idea book; where you can find new techniques and card ideas to try.  I received today's card as part of a CASE the Catalog Swap I took part in.  So let's get into the card shall we.  The floral image from the Forever Blossoms Stamp Set was stamped in Stazon Ink on Shimmery White Cardstock.  This is a perfect base because you can do a little watercoloring on.  The Shimmery White Cardstock is smooth enough that you can get a very nice stamped impression but also strong enough to let you add a lot of water when watercoloring.  Which actually was not the case with this card, the amount of water I mean.  


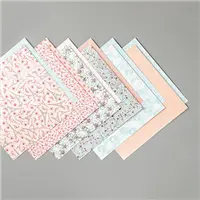
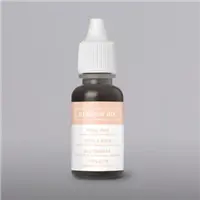
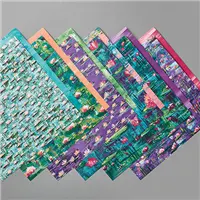
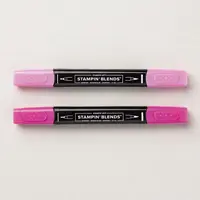
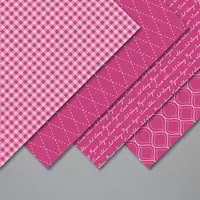
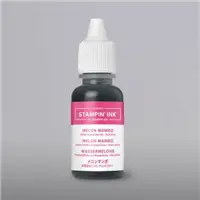
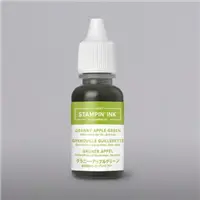
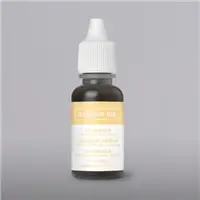
The stamped images were then watercolored with a little ink.  I usually use a few drops of a ink refill to watercolor with in a little white watercolor tray; which can be picked up at any box store in the craft section.  The Aqua painter is a perfect choice for adding the color.  Remember the more water you add the lighter the color.  It's better when watercoloring to add multiple lighter layers and build up the colors after each layer dry.  The colors used were Petal Pink and Old Olive.  Once dry this layer was added to a Pool Party Card Base cut at 5 1/2 x 8 1/2 (scored at 4 1/4).  The sentiment was then stamped on Whisper White Cardstock and then cut out using the Stitched Nested Label Dies.  There was also a couple of the stitched labels in the next size down from the Parisian Blossoms Speciality Designer Series Paper.  


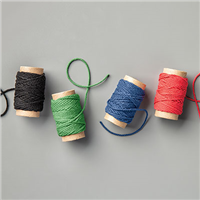
The stitched labels where then attached together.  You can take the one DSP label and cut in half to place behind the sentiment.  Then you can add some of the Poppy Parade Twine from the Country Club Twine Combo Pack in a couple loops and then the sentiment put on top with a few Stampin' Dimensionals.  That finishes the card.  I hope that you will give watercoloring with ink refills a try if you haven't before.  Thank you for dropping by today.  If you need any of the supplies that you have seen used today you can pick them up in my online store.  
Rick Adkins


Use the March Host Code on any order of $50 (before taxes & shipping) or more during the month and receive a gift from me in April as a Thank You.  If your order is $150 or more, please don't use the host code.  You will forfeit your Stampin' Rewards if you do; and I want you to get those rewards.


If you place any size order with me during the month of March, you will receive the March Creative Stampers Tutorial Bundle from me as a little thank you.  This month's tutorial bundle features fourteen floral themed tutorials.  The Creative Stampers Tutorial Bundle can either be earned for FREE with any size order or Can be purchased for $20 from me.

Stampin' Up! Shopping List: 


Monday, March 2, 2020

Lily Impressions DSP Card - Video Tutorial

Hello and welcome to my blog; today I am going to share a fun way to make a card using Designer Series Paper as the card base.  I picked the Lily Impressions Designer Series Paper that's one of the Sale-A-Bration offering this year.  I also used the Lovely Lily Stamp Set and the matching Lily Pad Dies both of which are also Sale-A-Bration items and can all be earned for free with qualifying orders.  During the video I also share how to get a four color blend using two sets of Stampin' Blends.  Doing a four color blend is a little more advance coloring technique and it gives a more realistic coloring look.  Here's a look at my card.

Tips & Tricks: 

I started out my card design by cutting my designer series paper down to the correct size.  It's cut to 4 1/4 x 12, and scored at 1" & 5 1/2".  Once it was scored I then used my bone folder and burnished each score line.  The 1" score line gets folded back to the front so that you can see both sides of the paper on the front of the card.  This is one of the reasons I love Designer Series Paper cards, because you don't have to decided which side of the paper you want to see, you actually get to see them both.  


One thing depending on the designer series paper that you pick make sure that you have the paper turned in the right direction.  For this one it really isn't noticeable that I had it flipped upside down.  It still worked out just fine.  To decorate the front of the card a little I used both a 1/2" x 4 1/4 piece of Gorgeous Grape Cardstock for the this card as you will see in the video to add a little stability and to add just a little more color.  But, one the first card I used a piece of the Lovely Lipstick 1/8" Grosgrain Ribbon instead.  I also used the detailed die from the set and cut out a piece of Green foil from the Noble Peacock Foil pack.  I added this to the center of the card front with a little liquid glue behind.  


Once I had the foil die cut a large stitched whisper white circle and scalloped circle to layer behind.  I stamped the lily and lily pad from the stamp set twice in Memento Tuxedo Black Ink.  Once the ink dried a little bit I started the coloring process.  I started out with Dark Lovely Lipstick in the deepest shadow areas of each petal.  I worked one petal at a time so that I could get a good blend.  Next I moved the Light Lovely Lipstick and blended the dark out; next I moved to Dark Flirty Flamingo and then to Light Flirty Flamingo.  When blending flowers I do a very light handed flicking motion.  I also go in the direction of the flowers petals.  For the Lily pad since they are rounded I color in a circular motion.  This coloring method makes a round object appear rounded.  Once all the coloring was completed I used the matching die and cut everything out.  I added the colored images to the stitched circles with liquid glue and stampin' dimensionals.  


Once everything was added to the front of the card I stamped the inside and colored the lily on the inside and added a sentiment.  For the card in the video I choose not to add anything to the inside yet because I wasn't sure what occasion I may want to use the card.  I also added some of the designer series paper to the flap of the envelope.  This way I have a perfectly coordinated card and envelope that's ready to go.  

Video Tutorial: 

If you are viewing this post by email you may not be able to see the video.  If that is the case you can click here or click the image below to view.  Not all mail servers will show embedded videos.  

Thanks for dropping by today, I hope that you have found my little tips helpful.  If you need any of the supplies I used today you can pick them up in my online store.  Remember that during Sale-A-Bration you are rewarded with free goodies based on your qualifying orders.  
Happy Stampin' 
Rick Adkins 

Use the March Host Code on any order of $50 (before taxes & shipping) or more during the month and receive a free gift from me in April as a Thank You.  If your order is $150 or more please don't use the host code.  You will forfeit your Stampin' Rewards if you do; and I want you to get those rewards.  


If you place any size order with me during the month of March you will receive the March Creative Stampers Tutorial Bundle from me as a little thank you.  This month's tutorial bundle features fourteen floral themed tutorials.  The Creative Stampers Tutorial Bundle can either be earned for FREE with any size order or Can be purchased for $20 from me.  


Stampin' Up! Shopping List:  


Tuesday, February 25, 2020

Wishing You The Best - Tags in Bloom New Saleabration Stamp Set

Hello and welcome to my blog; today I am going to share with you a card I made using the New Tags in Bloom Stamp Set.   Brighten someone’s day with a tag or card you make using the Tags in Bloom Stamp Set. This Two-Step Stampin’ set lets you layer images to create more depth and interest. Stamp the outline flower image in one color, then stamp the corresponding solid flower image over it with a different color. The photopolymer clear stamps make it easy to align the images. Earn this stamp set FREE with a qualifying purchase March 3–March 31, 2020, during part two of our Sale-A-Bration.  Here's a look at my card.

Tips & Tricks: 

I started out with stamping the floral frame in Melon Mambo on a piece of Whisper White cardstock.  Next I stamped the fill in stamps to add the colors to the flowers, and leaves.  For that I used Melon Mambo stamped off for the outside of the flowers.  For the inside I used So Saffron, and for the leaves I used Granny Apple Green.  
Once I had everything on the floral frame stamped I stamped the stitched label in Granny Apple Green Ink and then the sentiment in So Saffron.  I used the Label me Lovely Punch and punched out the stitched tag and popped it up in the center of the floral one using dimensionals.  I then layered that piece onto a piece of Melon Mambo cardstock, and then popped that up onto the card base (Melon Mambo) over the Granny Apple Green Gingham pattern from the Brights DSP paper pack.  
To finish off the card I added a few rhinestones to the card front along with a double bow that I made using pieces of the burlap that I removed from the Burlap Braided Trim from the Tropical Oasis Suite.  I love the texture that the twine from this ribbon gives to the project.  It has great texture that's hard to come by.  You also get a ton when you start pulling it apart.  

Video Tutorial: 

If you are viewing this post by email you may have to click here or click on the image below to view the video.  Not all mail servers will show the embedded video.  

The Tags in Bloom stamp set will be available starting March 3, 2020 to earn with a qualifying order.  This is not the only item that's will be part of the second release.  Be watching this week for more sneak peeks.  If you want to earn the Tags in Bloom Stamp Set the products that I have listed below in the shopping list will get it for you.  The total cost of the items listed was $108 before taxes and shipping so you would have a qualifying Sale-a-bration order for this stamp set.  
Happy Stampin' '
Rick Adkins 

Stampin' Up! Shopping List: 


Template Designed by creativeworkerbee