Showing posts with label Christmas. Show all posts

Wednesday, December 11, 2019

Christmastime is Here Square Card

Hello and welcome to my blog; today I am going to share with you a super cute square card that I made the other night during a YouTube Live.  I used the Christmastime is Here Suite of Products.  Which came out on November 1, 2019 and is while supplies last (as of this post the products are still available to purchase.)  Here's a look at my card.

I based this card from a sketch that I found in the November 2019 Cardmaking and Papercraft Magazine.  You can change this up to make a full size card and make some super quick extra Christmas Cards if you need some.  I used a 2 1/4, 2 and 1 1/2" circle punches to punch out the circles from the designer series paper.

Video Tutorial: 

If you are viewing this post by email you may have to click here or on the image below to view the video.  

Sizes & Dimensions: 

  • Mossy Meadow Cardstock:  4 1/4 x 8 1/2 scored at 4 1/4
  • Whisper White Cardstock:  (2) 4 x 4 & a scrap for a 2" circle 
  • Christmastime Is Here Speciality Designer Series Paper:  3 3/4 x 2 & scraps for a 2", 2 1/4", and 1 1/2" circles plus 1/2" x 4 piece for inside 


Happy Stampin' 
Rick Adkins 

If you live in the US.  I would love you to choose me as your demonstrator.  If you would like to purchase any of these products you can click on the Shop Now Button or by clicking on any of the images below.  Alternatively, you can also contact me by email to place your order.  Please be sure to use the monthly host code and I’ll send a little something out to you the following month to say Thank You!  

December HOST CODE:  CEUXJX6R
  1. Spend any amount with me this month and receive the Creative Stampers Tutorial Bundle.  Plus get a gift from me in January.
Please remember that if you use the host code you cannot use that order towards my KCRP’s (Kinmon Crafty Reward Points) that would be double dipping and is not allowed.  For more information on KCRP’s click here.  

Three main reasons to Join!  
1.     You Get at least a 20% discount on all your orders while you are a demo.   
2.     You get to join my fun Kinsmon Crafters Team and Private Facebook Group.
3.     Access to directions to all my online classes 

Stampin' Up! Shopping List: 

Tuesday, December 3, 2019

Let it Snow Scandinavian Star Ornament Home Decor Piece Video Tutorial

Hello and welcome to my blog; today I am going to share with you a super cute home decor piece that's super easy to make and actually quick.  One other thing that is great about this project is you can use up some of that Designer Series Paper you may have on hand or in your stash.  I saw this on a video and in industry magazine recently and just had to try it.  I have been making the smaller version of the Scandinavian Star Ornaments for one of our Christmas Trees.  We have a few different trees that we put up every year, you can see past Christmas Open House photos by doing a search in the search bar.  If not I will try to come back and try to link it from a couple years ago.  We decided this year to create a tree with handmade ornaments, so I am super excited to see it completed.  Anyway here's a look at my home decor piece.

Tips & Tricks: 

This project only takes 12 1" x 12" strips to make.  So you can make a lot of them with one pack of DSP.  Once you have your Designer Series Paper cut into the strips you are going to take six of them and weave together.  You start with three stripes and weave the other three together.  Once all together you are going to turn it into an x and then glue the two closes strips together as shown on the video.  You are going to repeat this all the way around and repeat with the other six stripes.  
Once both stars are constructed you are going to put both together.  To secure both stars together you are going to weave the leftover strips into the curls and secure with glue.  To finish it off you are going stamp and color one of the snow men from the stamp set or whatever you decided to put on the inside.  Color it with coordinating colors and layer together with dimensionals.  Attach to the center of the put together stars with a little liquid glue.  Create a hole at the top and add your ribbon.  Make a loop for the top and a bow to add a little pretty.  At this point you are ready to hang. 

Video Tutorial: 

If you are viewing this post by email you may have to click here or on the image below to see the video.  Some mail servers will not play the embedded video.  
I hope that you have enjoyed this project and that I have inspired you a little to try this at home.  This would make a great decoration for any season by changing up the paper.  Thanks for dropping by I will see you again very soon.  
Happy Stampin' 
Rick Adkins 

Stampin' Up! Shopping List: 


Thursday, November 7, 2019

Tis the Season

Hello and welcome to my blog; I hope that you are having a wonderful day!  I am going to share with you the card that I did last night during my Facebook Live.  I have a weekly Facebook Live mini Class every Wednesday night at 8 pm CST.  I also share that project and and tutorial the next day here and on my YouTube Channel.  Last night I used products from the Night Before Christmas Suite in the 2019 Holiday Catalog.  Here's a look at my card.


Tips & Tricks: 

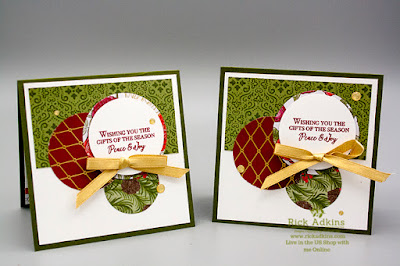
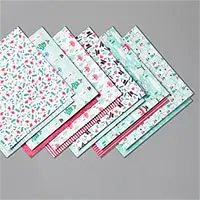
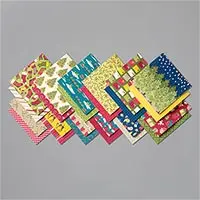
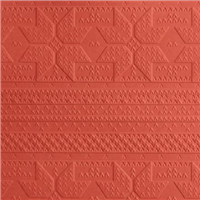
I created this card with some scraps from my stash.  Well the designer series paper and the stamped and die cut images are from scraps any way.  I used my layering circle dies and my 2 1/4" punch to cut out punch the circles.  You can pick any of the designer series paper from the Night Before Christmas Designer Series Paper 6 x 6 paper to create this card.  Any of the designs in this pack of DSP will work for this card.  The background piece of cardstock in Old Olive and I embossed it with the Winter Knit 3d embossing folder, before attaching it to the Very Vanilla Card base.  
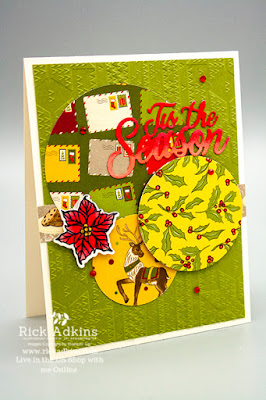
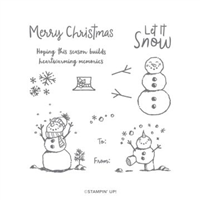
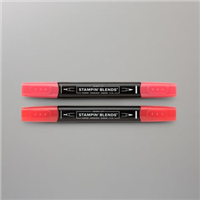
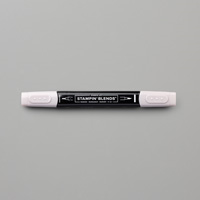
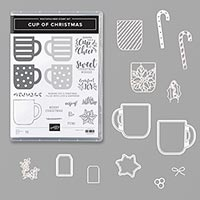
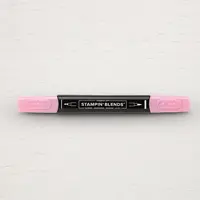
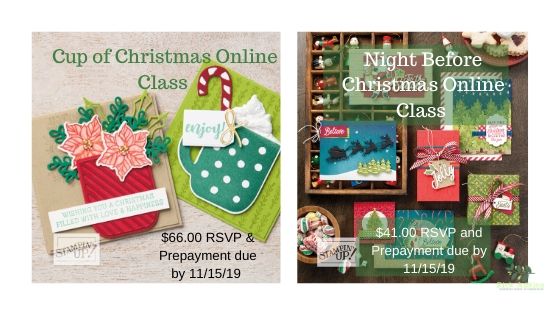
Once I had the embossed background and the circles attached to the card base; I then stamped the little poinsettia image from Cup of Christmas and colored it with my Real Red light and dark stampin blends and the Flirty Flamingo Dark blend dark mango melody stampin' blend.  I ran it through my die cutting machine with the matching embossing folder and attached it with a Stampin' Dimensionals.  The Cup of Christmas set isn't part of this suite of products but I am featuring both of these sets in two of my online Classes this month.  If you are interested in either of these classes you can email me and I will send you the registration link.  If you want to take both of these classes at the same time please mention that in the email because you will save on shipping costs.  
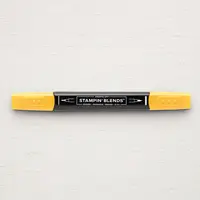
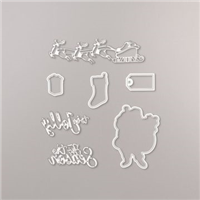
Once the poinsettia was colored and cut out and attached to the card front.  I worked on the sentiment for my card; I took a scrap of Very Vanilla cardstock and colored it with the Flirty Flamingo dark, Real Red light and dark blends and blended the colors together to make an ombre' look and then used the Tis the Season die and cut it out on my die cutting machine.  After all that I attached it to the card front with a little liquid glue.  To finish off the card I added  a few Red Rhinestones to the front of the card.  

Video Tutorial: 


If you are viewing this post by email you may have to click here or the image below to view the video tutorial.  Some email servers will not show the embedded video.  

Thanks for dropping by today, and I hope that you have enjoyed this little tutorial on how I made my Tis the Season Card.  I will see you again tomorrow with a new project.  
Happy Stampin' 
Rick Adkins 

If you live in the US.  I would love you to choose me as your demonstrator.  If you would like to purchase any of these products you can click on the Shop Now Button or by clicking on any of the images below.  Alternatively, you can also contact me by email to place your order.  Please be sure to use the monthly host code and I’ll send a little something out to you the following month to say Thank You!  

November HOST CODE:  QU2TJBJN
1.     Spend any amount with me this month and receive the Creative Stampers Tutorial Bundle.  Plus get a gift from me in December.
Please remember that if you use the host code you cannot use that order towards my KCRP’s (Kinmon Crafty Reward Points) that would be double dipping and is not allowed.  For more information on KCRP’s click here.  


Three main reasons to Join!  
1.     You Get at least a 20% discount on all your orders while you are a demo.   
2.     You get to join my fun Kinsmon Crafters Team and Private Facebook Group.
3.     Access to directions to all my online classes 
I All Ready Know I Want to Join!  Sign Me UP!

Stampin' Up! Shopping List: 


Template Designed by creativeworkerbee