Showing posts with label Christmas. Show all posts

Wednesday, October 30, 2019

New Stampin' Up! Paper Trimmer


Hello and welcome back to my blog today; Papercrafting begins with a beautiful first cut, which means having the right tool for the job is kind of a big deal.  Well, do I have the tool for you!  Get your hands on the new Paper Trimmer.  I wanted to take a little time and talk to you about the new Stampin' Up! Trimmer that will be available starting November 1, 2019.  Yes, it will be available in time to wrap and put under the Christmas Tree.  I have been playing with this new trimmer all month long (one of the perks of being a demonstrator); and I am loving it.  I have used the blade that came with it all month long and haven't had to change it one time.  And, believe me I cut a lot of cardstock, glimmer paper, and window sheets with it over the last month.  I've tried my best to give it a good work out before I would even share any real information with you.  I know if you have followed me you have seen it used in my Facebook Lives, and other videos.  But, like I said I haven't really talked about it because I wanted to give it a good once over before I did.  Here's a look at the trimmer a little closer up.
image by Stampin' Up! 

Product Details: 

Our new Paper Trimmer is lightweight, portable, and perfect for making stable and straight cuts!  

Paper Trimmer
Item: 152392 | $25.00 usd

  • 15-3/8 x 8 x 1/2” (39 x 20.3 x 1.3 cm)
  • Includes 1 cutting blade and 1 scoring blade.
  • Includes imperial and metric measurements.
  • Ruler and grid protected by durable plastic cover.
  • Point on cutting handle for precise measuring.
  • Right-side grid for cutting thin strips.
image by Stampin' Up! 

 Click here to see the cute promotional video.  It's quite entertaining. 
image by Stampin' Up! 
I hope that you have found my little post about the New Stampin' Up! Trimmer helpful.  I have been extremely pleased with it since I've gotten mine.  And even more pleased that I have not had to change the blade once this entire month and it's still cutting just as it did on day one.  If you have a one of the old trimmers and some blades use those up until you need a new trimmer and I am happy to help you get one of the new ones at that time.  But If you are in the market for a new trimmer or want to have one under the Christmas tree let me know and I am happy to help you get one on November 1st.  The trimmer will be available November 1st, but Stampin' Up! is holding off on releasing the blade replacements until later on.  No there's not anything wrong with them, they just sold better than they expected during the demonstrator preorder.  So, Stampin' Up! wants to hold off until they have a large enough supply built up to accommodate the orders that may come in later on.  But as I mentioned above I've been on the same blade all month and it's still going strong.

Thanks for dropping by I will see you again in the morning for a fun Halloween post.

Happy Stampin' 
Rick Adkins 


If you live in the US.  I would love you to choose me as your demonstrator.  If you would like to purchase any of these products you can click on the Shop Now Button or by clicking on any of the images below.  Alternatively, you can also contact me by email to place your order.  Please be sure to use the monthly host code and I’ll send a little something out to you the following month to say Thank You!  

November HOST CODE:  QU2TJBJN
1.     Spend any amount with me this month and receive the Creative Stampers Tutorial Bundle.  Plus get a gift from me in December.
Please remember that if you use the host code you cannot use that order towards my KCRP’s (Kinmon Crafty Reward Points) that would be double dipping and is not allowed.  For more information on KCRP’s click here.  


Three main reasons to Join!  
1.     You Get at least a 20% discount on all your orders while you are a demo.   
2.     You get to join my fun Kinsmon Crafters Team and Private Facebook Group.
3.     Access to directions to all my online classes 

Sunday, October 27, 2019

CASE the Catalog - Merry Moose

Hello and welcome to this weeks Case the Catalog post; this week I picked a card featuring one of my favorite stamp set bundles.  I picked a card that can be found on page 27 of the Stampin' Up! Holiday Catalog.  In case you don't have a catalog and you missed the title I am Casing one of the Merry Moose cards on that page.  If you are not sure what I mean about CASE; it stands for Copy and Share Everything or Copy and Selectively Edit.  Here's a look at my card.

Here's a look at the card created by the concept artists at Stampin' Up! that inspired my card today.  This card can be found on page 27 of the Stampin' Up! Holiday Catalog.  
Image copyright by Stampin' Up! 
You can see from both photos I did Copy and Selectively Edit my version of this card.  I went with a Very Vanilla card base (4 1/4 x 11 scored at 5 1/2 to make a top folding card) and layered a full size Balmy Blue layer on top (4 1/4 x 5 1/2).  There's was created with a side folding Balmy Blue cardbase.  Both versions are just as nice.  This is one thing about casing a card is you can take the idea and change it to your style.  I happen to prefer to make top folding cards.  
I went with the Very Vanilla card base so that I didn't have to add additional cardstock to the inside of the card.  This allows me to write my greeting with enough room.  I could have just added an additional layer but with that comes additional bulk to the card.
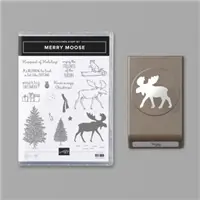
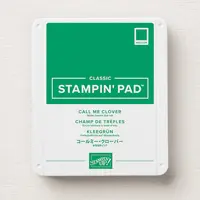
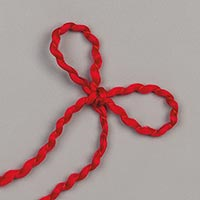
I stamped the solid image of the moose across the card front with matching Balmy Blue ink just as the catalog sample.  I also did the Moose outline on a piece of Crumb Cake cardstock with matching ink and punched it out with the matching punch.  I added the Real Red Curly Ribbon as a scarf and tied it around his little neck to secure it.  I then popped the moose punch out up on a few dimensionals.  I did change the width of the Call Me Clover sentiment banner and decided not to fish tail the ends as seen in the inspiration image.  This was also popped up on dimensionals. 
There are a few great things about CASEing that I hope you are learning from this bi-weekly series!  One, that you can find great ideas from the catalogs, they are more than just a shopping source.  The catalogs have a countless number of ideas for card making and paper crafting to copy and learn from.  And, two you can improve your skills by casing.  When you do this you not only have to figure out what was used but the sizes used, color combinations, and different techniques.  All of these things helps you to improve and build your card and paper crafting skills and makes you a better crafter.  Thanks for dropping by this week for this part of the CASEing bi-weekly series.  My hope is that you are learning a lot about the importance of doing this and that you are giving it a try each week.  I will see you again tomorrow.

Happy Stampin' 
Rick Adkins 

If you live in the US.  I would love you to choose me as your demonstrator.  If you would like to purchase any of these products you can click on the Shop Now Button or by clicking on any of the images below.  Alternatively, you can also contact me by email to place your order.  Please be sure to use the monthly host code and I’ll send a little something out to you the following month to say Thank You!  


November HOST CODE:  QU2TJBJN
1.     Spend any amount with me this month and receive the Creative Stampers Tutorial Bundle.  Plus get a gift from me in December.
Please remember that if you use the host code you cannot use that order towards my KCRP’s (Kinmon Crafty Reward Points) that would be double dipping and is not allowed.  For more information on KCRP’s click here.  


Three main reasons to Join!  
1.     You Get at least a 20% discount on all your orders while you are a demo.   
2.     You get to join my fun Kinsmon Crafters Team and Private Facebook Group.
3.     Access to directions to all my online classes 

Stampin' Up! Shopping List: 


Thursday, October 10, 2019

Toile Christmas Gift Card Holder

Hello and welcome to my second post today!  We all need gift card holders, but must are all the same and there's nothing exciting or different about them.  Must crafters love designer series paper but we struggle with which side to use.  Well, I have a solution for both of these problems with this little gift card holder that I created.  I love this little gift card holder so much that; I wanted to share it with you today.  I couldn't hold this project for another day.  That's how excited I am about  the super easy and cute gift card holder that I made last night during my Facebook Live.  Here's a look at my project.


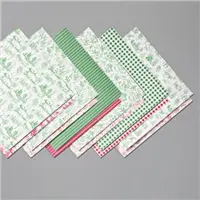
I am going to show you how to create a gift card holder using the Toile Tidings Designer Series Paper and the Toile Christmas Stamp Set and matching dies from the 2019 Stampin' Up! Holiday Catalog.  Toile Tidings Designer Series Paper features traditional toile designs in classic Christmas colors--the perfect paper for a cozy Christmas.

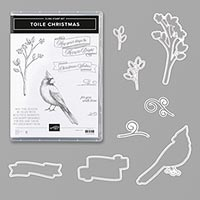
The Toile Christmas Bundle includes the Toile Christmas Cling Stamp Set and the Christmas Cardinal Dies.  Toile Christmas Cling Stamp Set pairs the classic Christmas cardinal image with sophisticated seasonal greetings for all your Christmas projects. The berry branch works as a sweet perch for the cardinal or as an accent piece with your greetings. Cardinals never go out of style, so you'll love the Toile Christmas Stamp Set for many Christmases to come! This is a Distinktive* stamp set; it has a special texture that gives added depth and dimension in a single step, creating photo-realistic images. *Patent pending. The Christmas Cardinal Dies helps you to create custom Christmas die cuts, including a festive cardinal, in record time.
Now that I have shown and talked to you a little about the products that I used on my gift card holder let's have a little chat about the holder itself shall we.  This is a great project for someone that doesn't have a lot of time but wants to create some holiday gifts.  I mean who doesn't like a gift card to their favorite store or to a coffee shop.  This is perfect for a teacher gift with a Starbucks gift card inside.  Or for the person that finds it hard to cut up that designer series paper you've been hording because you can't decided which side to use.   One of the other things I love about this project is you actually get to see both sides of the designer series paper.
Just a word of warning!  Once you start stamping the branch and cardinal you may not be able to stop.  It becomes a little additive.  I am just saying.  I may have stamped about 50 or so to color.  I am not sure what I am going to do with these yet but I am sure I can think of something.

Video Tutorial: 

If you are viewing this post via email you my not be able to see the embedded video tutorial.  If that's the case you can click here or on the image below and it will take you to the video on my YouTube Channel.  
Thanks for dropping by for my second post today, I hope that you find this project helpful and that I have inspired you to use up some of your designer series paper.  Remember you can always purchase another pack.  You have my permission.  LOL!  
Happy Stampin' 
Rick Adkins 

If you live in the US.  I would love you to choose me as your demonstrator.  If you would like to purchase any of these products you can click on the Shop Now Button or by clicking on any of the images below.  Alternatively, you can also contact me by email to place your order.  Please be sure to use the monthly host code and I’ll send a little something out to you the following month to say Thank You!  
October HOST CODE:  SQ2WWJZN
  1. Spend any amount with me this month and receive the Creative Stampers Tutorial Bundle featuring Fall & Halloween Projects.  Plus get a gift from me in November. 

Please remember that if you use the host code you cannot use that order towards my KCRP’s (Kinmon Crafty Reward Points) that would be double dipping and is not allowed.  For more information on KCRP’s click here. 

Stampin' Up! Shopping List: 

Template Designed by creativeworkerbee