Hello and welcome to my blog; today I am going to share with you a project that I think you can totally use especially if you need to make some treats for your child's classroom for Valentine's day or for a view coworkers to show you are thinking about them. I came up with this super cute inexpensive treat idea using products from the From My Heart Suite from the 2020 January - June Mini Catalog. And, the best part is the treats that fit inside are little snack cakes from Little Debbie I used the Be My Valentine Cakes. The super cute little heart shaped snack cakes! And they have Flirty Flamingo icing on them! So it was perfect. And the even better part was they are super easy to make, and you could fold them flat and store them until you need them. Here's a look at my project.
Tips & Tricks:
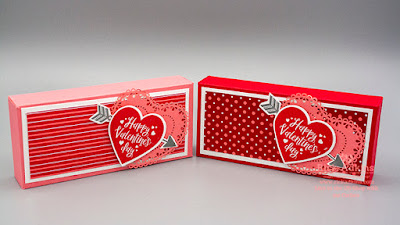
To make this top opening box you will need either a piece of Real Red or Flirty Flamingo Cardstock cut at 7 1/2" x 8 1/2". On the 7 1/2" (short) side you are going to score at 2 1/2, 3 1/2, 6 & 7. On the 8 1/2" (long) side you are going to score at 1 /2", 1 1/2", 7, & 8. The long side of the box is the side that the flaps will open and close. Once all the score lines are folded and burnished you will do your cutting. You can watch the video for complete cutting and assembly instructions.
The box measures when complete 2 1/2" x 1" x 5 1/2". So it's a nice size box. You can fit so much more in it then just the little debbie snack cakes if you wanted to. If you are using the little debbie cakes it will fit one pack of the Be My Valentine Snake Cakes pictured above. You get 5 or the two packs in a box for a couple bucks. So really cost effect to give. It's also a great way to dress up a simple little item. And really who doesn't like Little Debbies? I love them and I am almost 46 years old.
I used the Heartfelt bundle to create the sentiment on the outside of the box, and the From My Heart Specialty Designer Series paper along with the Heart Shape Doilies to dress up the box. I cut my DSP down to 2 x 5" and matted them on a piece of 2 1/4 x 5 1/4" whisper white cardstock. I used a scrap piece of whisper white cardstock to stamp the heart in Real Red Ink and punched it out using one of the matching Heart punches from the Bundle. I stamped the arrow in Basic Gray ink and cut it out by hand. I added the doily to the front of the box with a little snail adhesive and then added the arrow with mini glue dots. I popped the heart up on the box with a couple stampin' dimensionals.
Video Tutorial:
If you are viewing this post by email you will have to click here or the image below to view the video. Not all mail servers will show the embedded video.
Thanks for dropping by today! I hope you give this project a try if you need any of the supplies you can order them in my online store by clicking on the item in the shopping list below. You can also email me your list or text me 1 (256) 393-2795 if you are in the US.
Happy Stampin'
Rick Adkins
***Remember, if you put in an order ($35 minimum) by
Tuesday, January 14th, 2020 at midnight,
I'll send you all three make and takes from this weeks Facebook Live Mini Class for free!
But, your order MUST be in by Tuesday at midnight!!
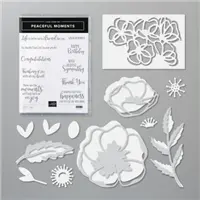
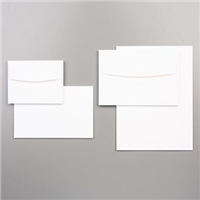
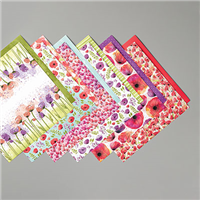
Hello and welcome to my blog; today I am going to share with you this super cute card that I created the other day. It's a perfect card for a Winter or Spring Wedding. I used products from the Peaceful Poppies Suite to create this card, but it's not your typical sized card. I used the Memory & More Note cards as the base of my card. Here's a look at my card.
I started out by cutting a piece of Pool Party Cardstock down to fit the Memory & More Note card (4 x 6). Then I cut down a piece of the Peaceful Poppies Designer Series Paper to fit onto the pool Party cardstock. I cut it so that I could flip the top over and show the two different sides of the designer series paper. I added some the Metallic Edge ribbon around this layer and tied a flat knot.
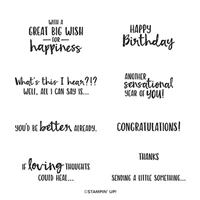
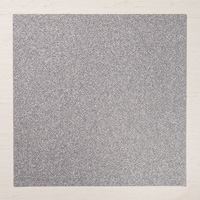
Next it was time to create the the poppies for the card. I used Cajun Craze Grapefruit Grove Blackberry Bliss and Purple Posey to create the large and small poppies. I also added in a little silver glimmer paper for the centers. The leaves where cut from whisper white pool party and sliver glimmer paper. I layered all the pieces together with multipurpose liquid glue. I stamped the sentiment on a piece of whisper white in pool party ink, and used the die from the stamp set to cut out the sentiment.
Thanks for dropping by today, I hope that you have a wonderful day, and that you have found a little inspiration from today's card.
Happy Stampin'
Rick Adkins
***Remember, if you put in an order ($35 minimum) by
Tuesday, January 14th, 2020 at midnight,
I'll send you all three make and takes from this weeks Facebook Live Mini Class for free!
But, your order MUST be in by Tuesday at midnight!!


")


")