Showing posts with label spring wedding. Show all posts

Wednesday, March 4, 2020

Wonderful Moments Wedding Card

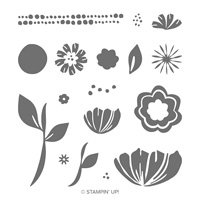
Hello and welcome to my blog; today I am going to share a card with you that I CASEd from the 2019-2020 Annual Catalog.  Case means to Copy and Share Everything.  And is a great way to learn new techniques and other card ideas learn from them.  I used the Wonderful Moments stamp set for my card.  The Wonderful Moments stamp set is a beautiful set with some wonderful sentiments and imagery that's easy to color with your favorite media.  Here's a look at my card.


Here's a look at the card that inspired my card today.

image by Stampin' Up! 

Tips & Tricks: 

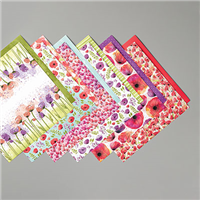
To start off I took a piece of Whisper White Cardstock cut at 4 x 5 1/4, and stamped the bride image in Tuxedo Black ink.  I then repeated the stamping on a piece of the Bird Ballad Designer Series Paper in the same ink.  Once the ink was dry on the DSP I took my basic black stampin' write marker and extended the lines of the dress to run off the card front.   I then used my Paper Snips and cut out the dress.  I made sure to cut it out just along the stamped lines.  I then took my Stampin' Blends and colored the rest of the bride.  

Once all the coloring was done I used some Multipurpose Liquid Glue and attached the designer series paper dress right over the other one.  I then stamped the sentiment on the card front with calypso coral ink.  I added the card front to a piece of petal pink cardstock 4 1/8 x 5 3/8.  I then added it to my Sahra Sand Card base that was cut to 4 1/4 x 11 scored at 5 1/2.  

To finish off the card I added a few rhinestones to add a little bling and shine to the card.  Thanks for dropping by today.  If you need any of the supplies that I used today you can find them listed below in my Stampin' Up Shopping List.  
Happy Stampin' 
Rick Adkins 

Use the March Host Code on any order of $50 (before taxes & shipping) or more during the month and receive a free gift from me in April as a Thank You.  If your order is $150 or more please don't use the host code.  You will forfeit your Stampin' Rewards if you do; and I want you to get those rewards.  


If you place any size order with me during the month of March you will receive the March Creative Stampers Tutorial Bundle from me as a little thank you.  This month's tutorial bundle features fourteen floral themed tutorials.  The Creative Stampers Tutorial Bundle can either be earned for FREE with any size order or Can be purchased for $20 from me.  


Have you joined this weeks Spot Challenge yet?  Click here to play along.  


Stampin' Up! Shopping List: 


Monday, January 13, 2020

Sending You Thoughts & Peaceful Moments Wedding Card

Hello and welcome to my blog; today I am going to share with you this super cute card that I created the other day.  It's a perfect card for a Winter or Spring Wedding.  I used products from the Peaceful Poppies Suite to create this card, but it's not your typical sized card.  I used the Memory & More Note cards as the base of my card.  Here's a look at my card.  

I started out by cutting a piece of Pool Party Cardstock down to fit the Memory & More Note card (4 x 6).  Then I cut down a piece of the  Peaceful Poppies Designer Series Paper to fit onto the pool Party cardstock.  I cut it so that I could flip the top over and show the two different sides of the designer series paper.  I added some the Metallic Edge ribbon around this layer and tied a flat knot.  
Next it was time to create the the poppies for the card.  I used Cajun Craze Grapefruit Grove Blackberry Bliss and Purple Posey to create the large and small poppies.  I also added in a little silver glimmer paper for the centers.  The leaves where cut from whisper white pool party and sliver glimmer paper.  I layered all the pieces together with multipurpose liquid glue.  I stamped the sentiment on a piece of whisper white in pool party ink, and used the die from the stamp set to cut out the sentiment.  
Thanks for dropping by today, I hope that you have a wonderful day, and that you have found a little inspiration from today's card.  
 Happy Stampin' 
Rick Adkins 


***Remember, if you put in an order ($35 minimum) by 
Tuesday, January 14th, 2020 at midnight, 
I'll send you all three make and takes from this weeks Facebook Live Mini Class for free! 
But, your order MUST be in by Tuesday at midnight!! 
You must use Host/Hostess Code 3PN3UVRP.


Join my NEW Online Technique & Fancy Fold Club!  You can find out all the details by clicking here!

Receive the January Creative Stampers Tutorial Bundle with any size order!

Stampin' Up! Shopping List: 

Saturday, March 30, 2019

Rick's Saturday Simple Stamping Episode 18: A Spring Wedding Card using #simplestamping

Hello and welcome to my Blog and YouTube Channel today; is the 18th Episode of Saturday Simple Stamping.  Wow, can you believe it!  Since Spring is here and there are a ton of weddings that are going on or coming up I thought it would be a great time to do a wedding card.  And since it's that time and there are so many new stampers out there I thought it was a perfect kind of card todo.  Here's a look at my card.

Bloom by Bloom Stamp Set, #simplestamping, Rick Adkins, Floral Card
  I just love simple stamping and it's such a great way to share with new stampers how to create cards that are easy for them to recreate.  All these projects can be found in my Simple Stamping Playlist on my YouTube Channel if you missed a episode.

Tips & Tricks: 

I started out my card by using a piece of Whisper White Cardstock cut at 5 1/2 x 4 1/4 (so actually quarter sheet of cardstock).  I then started stamping with first and second generation stamping for the large flowers using Petal Pink ink.  Petal Pink seems to be my new go to color lately, I seem to go to it when I am not sure what to use.  Petal Pink actually goes very well with So Saffron and Garden Green; which is why I picked those two colors.  
I then stamped the smaller flowers in Petal Pink and the other flowers I used was So Saffron (stamped off once with the solid circle and then stamped full strength with the other stamp to create the daisy like flower.  
I then cut down the card front to 4 x 5 1/4.  Make sure that you save the long piece that you cut off so that you can add it to the inside of the card, this makes a great accent to tie the inside into the front.  I then layered that onto a piece of Petal Pink Cardstock cut at 5 3/8 x 4 1/8.  Then I added my ribbon.  I designed the card using the Very Vanilla lace Trim to begin with but wasn't sure if I liked it or not so in the video I change to the Whisper White Dotted Tulle Trim.  So leave me a comment on which one you prefer.  I will draw a winner from all the comments on my YouTube Channel and here for a prize. You will need to live in the United States to be a winner due to Stampin' Up! policies.  I will be giving away a roll of the Rich Razzleberry 1/4" Velvet Ribbon.  I will announce the winner on Monday evening.  
Image by Stampin' Up! 

Video Tutorial: 


If you are viewing this post in your email you may have to click here to view the video because I've noticed that some emails will not play the video.  
Bloom by Bloom Stamp Set, #simplestamping, Rick Adkins
Thanks for dropping by for this weeks Simple Saturday Stamping Episode.  Last week I didn't do a video for the card so encase you were wondering where it was I thought I would try something a little different.  This also told me that you all love the videos and wanted to see them so I went back to the old format.   You can find all the supplies in the Shopping List below; I would love to be your demonstrator and help your along your paper crafting journey.  

Happy Stampin' 
Rick 

Stampin' Up! Shopping List: 


Template Designed by creativeworkerbee