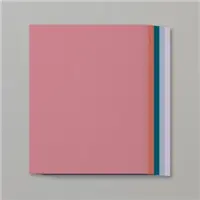
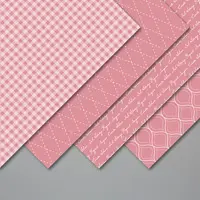
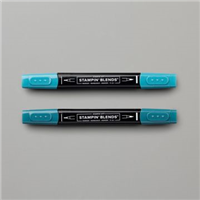
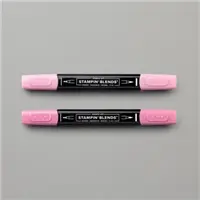
Hello and welcome to my blog; today I am going to share with you a recap of all the cards and projects that I have shared this week. If you missed one of my posts this week you can find them all in one place. In this post you will find each project listed by day of the week and be able to click on the link to visit each blog post. I will also have a list of the supplies that I used on each project in case you would like to shop for those particular supplies.
Hello and welcome to my blog; today I am going to share with you another #simplestamping card. Today's card features the dinoriffic stamp set Dino Days new in the 2019 Stampin' Up! Annual Catalog. This is a super fun set featuring some very cute dinosaurs. As I mentioned in another post I totally think this set can be used for anyone not just kids.
If you are new to stamping these tutorials and videos are designed just for you. They are designed to teach new crafters how to create wonderful cards only using Stamps, Ink, and Paper! These are super simple but fun and cute cards that you can easily recreate without problems. I design a new card for my beginning stampers each week. I remember how it felt when I first started stamping and how scary it can be to share your cards with others. So I am here to help you not to feel that way. And one way I can do that is to share with you a Simple Stamped card that you can recreate and to help guide you in that you don't have to have all the fun stuff just yet. All that comes as you progress. Here's a look at today's simple stamping card.
See I told you super cute cards but easy to reproduce for the new stamper in mind. I started off with just a piece of Thick Whisper White Cardstock. A standard size piece of cardstock in the US is 8 1/2 x 11. You can get two cards from one sheet. You will want to score it down the middle: I did a portrait style card today so we will turn it on the long side and score it at 5 1/2. Turn it back around on the short side and cut down the middle at 4 1/4. Now you how two card bases cut at 4 1/4 x 11 scored at 5 1/2. Now all we have to do is stamp.
If you are viewing this post via email you will need to click on the image below to view the video. Some email servers will not show the embedded video.
Simple Stamping:
Now since we have the paper cut it's time to pull out the ink. I used Pretty Peacock, Lovely Lipstick, Mango Melody, Old Olive, Pineapple Punch, and Pool Party. In the image above you will see the addition of Pool Party little images that I didn't show in the video. I used two of the small images to fill up some of the white space on the card. You can see them and copy them from the pictures below.
Pick a dinosaur and a ink color and stamp one dinosaur in each color, around the card. I started with the largest one first and then filled in the rest.
Once you have both cards stamped add your sentiment and then use the smaller stamps in pool party to fill in the white space a little. For the card above I used the Palm branch to fill in areas.
For this one I used the same colors but used the foot prints to fill in some of the white space.
Here's another look at both cards so that you can see them side by side without having to scroll back up. Thanks for dropping by today, I hope that you will give this simple stamped card a try. You will find all the supplies used in the Stampin' Up! Shopping List below.
This Host code and
offer only good from June 14, 2019 till June 30, 2019
1.Spend any amount in my online store
using this month’s host code and get the June Creative Stampers Tutorial Bundle
Free
2.Spend $75.00 (before taxes &
shipping) in my Online Store using the current host code and get a Combo Pack
of Pretty Peacock Stampin’ Blends Markers Free (Sent to you in July once I
close out the host code).
3.Spend $150 or more (before taxes and
shipping) and get both my June Monthly Card Class kit (until the 20th, after
that I will put you on the list for the July Monthly Card Kit), the Pretty
Peacock Stampin’ Blends Combo Pack (sent in to you in July) and the June
Creative Stampers Tutorial Bundle FREE as my gift to you.
Remember if you use the Host Code on Your
Orders you cannot use that order for KCRPs (Kinsmon Crafty Rewards Points) See
Details here!
Get your name in the hat for my Sizzlin'
Summer Kick off Promotion during June, July, & August with every $30
(before shipping and taxes) you spend. Get your name in the Coconut for a
chance to win some products from the 2019 Holiday Catalog in
September. Click here to see other ways you can be entered
to win!
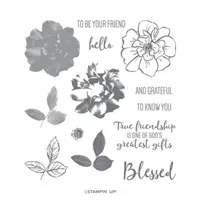
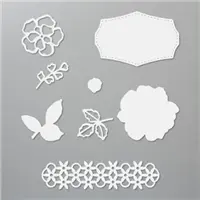
Hello and welcome to my blog; today I am going to share with you a very pretty card featuring the To a Wild Rose Stamp Set from Stampin' Up!. The To a Wild Rose stamp Set is the Million Dollar Achiever set Inspired by Mary Ellen Byler. Once a demonstrator hits a Million Dollars in sales they get to go to the home office in Riverton Utah for a special trip and they get to help design a stamp set. Isn't that just the coolest thing. Mary Ellen has spoken about her set and how it was inspired by her Grandmother who always grew roses. I thought that little story and the stamp set both was so cute and wonderful. It made me want this set even more; not that I didn't already want it when I saw it in the catalog. And, it was a three step stamp set plus matching dies; it was a no brainier. Here's a look at my card.
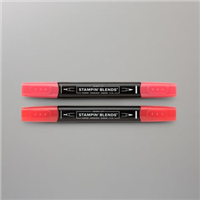
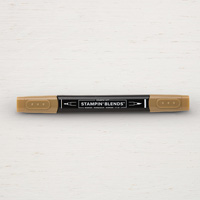
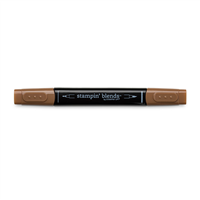
Like I said before this stamp set is super cute and so easy to stamp. I just used my clear blocks to stamp the images on my project today, but if you want exact placement you will want to use the stamparatus. My colors for today's project are Pineapple Punch, Old Olive and Early Espresso. I have created a little graphic for you to pin to Pinterest so you don't have to try to remember what I used.
I started off by stamping the most solid image of the rose but before I stamped it on my project I had to stamp off one time to get the excess ink off. I wanted it to be a very light shade of Pineapple Punch. The next layer (the next solid rose stamp) was stamped at full strength. The outline image was stamped with just Early Espresso. For the leaves I only stamped with the second solid image full on straight from the ink pad in Old Olive. And, the out line in Early Espresso. Once I had the three flowers and leaves done on my card front I then stamped a few extras so I could cut out using the matching Wild Rose Dies. If want this set make sure you get it with the Cost saving bundle code in the catalog or in my online store. Why not save that extra 10%.
Before I stamped the Blessed and Grateful Stamps I laid out my die cut rose and leaves to make sure I had the perfect placement. Once I was sure I did I stamped the Blessed first in Early Espresso and then stamped the and Grateful sentiment under it and slightly to the right of the card front.
I layered my card front (4 x 5 1/4) onto a Old Olive mat cut at 4 1/8 x 5 3/8, and attached it my Pineapple Punch card base (5 1/2 x 8 1/2 scored at 4 1/4). I then needed to stamp the inside of my card and so I added one rose and a few leaves at the top of a whisper white panel and attached it to the inside. To finish off the presentation of my card I stamped the envelope to match. Because, you should never send a naked envelope.
Well, that finishes my Blessed and Grateful Card using the stamp set To a Wild Rose. I hope that you like it and if I have inspired you to give it a try. If you don't have a demonstrator you work with I would love to earn your business. You can pick up all the supplies I used today in my online store by clicking on the item in the shopping list below. I will be back tomorrow with the next episode of Saturday Simple Stamping see you then.
Happy Stampin'
Rick
Host Code and Free Gift:
June Host Code: Q9PRMKP7
This Host code and
offer only good from June 14, 2019 till June 30, 2019
1.Spend any amount in my online store
using this month’s host code and get the June Creative Stampers Tutorial Bundle
Free
2.Spend $75.00 (before taxes &
shipping) in my Online Store using the current host code and get a Combo Pack
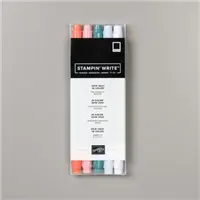
of Pretty Peacock Stampin’ Blends Markers Free (Sent to you in July once I
close out the host code).
3.Spend $150 or more (before taxes and
shipping) and get both my June Monthly Card Class kit (until the 20th, after
that I will put you on the list for the July Monthly Card Kit), the Pretty
Peacock Stampin’ Blends Combo Pack (sent in to you in July) and the June
Creative Stampers Tutorial Bundle FREE as my gift to you.
Remember if you use the Host Code on Your
Orders you cannot use that order for KCRPs (Kinsmon Crafty Rewards Points) See
Details here!
Get your name in the hat for my Sizzlin'
Summer Kick off Promotion during June, July, & August with every $30
(before shipping and taxes) you spend. Get your name in the Coconut for a
chance to win some products from the 2019 Holiday Catalog in
September. Click here to see other ways you can be entered
to win!


 Denim Ribbon")