Showing posts with label Rose. Show all posts

Friday, February 14, 2020

To A Wild Rose Split Lace Card

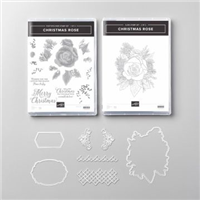
Hello and welcome to my blog; first off let me say Happy Valentine's Day.  I wanted to share with you a super cute card that I made a few months ago using the To A Wild Rose Bundle and the Stitched Lace Die.  I love the sentiments and the layering images of the To a Wild Rose Stamp Set so when I designed this card I knew I wanted to use this stamp set and I wanted to do a split card base, but the question was what to do the split with.  I decided to use the Stitched Lace Die because I could do a 5 1/2 x 4 1/4 piece of cardstock and cut it down and get three pieces from it.  Here's a look at my card.


I used my Stamparatus to stamp all my roses and leaves.   I find it easier to use my Stamparatus to get perfectly layered images each time with this layering stamp set.  I stamp each layer with the lightest color first and then the darker color.  For the rose I used Flirty Flamingo and Melon Mambo inks.  For the leaves I used Pear Pizzazz and Old Olive Inks.  I used Tuxedo Black to stamp the outline; which by the way I usually stamp first because I find it easier to line the layering stamps up.

For the center of the rose I stamped it in So Saffron ink.  Once I had everything stamped it was time to cut everything out with the matching dies.  I then used the Stitched Lace Die and ran it through my die cutting machine with a piece of whisper white cardstock.  Once I had everything done I cut them into strips (1 1/2 x 4 1/4").  I then cut off a 1/2" strip from the bottom of the card base, and then cut off another inch.  I needed the 1/2" strip to replace at the bottom of the die cut strip.


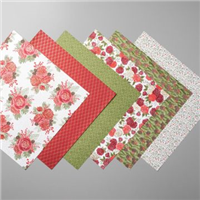
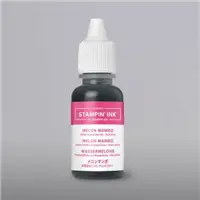
After cutting everything apart it was time to put it back together.  I added the strips of the lace with a little liquid glue and then did the same with the strips of Flirty Flamingo Cardstock over where I added the lace piece.  I also repeated this process on the back inside of the card this added stability to the reassembled card base place hides the ugly surgery we did to this card.  I added a very thin strip of Melon Mambo cardstock to add a little interest to the card.   I then added the die cut rose and leaf to the top section letting it overlap the lace just a little.  I then stamped my sentiment in Tuxedo Black ink to finish my card.

Thanks for dropping by I hope you give this technique a try.  You will love doing a little surgery on your cards to create a very dramatic look with out to much work.  If you need any of the supplies I used to you can pick them up in my online store by clicking on the item in the Stampin' Up! Shopping list below.
Happy Stampin' 
Rick Adkins 

Stampin' Up! Shopping List: 


***Remember, if you put in an order ($40 minimum before taxes and shipping) by 
Monday, February 17th, 2020 at midnight, 
I'll send you all three make and takes for free! 
But, your order MUST be in by Tuesday at midnight!! 
You must use Host/Hostess Code AGA9YBUB.


Join my NEW Online Technique & Fancy Fold Club!  You can find out all the details by clicking here!

Last day to sign up for my Monthly Card Club by February 20, 2020!  Sign up and learn more about Card club by clicking here!  February's featured stamp set is the Morning Star Stamp Set.  Stamps sets are not included in the club but may be purchased using the host code as an add on.  Or you may use something you already own.  


Receive the January Creative Stampers Tutorial Bundle with any size order!  Features 17 projects designed by Stampin' Up! demonstrators from around the world.  This month we all featured a item in the Sale-a-bration Brochure.  

Tuesday, November 5, 2019

How to Watercolor the Christmas Rose with Stampin’ Write Markers

Hello and welcome to my blog; today I am going to share with you how to watercolor with your stampin' write markers.  I used the new limited time Christmas Rose Stamp Set from the Christmastime is Here Suite as my focal image.  You can use your Stampin' Write markers or any other water based marker to watercolor with as long as you have the right surface.  I am going to share with you a few tips and tricks on how to do just that in this post.  But first lets look at my card shall we.

Tips & Tricks: 

One of the big thing with creating a watercolor look with your stampin' write markers, and this is the main thing, is the type of paper you use.  Cardstock will not work, it absorbs the water to much and then makes the paper pile.  You have to use a paper that's designed for watercolor, so that mean watercolor paper, shimmery white, or Bristol paper.  Bristol is a artist paper that is used by artist for certain techniques and media.  I used a piece of the Fluid 100 Watercolor paper today.  
I started off my card by stamping the Christmas Rose outline image on the watercolor paper using my Stamparatus.  I decided to use the stamparatus because watercolor paper can be a little rough and to get a very good impression you may have to stamp it more than once.  Once I had the image stamped in Versamark ink I coated it with gold stampin' emboss powder and heat set it until it was smooth and melted.

Once I had the outline of the Christmas Rose image heat set on the Fluid 100 watercolor paper (which by the way is a artist quality watercolor paper that released in art supply stores a few years back and was well received) it was time to start using my Stampin' Write markers and aqua painter to start watercoloring.  I started out with the rose and used real red and placed some colors down in each section and worked petal by petal to wet each section and expand the colors.  Once I had the first layer down and had it dried I added some Cherry Cobbler and Merry Merlot markers to add shadows to the petals.  Once that was done I repeated the process.
Once the roses where done I then worked on the leaves and pine needles.  After that I worked on the berries and pinecones.  I repeated the same process as above.  I used the following colors to color the image; Real Red, Cherry Cobbler, Merry Merlot, Shaded Spruce, Garden Green, Old Olive, Soft Suede, and Seaside Spray.  Once I had the entire image dried I added it to a piece of the Christmastime is Here Specialty Designer Series Paper as a mat.  I heat embossed my sentiment on a piece of Vellum Cardstock.  I added this to the watercolor paper by wrapping the ends around and attaching it with a couple pieces of tear & tape.  I then used liquid glue to attach the focal image to the mat, and then to the card base.
To finish off my card I added a few Basic Pearls to the card front, to add a little elegance to the card.  I thought that the pearls added more than rhinestones to the card.

Video Tutorial: 

If you are viewing this post by email you may need to click here or the image below to view the video.  
Thanks for dropping by today, I hope that you have enjoyed my little tutorial on using Stampin' Write Markers to watercolor the Christmas Rose image from the Christmastime Is Here Limited time suite of products.  This suite of products is available from November 1st only while the current supplies last.  This is how Limited Time Products are always handled.  So if you want any of these products I highly encourage you to order ASAP.   
Happy Stampin' 
Rick Adkins 


If you live in the US.  I would love you to choose me as your demonstrator.  If you would like to purchase any of these products you can click on the Shop Now Button or by clicking on any of the images below.  Alternatively, you can also contact me by email to place your order.  Please be sure to use the monthly host code and I’ll send a little something out to you the following month to say Thank You!  

November HOST CODE:  QU2TJBJN
1.     Spend any amount with me this month and receive the Creative Stampers Tutorial Bundle.  Plus get a gift from me in December.
Please remember that if you use the host code you cannot use that order towards my KCRP’s (Kinmon Crafty Reward Points) that would be double dipping and is not allowed.  For more information on KCRP’s click here.  


Three main reasons to Join!  
1.     You Get at least a 20% discount on all your orders while you are a demo.   
2.     You get to join my fun Kinsmon Crafters Team and Private Facebook Group.
3.     Access to directions to all my online classes 

Stampin' Up! Shopping List: 


Template Designed by creativeworkerbee