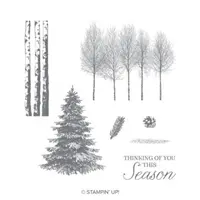
Hello and welcome to my blog; today I am going to share another episode of How Did They Make That! This week I am sharing how the Stampin' Up! Concept Artists created the great little Holiday Thinking of you Card featuring the Winter Woods Stamp Set on page 61 of the Stampin' Up! 2020-2021 Annual Catalog. Here's a look at the card that I am sharing.

Here's a look at the inspiration card by the Stampin' Up! Concept Artists on page 61.
 |
| Image by Stampin' Up! |
Tips & Tricks:
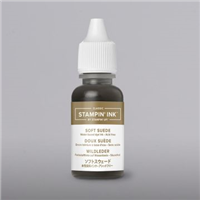
This card was actually a lot easier than I had thought it would be. After figuring out all the sizes and dimensions of the card (which I will give you as we go along and again at the bottom) it was super easy. I started off with a 4 1/4 x 11 piece of Old Olive Cardstock (they used a 5 1/2" x 8 1/2" piece). This was the only change that I made to the card. Next you will need a 3" x 5 1/2" piece of Old Olive Cardstock, a Stamparatus (or other stamp positioning tool), Old Olive Ink. The Stamparatus works great for this card because we are going to do the hinge technique to get the center panel. If you are not sure what I am talking about you will after you watch the video below.

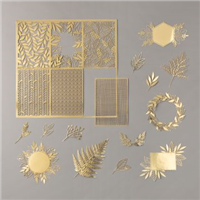
Using the hinge technique with our Stamparatus and 3" x 5 1/2" piece of Old Olive Cardstock we are going to take the birch tree image and place on the cardstock the way you want it and close the top plate. Ink up the Cling Stamp in Old Olive Ink and close the door. Lift up and move down one notch in your Stamparatus and repeat. You will repeat this step all the way down to the bottom of the 3" x 5 1/2" piece of Old Olive Cardstock. Once complete attach to the center of your Old Olive card base with Stampin' Seal. Next you will need one of the fabulous gold floral pieces from the Feels Like Gold Laser Cut Speciality Paper and attach to the center with Stampin' Seal.

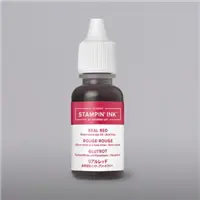
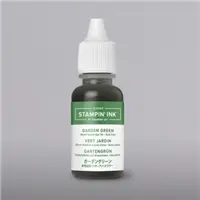
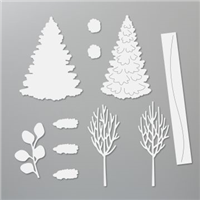
Add a little Stampin' Seal to the center of the gold piece and place your ribbon. Take a piece of Whisper White Cardstock and the sentiment and ink it up in Real Red Ink and stamp it. Take a 2" Circle Punch and punch it out and add to the card front with Stampin' Dimensionals. Now stamp four - six Pine Boughs in Old Olive and two in Garden Green Inks. On a scrap of Soft Suede Cardstock stamp two or three pinecones in Soft Suede Ink. Use the matching In the Woods Dies and cut out all these pieces. Use a combination of Multipurpose Liquid Glue and Stampin' Dimensionals to attch these pieces to the circle and tuck some underneath.

The finishing touch to this card is to take your Take Your Pick Tool and place Red Rhinestone Basic Jewels on the Gold Foil Floral piece where the berries are. This adds a show stopper touch the the card and a ton more bling then just the Gold piece alone.
Video Tutorial:
If you are viewing this post by email you may not be able to view the video. If so click here and the video will pop up. Not all mail servers will show the embedded videos.
Project Recipe:
I have created a little graphic for you to save to your Pinterest boards with all the main items listed to make it easy for you to recreate this card. If you would like to check out my other Project Recipes you can do so by clicking here.

Sizes & Dimensions:
- Old Olive card base 5 1/2" x 8 1/2" or 4 1/4" x 11" scored in half
- Old Olive Cardstock - 3" x 5 1/2"
- Whisper White Cardstock - (2) 4" x 5 1/4" (one for the inside and one to stamp everything)
- Soft Suede Cardstock - scrap
Thanks for dropping by today I hope that you have a wonderful day and I will see you again tomorrow for another papercrafting idea. Tomorrow I will share my card for this weeks creative challenge at The
Spot. If you need any of these supplies you can pick them up in my online store by clicking on the items in the Shopping list below.

Happy Stampin'
Rick Adkins

Use the Host Code on any order of $35 (before taxes & shipping) or more by August 31th and get invited to my September Monthly Card Class as a Thank You. ($25 value) If your order is $150 or more, please do not use the host code. You will forfeit your Stampin' Rewards if you do; and I want you to get those rewards.
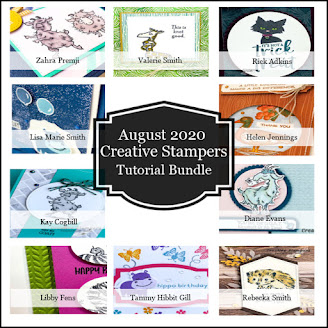
If you place any size order with me during the month of August, you will receive the August Creative Stampers Tutorial Bundle from me as a little thank you. This month's tutorial bundle has ten project tutorials that feature our favorite new Cozy Critters products from one of the new Stampin’ Up! Catalogs. The Creative Stampers Tutorial Bundle can either be earned for FREE with any size order or Can be purchased for $22 from me.

I am very close to earning the 2021 Stampin' Up! Incentive Trip to Maui and your orders can help me get there. I am running a few special promotions until the end of September to not only help me earn this trip but to help you save a little cash as well. I am kicking off my Maui of Bust Promotions with a Mega Holiday Embellishment Product Share. The deadline to take part in the Mega Holiday Embellishment Product Share is August 21, 2020. You can check out what's all included in this Mega Holiday Embellishment Product Share by clicking here. I will have a new smaller promotion each week that runs from Tuesday of one week till Monday of the following week. So be watching for those as well. Some promotions will only last a couple days.

With each $1000 I earn I will be cutting off a chain from my Maui or Bust Countdown Chain. I got to cut the first one off the other day during my Live Video. 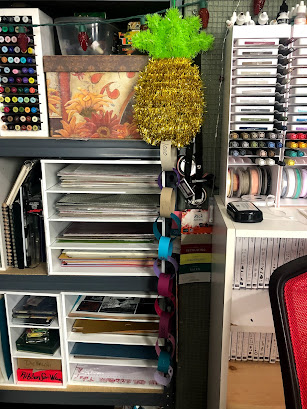
Rick Adkins

Use the Host Code on any order of $35 (before taxes & shipping) or more by August 31th and get invited to my September Monthly Card Class as a Thank You. ($25 value) If your order is $150 or more, please do not use the host code. You will forfeit your Stampin' Rewards if you do; and I want you to get those rewards.

If you place any size order with me during the month of August, you will receive the August Creative Stampers Tutorial Bundle from me as a little thank you. This month's tutorial bundle has ten project tutorials that feature our favorite new Cozy Critters products from one of the new Stampin’ Up! Catalogs. The Creative Stampers Tutorial Bundle can either be earned for FREE with any size order or Can be purchased for $22 from me.

I am very close to earning the 2021 Stampin' Up! Incentive Trip to Maui and your orders can help me get there. I am running a few special promotions until the end of September to not only help me earn this trip but to help you save a little cash as well. I am kicking off my Maui of Bust Promotions with a Mega Holiday Embellishment Product Share. The deadline to take part in the Mega Holiday Embellishment Product Share is August 21, 2020. You can check out what's all included in this Mega Holiday Embellishment Product Share by clicking here. I will have a new smaller promotion each week that runs from Tuesday of one week till Monday of the following week. So be watching for those as well. Some promotions will only last a couple days.
With each $1000 I earn I will be cutting off a chain from my Maui or Bust Countdown Chain. I got to cut the first one off the other day during my Live Video.