Showing posts with label video tutorial. Show all posts

Friday, July 17, 2020

Four Corner Flap Card - How To Video


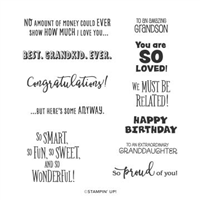
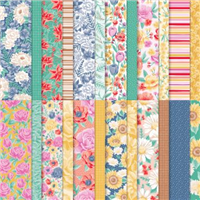
Hello and welcome to my blog; today I am going to share the fun little card that I created during my Facebook Live on Wednesday night this week.  I created a fun little fun fold card inspired by Gloria Plunkett's design I found on Pintrest.  I loved this little card so much that I just had to make my own version of it.  Here's a look at my card that features the A Grand Kid Stamp Set and the Flowers For Every Season Designer Series Paper.  


I love this card for one reason because it showcases both sides of your designer series paper.  Which I love!  I I don't have to worry to much about which side I am going to use because you can see both sides.  Which is always a problem when you use Designer Series Papers.  Sometimes you just can not decided which side to face up.  This takes card of that problem.  


My sentiment came from the A Grand Kid Stamp Set which has some very fun sentiments that can be used for anyone not just a grandchild.  And considering I don't have kids or grandkids it's a good thing.  To make this card you will need four sheets of Designer Series paper cut at 2 1/2" x 1 7/8".  You are going to fold one corner down on each one to make the Four Corner Flap Card.  I measured in from one side a 1/2" on the bottom or top depending on which way your DSP will be facing.  And 1 1/8" from the side and made two little pencil marks to know where to score at.  

Video Tutorial: 


If you are viewing this post by email you may have to click here to view the video.  Not all mail servers like to show the embedded videos.  


After cutting scoring and folding in the flaps on the designer series paper you are going to need something to put them on.  I used a 4 x 5 1/4 piece of Just Jade Cardstock as my card front base.  I added each piece of the Flowers for Every Season Designer Series Paper to the card front with a little Stampin' Seal Adhesive with just a little 1/8" border around the edges.  My center border was just a little bigger.  I stamped my sentiment from the A Grand Kid Stamp Set in Just Jade Classic Ink and cut it out with the next to the smallest Stitched Square Die from the Stitched Shapes Dies.  I cut it where it created a diamond and placed it in the center of the card front with a couple Stampin' Dimensionals.  I added the card front to a Thick Whisper White card base cut at 4 1/4 x 11 (scored at 5 1/2).  


Here's my Product Recipe card that contain the main parts of the card.  You can save this to one of your inspiration boards on Pinterest if you would like.  Thanks for dropping by today I hope that you have a wonderful weekend.  If you need any of the supplies you have seen today they can be picked up in my Online Store by clicking on the items in the Shopping List below.  

Happy Stampin' 
Rick Adkins 


Use the Host Code on any order of $50 (before taxes & shipping) or more during the month and receive a gift from me in June as a Thank You. If your order is $150 or more, please do not use the host code.  You will forfeit your Stampin' Rewards if you do; and I want you to get those rewards.


If you place any size order with me during the month of July, you will receive the July Creative Stampers Tutorial Bundle from me as a little thank you.  This month's tutorial bundle has ten project tutorials that feature our favorite new products from the 2020-2021 Stampin’ Up! Annual Catalog.  The Creative Stampers Tutorial Bundle can either be earned for FREE with any size order or Can be purchased for $22 from me.


Don't forget about Bonus Days are going on now!  You get reward for shopping now with every $50 qualifying order. and you get to spend the $5.00 coupon codes when you shop in August.  

Join me on Tuesday July 20th for a fun crafting night together.  Bring a Stampin' Up! Kit and let's beat the summer heat with a little indoor crafting in my Zoom Craftroom.  


Join me in my July Monthly Card Class.  It's $25 or free with qualifying order  of $35 (before shipping and taxes) in my online store with this month's host Code  Deadline to get in is July 17th.  


Last day to join the july Card Club is July 17th.  Click on the Club Tab at the top to join.  

Stampin' Up! Shopping List: 


Sunday, May 24, 2020

Tips & Tricks of Refilling Your Ink Pads

Classic Stampin' Ink, Ink Refill, Stampin' Up!, Rick Adkins

Hello and welcome to my blog; today I have a quick little tip video for you on refilling your ink pads.  This is something that we all must do to keep our ink pads working properly.  Or, you can just toss it and buy a new one, believe me I feel you, but refilling is so much cheaper.  And not as hard as you may think.  

Classic Stampin' Ink, Ink Refill, Stampin' Up!, Rick Adkins

What do I have to Have:  

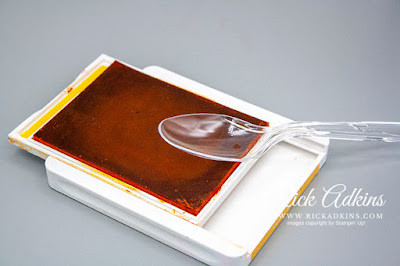
All you really need is your ink pad, an ink refill, and a plastic spoon.  Once you have these basic items on hand you can quickly and easily refill your ink pads without too much of a mess; unless you are like me and get ink everywhere.  If you are, bless you I feel your pain.  But in all honesty, it is not that hard.  
Tips & Tricks: 

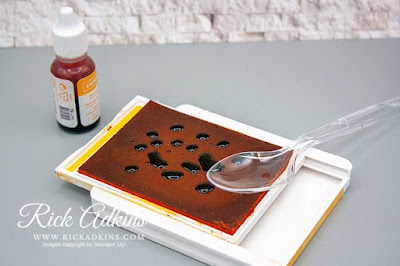
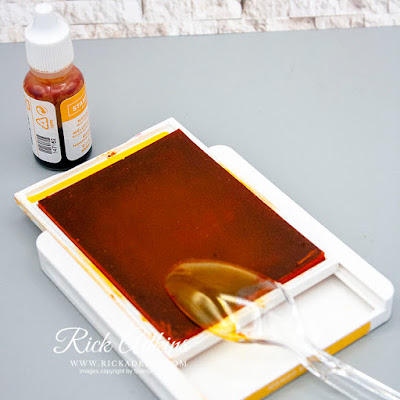
Now, as I mentioned above, I do not use any fancy tools to do this I just bought a box of plastic spoons from the store and I use the back of it.  And I clean it off when I am done with a baby wipe so one spoon will last you for a while.  I simply take a few drops of my chosen ink refill and put on my ink pad and move the ink around with the spoon and press it into the pad a little.  It does not take a lot of pressure you really want gravity to do the work for you.  The ink will soak into the pad.  

Classic Stampin' Ink, Ink Refill, Stampin' Up!, Rick Adkins

You can also look at the side of the pad to see if color of the foam is getting darker.  As the ink soaks into the pad you will see it soaking into the pad.  But the spoon allows you to spread the ink around the pad so that you have good coverage.  Now another little tip is you can use this same technique to move ink out of your way if you are using a distinktive stamp.  These types of stamps work better with an ink pad that is not as juicy.  In this situation to much ink is not your friend.  

Classic Stampin' Ink, Ink Refill, Stampin' Up!, Rick Adkins

Now, one thing that I like to do after refilling my ink pad is:  I like to let it sit for a little while before I use it.  A freshly inked pad can still be to inky, so you do have to watch the amount of ink refill you put on.  To me it is best to do a little let it sit and come back and add more if need be.  Ink pads can be a finicky little so and so, but if you know how to take care of them when they are low on ink it will make your life so much easier.  

Classic Stampin' Ink, Ink Refill, Stampin' Up!, Rick Adkins

Another piece of advice I have for new stampers and well any stamper is to make sure when you order your ink pad go ahead and get the ink refill as well.  That way you will have one on hand and want have to wait for one to arrive when you pad is running low on ink.  

Video Tutorial: 


I hope that you enjoy this bonus video tip this week and it helps you out.  I know there’s a lot of new stampers and crafters out there that may not know how to refill their ink pad and may just toss it and buy new or get frustrated and stop stamping because they are not getting the results they want.  Remember to get your ink refills at the same time you purchase your ink pads it saves time, money, and heartache.  

Happy Stampin' 
Rick Adkins 
Independent Stampin' Up! Demonstrator 

Monday, May 18, 2020

Free As A Bird Card using Watercolor Pencils

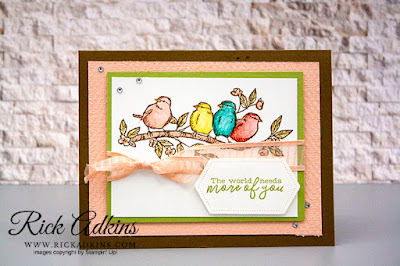
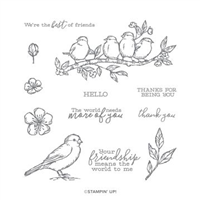
Hello and welcome to my blog; today I am going to share with you a fun card using the Free as A Bird Stamp Set, and some tips & tricks on using Stampin’ Up!’s Watercolor Pencils.  I have been playing with watercolor pencils for a long time and had a love hate relationship with them until Stampin’ Up! ®™ came out with their own a couple years ago.  Now I am in hog heaven using them.  Here is a look at the card I made today.  

Free As A Bird Stamp Set, Watercolor Pencils, Tasteful Texture 3d embossing Folder, Rick Adkins, Stampin' Up!

The Birds in the Free as A Bird Stamp Set are so cute and are just begging to be colored with your watercolor pencils.  Do not be afraid just go for it.  Once you follow a few simple tips & tricks I have for you today you will be able to send these cute little birds to all your friends because they deserve it.  
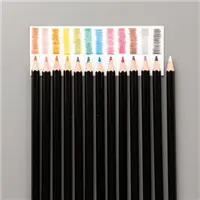
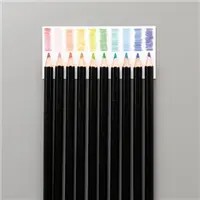
Our Watercolor Pencils now come in two sets, of high-quality, smooth color pencils; that are perfect for watercoloring any stamped image.   One thing that will help you to achieve a great look with your pencils is the type of paper you use.  You can use Whisper White cardstock just like I did today, but you must treat it very nicely.  Meaning you cannot use an aqua painter on plain cardstock.  You can however use a Blender Pen for best results.  This is my preferred method for moistening the pigment and moving it around to fill in my line art image.  Aqua Painters or any other type of water brush holds and release way too much water for the smooth Whisper White cardstock surface.  

s A Bird Stamp Set, Watercolor Pencils, Tasteful Texture 3d embossing Folder, Rick Adkins, Stampin' Up!

Now if I do use a aqua painter or want to use more water to more the pigment around for a nice wash type background I pull out my shimmery white cardstock or watercolor paper for this.  But I did not need that today, so I just stuck with the blender pen and the plain whisper white cardstock.  
Another thing you need to consider is the type of ink you are using.  If you are using a die-based ink like I did today you must sit the cardstock aside for awhile to completely dry or heat set with a heat tool.  I choice to just sit it aside and let the ink dry and soak into the cardstock.  Stazon which is the preferred ink for watercoloring is not one of my favorite inks, so I am fine with letting the other sit and dry the card my take a little longer, but I am happy to wait.  

s A Bird Stamp Set, Watercolor Pencils, Tasteful Texture 3d embossing Folder, Rick Adkins, Stampin' Up!

My next tip and this one is the most important one is how and where you hold your pencil.  Yes, there are certain places to hold your watercolor pencil or any pencil in art to achieve the correct look.  Watercolor pencils are all about the amount of pigment you put down on the paper.  You may be wondering why I put this here.  Well it’s because the closer to the end of the pencil you are holding in your hand the more pigment you are putting down on the cardstock.  So, if you want a dark area of color come closer to the point of the pencil and color.  Which means the for lighter and mid-range color you need to come back further from the tip of the pencil.  A good rule of thumbs is to hold the watercolor pencil in the middle area of the pencil for a medium amount of pigment to be placed on the cardstock.  And for lighter areas you want to hold the pencil closest to the end of the pencil as you will see in the video.  

s A Bird Stamp Set, Watercolor Pencils, Tasteful Texture 3d embossing Folder, Rick Adkins, Stampin' Up!

Once I have the entire image colored, I will come back with my blender pen and wet the pigment and get it to move around the cardstock blending the darks mediums and lights together.  This is how I achieved the gradient look on my images today.  

Video Tutorial: 


I hope that you find these little tips and tricks helpful as you explore watercolor pencils and stamping.  If you need any of the supplies, you have seen today you can pick them up in my online store by clicking on the item in the shopping list below.  

Happy Stampin' 
Rick Adkins 


Use the Host Code on any order of $50 (before taxes & shipping) or more during the month and receive a gift from me in May as a Thank You. If your order is $150 or more, please do not use the host code.  You will forfeit your Stampin' Rewards if you do; and I want you to get those rewards.


If you place any size order with me during the month of May, you will receive the May Creative Stampers Tutorial Bundle from me as a little thank you.  This month's tutorial bundle features Birthday Bonanza Suite of Products from the January-June Mini Catalog.  The Creative Stampers Tutorial Bundle can either be earned for FREE with any size order or Can be purchased for $20 from me.

Stampin' Up! Shopping List: 


Template Designed by creativeworkerbee