Showing posts with label valentine's project. Show all posts

Friday, January 24, 2020

Whitman's Chocolate Bar Heart to Heart Treat Box

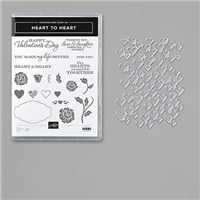
Hello and welcome to my blog; today I am gong to share with you a super cute box that I made to hold a Whitman's Chocolate Bar.  I wanted to dress up the already cute packaging that the chocolate bar already comes in.  I used the Heart to Heart Bundle to dress up my project.  This is actually a super easy project to do even through it doesn't look like it.  Here's a look at today's project.

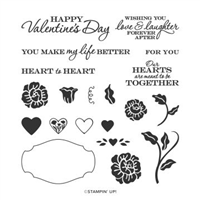
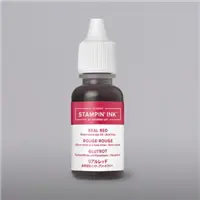
The first thing that I did was figure out what size cardstock I needed to create my box.  Once I had the cardstock figured out.  The measurement for my cardstock is 7" x 7 3/4".  On the 7 3/4" side you are going to score at 1 1/2, 1 7/8, 4 5/8, and 5.  On the 7" side you are going to score at 3/8" and 6 5/8".  Once I had everything cut I stamped the solid heart from the Heart to Heart stamp set in Flirty Flamingo ink on the front.  I then ran the whisper white cardstock piece through my die cutting machine with the Detailed heart die.  
Once I had the die cut out I took the loose hearts and colored them with my Stampin' Blends.  I colored each heart with either the light of dark Real Red and Flirty Flamingo markers.  I only used one color for each heart.  Once I had that done I sat them aside for later use.  
After coloring the hearts I added the detailed hearts die cut to the front of the box.  To do this I added the heart die cut to the front of the box with a little liquid glue behind the solid hearts and little dots behind all the other hearts that will touch the front.  Once all the glue was applied I placed the detail die cut onto the front of the box.  I let it dry before taking my snips and cutting off what was over hanging.  
After the detailed die cut was dried.  I came back in with my Take Your Pick Tool and a little liquid glue and added just a little glue into the open hearts.  I then picked the colored hearts that I did with my Stampin' Blends and placed them into each open spot I added the glue.  Once the glue was dry I added clear wink of stella to each one.  The wink of stella really doesn't show up very well in the photo but looks of so cute in person.  
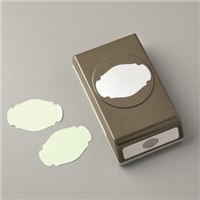
To finish off my super cute little box I stamped my sentiment in Flirty Flamingo onto a piece of scrap Whisper White cardstock and then stamped the outline from the stamp set in Real Red.  I used the matching Story Label Punch and popped it up in the center of the box with a couple Stampin' Dimensionals.  I added two of the colored hearts to the front of the sentiment with a couple mini glue dots.  
Thanks for dropping by today, I hope that you find my Whitman's Chocolate Bar Box as cute as I do.  I also hope that it will make you think about decorating a few chocolate bars yourself.  I picked mine up at the Dollar Tree.  Which is a great place to pick up certain candy inexpensively.  You can find all the supplies I used in the Stampin' Up! Shopping List below.  
Happy Stampin' 
Rick Adkins 


Join my team during Saleabration and you will get the super cute Mini Cutter and the DSP Sampler Pack free in your Starter Kit along with a Free Paper Pumpkin, Business Pack, a FREE Stamp Set of your Choice in addition to the $125 of product of your choice for $99.00 with Free Shipping.  That's $277.75 of products and supplies for only $99.00 (Price includes the Well Said Stamp Set (most expensive in catalog) plus 9% sales tax) 

Receive the January Creative Stampers Tutorial Bundle with any size order!


Stampin' Up! Shopping List: 


Tuesday, January 7, 2020

From My Heart Ferrero Rocher Gift Box

Hello and welcome to my blog; today I am going to share with you my From My Heart Ferrero Rocher Gift Box. I created this box to hold four Ferrero Rocher Candies, (which by the way is one of my favorites). This is a great little project for Valentine's Day, and since it is just around the corner.I used the From My Heart Designer Series Paper for the main focus of my box. Here's a look at the box.

Tips & Tricks:

For the box you will need a 7 x 7" piece of cardstock scored at 2" on all four sides. Well actually its just shy of 7 x 7. I cut it on my new trimmer and came back just one notch on it from the 7" mark so its' 6 and something 16th of an inch. I used both a piece of Real Red and Flirty Flamingo Cardstock for the box bases. I pulled these colors from the designer series paper; which I used for the tops. I cut the tops at 5 x 5 and scored at 1" all the way around.
I stamped my sentiment from the Heartfelt Stamp set in the center of one of the hearts in the Designer Series paper. Most of the sentiments from the stamp set will fit. I used Real Red ink for the sentiment. The little heart you see was also punched from the designer series paper with the dog punch. The heart on this punch is almost a perfect fit, there's just a very little over hang.

Video Tutorial:

If you are viewing this post by email you may have to click here or the image below to view the video.
Thanks fro dropping by today, I hope you found this little project both inspiring and helpful. You can pick up all the items needed besides the candy of course in my online store by clicking on the items below in the Shopping List. I hope you have a wonderful day, and I will see you again real soon.
Happy Stampin'
Rick Adkins

Heartfelt Online Bundle Class To Go
Deadline to register January 9, 2020 
Click here for details 

January Creative Stampers Tutorial Bundle 
Features 16 Love/Valentine Themed projects 
Get it free with any size order in my online store or you can purchase it for $25 US


Stampin' Up! Shopping List:

Friday, January 3, 2020

Heartfelt Bundle Online Class


Heartfelt Bundle Online Class Togo

Location: Comfort of Your Own Home
Time: At Your Convenience
Cost: $38.00 and Up (Based on the Budget Option you pick)
Detail: 

Roses are red, violets are blue; this class was designed just for you!  Celebrate your sweetheart with my Heartfelt Bundle Online Class Togo.  With bursts of hearts, traditional Valentine’s Day colors, and pops of pretty foil, your handmade creations will speak from the heart this Valentine’s Day.

I have designed this class for all skill levels.  In this class I am featuring the new Heartfelt Bundle from the From My Heart Suite in the NEW 2020 Mini Catalog!  You’ll make 5 different Adorable projects (2 super sweet treat holders and 3 cards ready to send) in this class.  The Heartfelt bundle allows you to use the hearts and arrows in the Heartfelt Stamp Set to create treat tags, boxes, and cards for Valentine’s Day. The greetings are designed to convey love and friendship.  The Heart Punch Pack features allows you to punch a paper heart and a scallop paper heart.  The heart craft punches perfectly align with some of the images on the Designer Series Paper and stamps.  You will want to have this bundle in your stash, so if you don’t own it, be sure to sign up for the selection that includes it! 
Use the ribbon, gems, doilies, and tins to create to your heart’s content!

This class has 3 options.  You will need the Heartfelt Bundle to complete your class.  You can choose to have it as part of your class, and they will be at a significant discount!  You will also need a Real Red, Flirty Flamingo, and Basic Gray ink pads to complete this class. 

Option 1:   Basic Heartfelt Bundle Class (No Stamp Set or Bundle) $38.00 (includes shipping and taxes)
Includes:  ½ pack of the From My Heart Specialty Designer Series Paper*
Roll of Real Red 3/8” Double Stitched Satin Ribbon*
                1 – Pack of Heart Doilies*
Video Tutorial & Printable PDF instructions
Card Kit (with the supplies to make your projects plus envelopes)

Option 2:  Heartfelt Bundle Class with Bundle Add on Heartfelt Bundle $83.75 (a 19% discount)
Includes:  Heartfelt Bundle (Heartfelt Stamp Set and Heart Punch Pack)
½ Pack of the From My Heart Specialty Designer Series Paper*
Roll of Real Red 3/8” Double Stitched Satin Ribbon*
1 Pack of Heart Doilies*
Video Tutorial & Printable PDF instructions
Card Kit (with the supplies to make your projects plus envelopes)
Option 2 also qualifies for a Free Level 1 Saleabration item (you can pick anything in the Saleabration brochure except the DSP it will not fit in my shipping packaging) 

Option 3:  Heartfelt Bundle Class Tutorial Only $15.00

Option 4:  Heartfelt Bundle Class Make & Take Packet (Kinsmon Crafters Team Only) $12.00
Basic Card kit supplies to make the products you will provide your own stamp set and other supplies. 

*Note that Supplies are while supplies last and may have to be substituted if items go on backorder or sales out. 
Register before January 9, 2020
All Class Materials Ordered on January 10, 2020
Received by January 13, 2020
Class Cutting & Packaging January 14-16th
Class Ships on or before January 17, 2020
Class Date:  January 23, 2020

To register click the link below to email and I will send you a PayPal Invoice to pay.  Please include in the email which class option you are registering for along with your address for options 1, & 2.  


Thursday, January 2, 2020

Heartfelt Reeses Cup Flip Top Box Video Tutorial

Hello and welcome to my second blog post for today; I wanted to take a little time and share with you the project that I made last night during my weekly Facebook Live.  Each Wednesday at 8 pm CST I do a Facebook Live on my business page showcasing a different project.  This week I wanted to share a project using the From My Heart Suite.  Roses are red, violets are blue; this product suite was designed just for you! Celebrate your sweetheart with the From My Heart Suite Bundle. With bursts of hearts, traditional Valentine’s Day colors, and pops of pretty foil, your handmade creations will speak from the heart this Valentine’s Day. The heart craft punches perfectly align with some of the images on the Designer Series Paper and stamps. Use the ribbon, gems, doilies, and tins to create to your heart’s content!  This suite of products goes live tomorrow with all the other great wonderful products in the Stampin' Up! Mini Catalog.  Here's a look at my project.

Tips & Tricks: 

This was a extremely easy box to put together once I figured the measurements.  The trick to figuring out what size you need is to measure the items that you are going to put in it.  I always measure height, width, and depth.  Then at that point it's pretty easy to figure out.  For my box I needed a 5 1/4 x 8 1/4" piece of cardstock.  
I designed my project to hold two regular size Reese's Peanut Butter Cups.  They are stacked up on top of each other.  I started out on the 8 1/4" side of  the cardstock and scored at 1 1/4, 3 1/2, 4 3/4, & 7.  On the short side you score at 1 1/4 & 4".  Once I had all the scoring done it was time to do a little folding and burnishing.  Once I had the cardstock cut as shown in the video, I added my designer series paper first.  I used a little of the From my Heart Specialty Designer Series Paper.  
The playful heart patterns in the From My Heart Specialty Designer Series Paper have red and pink foil accents on some designs. Some images from the paper can be cut out using the Heart Punch Pack. This paper is excellent for valentines, cards, and scrapbook pages.  After adding the paper I stamped the Happy Valentine's Heart from the Heartfelt Stamp Set and punched it out with the matching punch.  I also punched out a scalloped heart using the other punch.  I layered both hearts together and added a dimensional at the top of the heart and the bottom.  This way once added to the top of the box the ribbon was still free to slide and tie easily.  

Video Tutorial: 

If you are viewing this post by email you may have to click here or the image below to view the video.  Some email servers will not show the embedded video.  

Sizes & Dimensions: 

  • Flirty Flamingo Cardstock:  5 1/4 x 8 1/4 scored at 1 1/4, 3 1/2, 4 3/4 & 7 (long side) & 1 1/4 and 4 on the short side
  • Whisper White Cardstock:  Scrap for stamping and the scalloped heart
  • From my Heart Specialty Designer Series Paper:  (2) 2" x 1", (1) 2 1/2" x 1", (1) 2" x 2 1/2"
Thanks for dropping by today, I hope that you are having a wonderful day.  By the way I forgot to mention that most of the products that I used today will be part of my first Online Bundle Class of the year that will release on Friday.  You will want to make sure you are tuned in tomorrow to get registered for this fun Heartfelt Bundle Class.  

Happy Stampin'
Rick Adkins 


Product List

Template Designed by creativeworkerbee