Showing posts with label stampin blends coloring. Show all posts

Tuesday, October 22, 2019

Stampin' Blends Coloring - Christmastime is Here

Hello and welcome to my blog; today I am going to share with you a card I made with the upcoming Christmastime Is Here Suite of products that will release for a limited time in November.  The stamp set in this suite is a duo configuration stamp set; meaning you get two stamp sets one is a Cling Mount set and one is a Photopolymer set.  With this configuration you get both styles.  The cling stamp is just the outline image and the photopolymer set is designed to layer the colors into the outline.  I just stamped the outline image and colored it with my stampin' blends.  Here's a look at my card.

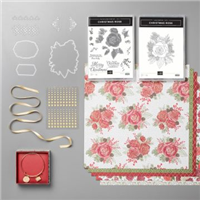
I love this stamp set and love the Christmas feel.  As I mentioned this is from a Limited Time Release coming in November.  In the suite that is coming there's the two stamp sets, matching dies, enamel dots, ribbon and designer series paper.  I will share another post next week with all the products from this suite.  I stamped the outline image onto a piece of Thick Whisper White cardstock using my Stamparatus and some Tuxedo Black Ink.  I did this because it's a larger stamp and I wanted to be able to stamp it twice if I didn't get a good impression the first time.
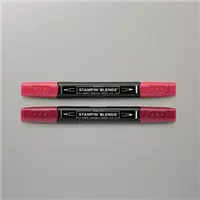
Once I got it stamped out I used my Stampin' Blends to color the image.  I colored the rose first using the light and dark Cherry Cobbler Combo Pack.  I colored the entire rose image with Cherry Cobbler Light first and put down a base color.  I then came back with my dark to add my shadows, and then went back in with my light to blend it out.  I did this on each petal, one at a time.
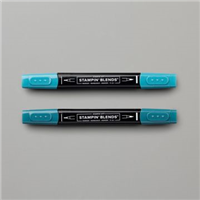
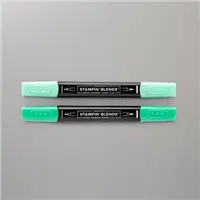
Next I worked on the leaves and colored them with Pretty Peacock light and dark blends.  This time I did them a little different.  I started with the dark and then came back in with the light.  With both I flicked in the colors and let the ink blend together.  Next I worked on the pine cones.  They were colored with Crumb Cake and Soft Suede stampin blends.  I then colored the pine branches with Shaded Spruce, put both light and dark in not really blending, but picking certain needles to be each color.  This gives the illusion of light and dark needles.  I wanted a different shade berry so I used Poppy Parade to color them.
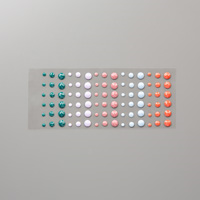
To embellish my card I did some ink platter on my Whisper White Thick panel with my Shaded Spruce Blends.  And let that dry and then added some of the gold enamel dots in the limited time release suite, and popped the rose bundle up on dimensionals.

Video Tutorial: 

If you are viewing this post by email you will have to click here or click on the image below to view the video.  

Thanks for dropping by by today, I hope that you have enjoyed the little walk through of my card.
Remember that the products in the Christmastime is Here Suite will release on November 1, 2019.  And they are only while supplies last.  I will be back again tomorrow with a new project for you see you then.
Happy Stampin' 
Rick Adkins 


If you live in the US.  I would love you to choose me as your demonstrator.  If you would like to purchase any of these products you can click on the Shop Now Button or by clicking on any of the images below.  Alternatively, you can also contact me by email to place your order.  Please be sure to use the monthly host code and I’ll send a little something out to you the following month to say Thank You!  

October HOST CODE:  SQ2WWJZN
1.     Spend any amount with me this month and receive the Creative Stampers Tutorial Bundle featuring Fall & Halloween Projects.  Plus get a gift from me in November.
Please remember that if you use the host code you cannot use that order towards my KCRP’s (Kinmon Crafty Reward Points) that would be double dipping and is not allowed.  For more information on KCRP’s click here.  


Three main reasons to Join!  
1.     You Get at least a 20% discount on all your orders while you are a demo.   
2.     You get to join my fun Kinsmon Crafters Team and Private Facebook Group.
3.     Access to directions to all my online classes 

Stampin' Up! Shopping List: 

Wednesday, October 2, 2019

Rare Blessings One Layer Card PCC353 By Rick Adkins

Hello and welcome to my blog; today I am going to share a really pretty and easy one layer card with you today.  I wanted the orchid image in the Rare Blessings Stamp Set from Stampin' Up! to be the main focus on my card today.  I didn't want a lot of embellishments, or layers so a one layer card was the way to go.  Here's a look at my card. 
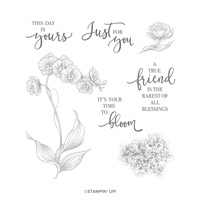
 The Rare Blessings Stamp Set features a wonderfully detailed orchid just for you to give to a friend. The Rare Blessings Stamp Set also comes with great sentiments in a beautiful font.  I think the orchid is what I noticed first when I was thumbing through the catalog back in April and was like omg I have to have that set.  Then I look at the sentiments and it was a must have after reading what was in the set and seeing the fonts.
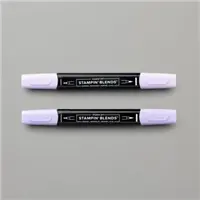
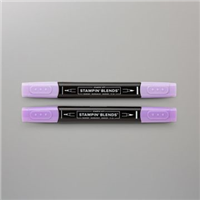
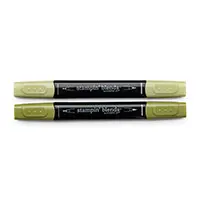
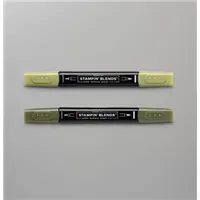
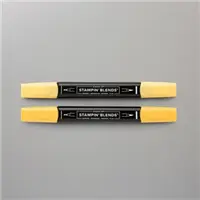
I used a little ink blending in the background of the card to enhance the coloring of the orchid.  But, before I laid down the Crushed Curry ink blend; I had to stamp the orchid and mask it.  I create my mask with a little Avery Removable Label and cut it out.  For the colors of the orchid I used my Stampin' Blends.  There's really not a lot of real estate to color with this image, but I still got four different colors on each section.  For the leaves I used Old Olive and Mossy Meadow.  For the orchid's blooms I used Purple Posy and Highland Heather.  For the flower centers I used Daffodil Delight.  I did use the light and dark of all these markers on the flowers and leaves.  Even with out a lot of area to color I still could get in there and add some nice shading.  
When I got the orchid colored it was standing out from the background enough.  The reason for that was the ink blending in the background was so soft compared to the coloring with the blends.  So I came back in with the Daffodil Delight blends and the color lifter and added some color around the the orchid.  I wanted it to kind of look like a glowing shadow around the image.  I think it made the image pop more.  What do you think?  

To decorate the envelope for this card; I simply stamped the orchid in tuxedo black ink on the front.  This gave me a nice backdrop for the front of the envelope and I still have plenty of room to write my recipients address.   To decorate the flap of the envelope I just stamped the orchid blooms around in a pattern, as you all know I like to do if you follow my blog.  
I hope that you have enjoyed my little one layer card today.  Thank you for stopping by and spending a few minutes of  your day with me.  I will be back again tomorrow with a video tutorial so I will see you tomorrow.  
Happy Stampin' 
Rick Adkins 


If you live in the US.  I would love you to choose me as your demonstrator.  If you would like to purchase any of these products you can click on the Shop Now Button or by clicking on any of the images below.  Alternatively, you can also contact me by email to place your order.  Please be sure to use the monthly host code and I’ll send a little something out to you the following month to say Thank You!

October HOST CODE:  SQ2WWJZN
  1. Spend any amount with me this month and receive the Creative Stampers Tutorial Bundle featuring Fall & Halloween Projects.  Plus get a gift from me in November. 

Please remember that if you use the host code you cannot use that order towards my KCRP’s (Kinmon Crafty Reward Points) that would be double dipping and is not allowed.  For more information on KCRP’s click here. 

Stampin' Up! Shopping List: 


Sunday, September 22, 2019

You Make Me Smile's Fall Color Inspiration featuring Harvest Hellos

Hello and welcome to my blog; today I am going to share with you my color inspiration for my You Make me Smile card featuring the Harvest Hellos Bundle.  Color drives most of our decisions and we don't even know it.  It's very important when crafting that you can find color inspiration and this is what I based this entire bi-weekly series on.  I get asked all the time where I come up with color combinations and there's inspiration out there everywhere.  It's just a matter of being observant and stopping and noticing all the beautiful colors around you.  I crated this series to help you find inspiration for your projects by sharing some of the ways I find mine.  Since tomorrow is the first day of Fall I drew inspiration from Fall leaves and harvest pumpkins.  Here's a look at my card.

Harvest Hellos: 

The Harvest Hellos Bundle includes the Harvest Hellos Photopolymer Stamp Set and the Apple Builder Punch.  The Harvest Hellos Stamp Set is an A+!  Use the apples for teacher or student gifts.  Then, like the autumn colors shifting from red to orange, the apple becomes a pumpkin with a spooky face!  The stamp set features 15 photopolymer stamps.  When matched with the Apple Builder Punch you can create beautiful die-cut apples (or pumpkins) for your projects. {* Largest punched image: 2-1/2" (6.4 cm)}  The Harvest Hello Bundle is in the Holiday Catalog on page 49.

Tips & Tricks:  

To start off my card I picked out the supplies that I knew I wanted to use.  I already knew my colors from picking my inspiration so I started out by picking the pumpkin stamp from the Harvest Hellos stamp set.  I stamped three of the pumpkins stems and larger leaves in Memento Tuxedo Black ink because I knew that I wanted to use my Stampin' Blends to color them.  To color I picked Pumpkin Pie, Daffodil Delight, Soft Suede, and Old Olive all in light and dark tones.  I started out coloring the pumpkins in light Daffodil Delight and then brought in the darker and slowly built up the colors to Pumpkin Pie as my darkest colors.  I did the same thing with the pumpkin leaves.  Once the pumpkin was colored I punched them out with the Apple Builder Punch.  I also punched out the stem but sadly the punch doesn't cut out this leaf but does do the other leaf design in the set. Since I couldn't punch that leaf out I had to pull out the paper snips and fussy cut it out.  Which was super simple to do.  

Once I had the main focal images cut out either by punching or fussy cutting I put them all together using a little liquid glue.  Next I picked my card base.  I knew the colors I was using but had to decided which one to use for the card base.  I went with my favorite color Crumb Cake.  I cut my Crumb Cake Cardstock to 5 1/2 x 8 1/2 scored at 4 1/4.  I then cut down a piece of the Regals Designer Series Paper  to 3" x 5 1/2".  Out of the four patterns in the this pack of paper I picked the gingham pattern in Cajun Craze.  I layered the designer series paper on a piece of Crushed Curry cardstock cut at 3 1/2 x 5 1/2" and then layered that on a piece of Early Espresso Cardstock that was 3 3/4 x 5 1/2".  I placed all my layered cardstock and designer series paper onto my card base.  Once I had everything stuck down it was time to start arranging the pumpkins.  Before I started layering my pumpkins I stamped the little curly cues that you normally see on pumpkins in Early Espresso ink on the designer series paper.  Once I had that stamped down I added the pumpkins.  The two on the sides I just glued them onto the card.  The center one I placed on Stampin' Dimensionals and placed on the center.  I tied a little double bow on the stem of the center pumpkin.  I stamped the sentiment on a little piece of Whisper White cardstock and made a fish tail banner.  I also popped it up on dimensionals.  This finished off my card.  

Pin Me!  

The photo below shows the key color inspiration along with the Stampin’ Up! Coordinating colors for today’s project idea that you can save or pin to Pinterest.  If you are viewing this post by email, you will need to click the title of the post to access my blog and pin.   You can view my entire project recipes by visiting my Color Inspiration Pinterest board by clicking here!  Make sure that you follow my board to be notified when a new color inspiration is added.
Thanks for dropping by today I hope that you have found a little inspiration from my card today.  If you live in the US.  I would love you to choose me as your demonstrator.  If you would like to purchase any of these products you can click on the Shop Now Button or by clicking on any of the images below.  Alternatively, you can also contact me by email to place your order.  Please be sure to use the monthly host code and I’ll send a little something out to you the following month to say Thank You!  
Happy Stampin' 
Rick 


Host Code and Free Gift:

September HOST CODE:  SQ2WWJZN
  1. Spend any amount with me this month and receive the Creative Stampers Tutorial Bundle featuring Fancy Fold or Interactive Projects.  Plus get a gift from me in October. 

Please remember that if you use the host code you can not use that order towards my KCRP’s (Kinmon Crafty Reward Points) that would be double dipping and is not allowed.  For more information on KCRP’s click here. 

Stampin' Up! Shopping List:

Paper Snips
[103579]
$10.00

Template Designed by creativeworkerbee