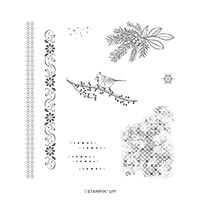
Hello and welcome to my blog; today I am sharing six different projects with you featuring just one stamp set. Well, the sentiments came from another one but the main images all came from the Christmas Countdown stamp set that coordinates with the Christmas Countdown Advent Calendar. I wanted to show you a few ways to use that stamp set besides just for the Countdown Advent calendar. I pulled sentiments from the Very Versailles and Well Said Stamp sets, we always need all occasions cards all year long so when you pair a holiday set with a great sentiment set your have cards that you can send all season long. Here's a look at my projects!

Tips & Tricks:
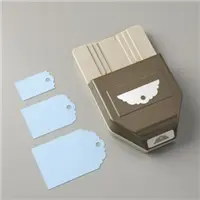
For the first project I created a simple tag using some of the leftover cardstock, and a little ribbon. Don't throw away your scraps they are so usable for tags and other things on projects. For this Christmas Tag I used a scrap of Pretty Peacock cardstock that was cut down to 2 inches so that it would fit in the Delightful Tag Topper Punch. I stamped a few of the images on the tag in matching Pretty Peacock ink and on a scrap of Whisper White that I added to the front of the tag. I finished the tag off with a little of the Silver Metallic Edge Ribbon and a little White Baker's Twine. Super easy project to dress up any packaging.

For my next project I created a simple card using some stamps, ink, paper and a couple punches. I stamped the large background image along the bottom of my Thick Whisper White card base that was cut at 5 1/2 x 8 1/2 in Pretty Peacock ink. I rotated the stamp around to create this torn edge look. So just with that stamp it looks like I have added a little decorative paper to the bottom and torn the edge. Don't count out these little textural stamps in your sets; they can create some wonderful looks on your cards. I then stamped the pine bouquet on some scrap cardstock and punched it out using the 2 1/4" circle punch and added a Pretty Peacock circle behind it. The sentiment came from the Very Versailles Stamp Set.

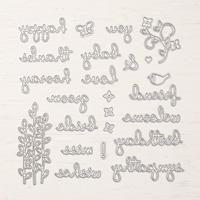
I couldn't leave winter birthdays out, so I wanted to create a fun little card only using the snowflake stamp from this set. And, just so you know it's small. I stamped the small snowflake repeatedly on a Thick Whisper White card base (4 1/4 x 11) in rainbow order. I started out with Lovely Lipstick ink, and worked my way through the rainbow until I got to the end of the card. I used the following inks for this card; Lovely Lipstick, Grapefruit Grove, Pineapple Punch, Call Me Clover, Blueberry Bushel, and Gorgeous Grape. I added the sentiment on the card with the Well Written Dies on page 197 of the Annual Catalog. These dies coordinate with the Well Said Stamp Set, but I didn't use the stamp set for this card, I thought the beautiful scrip was enough. I added a large vellum stitched circle to the front to help draw your attention to the sentiment.

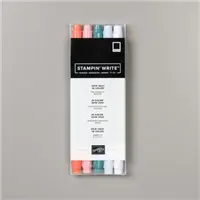
For the fourth card I created I took the same concept as above and stamped a repeating pattern with the largest stamp in the set. I stamped each color three times in a row until I filled up the card front. I used the current In Colors for 2019-2021 (Rococo Rose, Terracotta Tile, Pretty Peacock, Seaside Spray, and Purple Posy). By the way Purple Posy is now able to be ordered so if you haven't gotten it yet now's the time. It's a great all season color, that can be used any time of the year. I stamped the branch with the bird on it and cut it out. I added a little more color to the image with my Terracotta Tile Stampin' Write marker, just on the berries and the bird. This added a little more visual interest to my card.

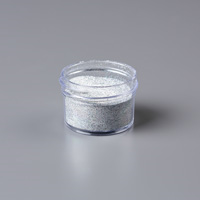
Now, I decided to step things up a little bit and added some masked ink blended strips to my card front. And then stamped the next largest long stamp in a plaid pattern on the card front. The ink blending was done with a little Old Olive and Mossy Meadow ink. That way I had some variation of tones on the card front. The stamping was done in Mossy Meadow so that it would stand out against the Old Olive and Whisper White. I finished off the card by adding the card front to a real red card base (5 1/2 x 8 1/2) and stamped the pine bouquet in Mossy Meadow ink and colored it with my Stampin' Blends in the matching colors. I then added a little real red to the berries and some Shimmery glossy Accents to the leaves and pine. I then added some of the Ice Stampin' Glitter to them so I had a little winter feel to the card. I finished it off by adding the Shimmery Glossy Accents to each berry so that they would also have a little shimmer.

For my last card I pulled out all the stops and created a emboss resist card front. I stamped all the Christmas images from the stamp set on a piece of Balmy Blue Cardstock in Versamark ink and added clear stampin' emboss powder to them. Once I had everything stamped and embossed I took Old Olive, Pear Pizzazz, Garden Green and Mossy Meadow ink and ink blended on top of the embossed cardstock. I then buffed the cardstock with a dry cloth and added it to a Balmy Blue mat and a Thick Whisper White Card Base. I love the two different tones on this card.

Well, there you go six different looking projects with just one stamp set. I hope that you have enjoyed today's post, I will be back tomorrow with the next episode of Rick's Saturday Simple Stamping. See you then.

Happy Stampin'
Rick Adkins

If you live in the
US. I would love you to choose me as your demonstrator. If you
would like to purchase any of these products you can click on the Shop Now
Button or by clicking on any of the images below. Alternatively, you can
also contact me by email to place your order. Please be sure to use the
monthly host code and I’ll send a little something out to you the following
month to say Thank You!

October HOST CODE: SQ2WWJZN
1. Spend any
amount with me this month and receive the Creative Stampers Tutorial Bundle
featuring Fall & Halloween Projects. Plus get a gift from me in
November.
Please remember that if you use the host code you cannot use that
order towards my KCRP’s (Kinmon Crafty Reward Points) that would be double
dipping and is not allowed. For more information on KCRP’s click here.

Three
main reasons to Join!
1. You Get at least a 20% discount
on all your orders while you are a demo.
2. You get to join my fun Kinsmon
Crafters Team and Private Facebook Group.
3. Access to directions to all my
online classes