Hello and welcome to my blog; today I have a super cute card for you using the Hippo Happiness Bundle and it's another version of one of the cards you can make using my 6 x 6 One Sheet Wonder cards that I made yesterday. If you missed that post you can click here and check it out. The Hippo Happiness bundle is a fun little bundle to play with and allows you to create so many different fun little cards for any occasion or person no matter their age. Here's a look at my card.

Tips & Tricks:
I made two different versions of this card using the same design. I just changed up the paper from the Flowers for Every Season Designer Series Paper. And I have two different looking easy cards that were made in just minutes. Again this is another card that you could make instead of one of the 3" x 4" cards I made yesterday. If you wanted to make three completely different cards from one sheet of 6" x 6" piece of Designer Series Paper. This card uses the same supplies just cut in a different way.

One thing to remember when you are using the same size strips of Designer Series Paper to make a card. You have to start from the ground up just like building a house. You have to have your foundation set before you can move on to the walls and roof. I started by taking one of my strips and placing it where I wanted it at on the bottom of the mat. I found that the Multipurpose Liquid Glue worked great for this because I had a little more wiggle room to get everything lined up just right.

Once I had the three strips of Flowers For Every Season Designer Series Paper lined up on my mat I then could wrap about 14" or so of the Magenta Madness 2020-2022 In Color Ribbon around this layer and tie it into a flat knot. Then I could place Stampin' Dimensionals behind it and place it on my Thick Whisper White card base. Which by the way I still cut at 4 1/4" x 11" and scored it at 5 1/2", but I turned it on it's side to make a side folding card.

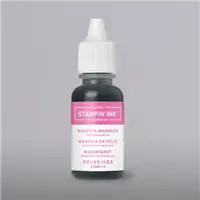
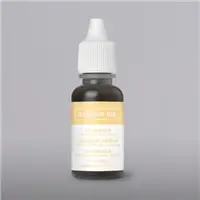
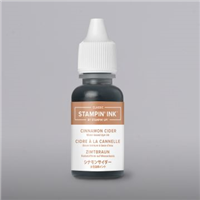
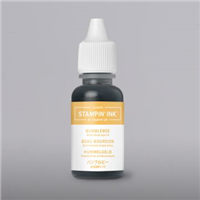
To save time in the video I had already took a piece of Whisper White cardstock (about 3 1/2" x 3 1/2") and precut it with one of the dies from the Hippo & Friends Dies. This samed me a little time in the video but you could totally stamp first then die cut if you wanted to. To get the two different shades of Magenta Madness Ink I just inked up the first layering stamp for the horse and stamped off onto a scrap piece of paper. Next I took the second horse image and stamped it full strength lining the images up and stamped it down. Then I added her little face with Tuxedo Black ink (every little horse or unicorn needs a face). Then I added the horn with So Saffron Ink. I then stamped the "when in doubt be a unicorn" sentiment in Magenta Madness Ink at the top of the die cut.

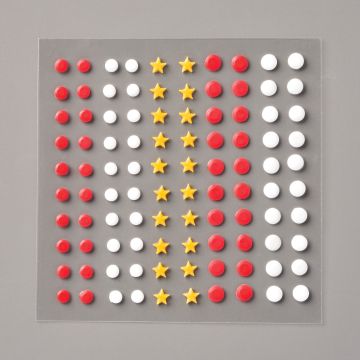
I then added my cute little unicorn to the front of my card with a couple Stampin' Dimensionals so that it was popped up not only on the card but over the ribbon as well. To finish off my card I added three of the stars from the All The Trimmings Embellishments from the August-December Mini Catalog. These little embellishments can be used for so much more than just the holidays. So, don't count them out, for your everyday crafting needs, they are perfect for that little special embellishment.
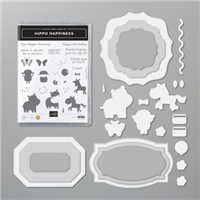
The Hippo Happiness Bundle includes the Hippo Happiness Stamp Set and the Hippo & Friends Dies. The Hippo Happiness Stamp Set allows you to make greeting cards, tags, and more with the darling critters. The stamp set helped designed and inspired by my friend Robin Cardin (My Pink Stamper) for her 1 Million Dollar sales achievement contains 27 photopolymer stamps. The matching Hippo & Friends Dies helps you create custom die-cut elements like frames, animals, and more for your projects. Pair the dies with the coordinating Hippo Happiness Stamp Set for more creative options. The Hippo & Friends Dies contain 25 dies with the largest die measuring 3-1/2" x 3-1/2" (8.9 x 8.9 cm).

Video Tutorial:
If you are viewing this post by email you may have to click here to view the video.
Project Recipe:
I have created a little graphic for you to save to your Pinterest board to help you remember the key items you will need to recreate this card. If you want to check out all my other Project Recipes you can do so on my Recipe Board here.

Before I go I have a couple other examples of projects using this bundle that were created by the Stampin' Up! Concept Artists.
 |
| Images by Stampin' Up! |
 |
| Image by Stampin' Up! |
Thanks for dropping by today! If you need any of the supplies you have seen today you can pick them up in my online store by clicking on the items in the Shopping list below and it will take you directly to my online store. I hope that you have a wonderful day.

Happy Stampin'
Rick Adkins

Use the Host Code on any order of $35 (before taxes & shipping) or more by August 14th and receive my August Monthly Card Class Kit & Invitation to my Zoom Live Class featuring the Ridiculously Awesome Stamp Set as a Thank You. ($25 value) In the Kit you will receive the supplies to make four different card designs. If your order is $150 or more, please do not use the host code. You will forfeit your Stampin' Rewards if you do; and I want you to get those rewards. Monthly Card Class Kits will be mailed to you by August 22nd.
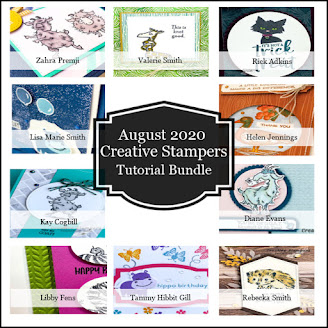
If you place any size order with me during the month of August, you will receive the August Creative Stampers Tutorial Bundle from me as a little thank you. This month's tutorial bundle has ten project tutorials that feature our favorite new Cozy Critters products from one of the new Stampin’ Up! Catalogs. The Creative Stampers Tutorial Bundle can either be earned for FREE with any size order or Can be purchased for $22 from me.

I am very close to earning the 2021 Stampin' Up! Incentive Trip to Maui and your orders can help me get there. I am running a few special promotions until the end of September to not only help me earn this trip but to help you save a little cash as well. I am kicking off my Maui of Bust Promotions with a Mega Holiday Embellishment Product Share. The deadline to take part in the Mega Holiday Embellishment Product Share is August 21, 2020. You can check out what's all included in this Mega Holiday Embellishment Product Share by clicking here. I will have a new smaller promotion each week that runs from Tuesday of one week till Monday of the following week. So be watching for those as well. Some promotions will only last a couple days.

With each $1000 I earn I will be cutting off a chain from my Maui or Bust Countdown Chain. I got to cut the first one off the other day during my Live Video. 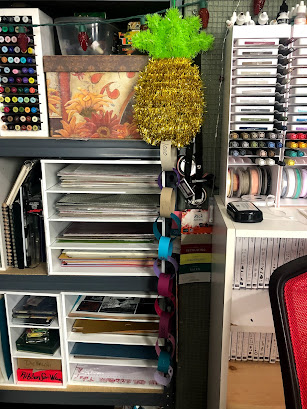
Rick Adkins

Use the Host Code on any order of $35 (before taxes & shipping) or more by August 14th and receive my August Monthly Card Class Kit & Invitation to my Zoom Live Class featuring the Ridiculously Awesome Stamp Set as a Thank You. ($25 value) In the Kit you will receive the supplies to make four different card designs. If your order is $150 or more, please do not use the host code. You will forfeit your Stampin' Rewards if you do; and I want you to get those rewards. Monthly Card Class Kits will be mailed to you by August 22nd.

If you place any size order with me during the month of August, you will receive the August Creative Stampers Tutorial Bundle from me as a little thank you. This month's tutorial bundle has ten project tutorials that feature our favorite new Cozy Critters products from one of the new Stampin’ Up! Catalogs. The Creative Stampers Tutorial Bundle can either be earned for FREE with any size order or Can be purchased for $22 from me.

I am very close to earning the 2021 Stampin' Up! Incentive Trip to Maui and your orders can help me get there. I am running a few special promotions until the end of September to not only help me earn this trip but to help you save a little cash as well. I am kicking off my Maui of Bust Promotions with a Mega Holiday Embellishment Product Share. The deadline to take part in the Mega Holiday Embellishment Product Share is August 21, 2020. You can check out what's all included in this Mega Holiday Embellishment Product Share by clicking here. I will have a new smaller promotion each week that runs from Tuesday of one week till Monday of the following week. So be watching for those as well. Some promotions will only last a couple days.
With each $1000 I earn I will be cutting off a chain from my Maui or Bust Countdown Chain. I got to cut the first one off the other day during my Live Video.