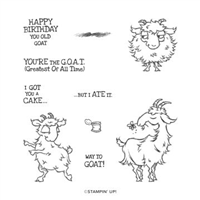
Hello and welcome to my blog; today I am kicking off a new Video Series showing how the concept artists at Stampin' Up! created different Catalog Samples. Each week I will pick one sample from one of the current catalogs and share how they made it. To kick this new series off I picked a card featuring one of my favorite stamp sets. I choose to create one of the samples from page 105 in the Stampin' Up! 2020-2021 Annual Catalog; that features the Way to Goat Stamp Set. Here's a look at the card.

Here's a look at the card that I am showcasing from the Annual Catalog this week.

Tips & Tricks:
You will notice a few differences from my card and theirs. I don't have the same measurements that was used in the original card so I went with what I thought was close. I did use all the same products as they did on this sample to show you how it was made.

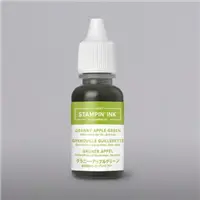
We both used a piece of Granny Apple Green Cardstock as our card base. I cut mine at 5 1/2" x 8 1/2" (metric people would use a piece that's 14.9 cm x 21 cm). On the front of the card base you are going to stamp the little can image from the stamp set all around in Granny Apple Green Ink. Next I stamped the Goat from the set in Tuxedo Black Ink or Stazon Jet Black. If you use Tuxedo Black you will have to heat set it or let it dry completely before using the Watercolor Pencils. The Goat was stamped on a piece of Shimmery White Cardstock that measured 3" x 4" (11.4 cm x 7 cm).

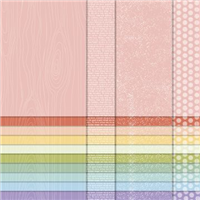
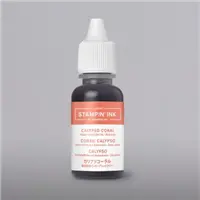
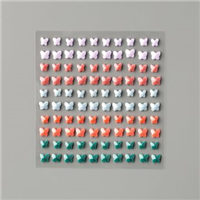
Once the ink was dry I used a few of the colors from the Watercolor Pencils and Watercolor Pencils Assortment 2 to color in the Goat and the outside around him. The grass was stamped using one of the images from the stamp set. Once dry I layered this onto a piece of Balmy Blue Designer Series Paper from the Subtles Pack cut just 1/4" larger. I then stamped my sentiment in Calypso Coral Ink onto a piece of Petal Pink Cardstock and punched it using the Lovely Label Pick A Punch. I popped the sentiment strip up on Stampin' Dimensionals (I used the black ones because I had them out) and added a couple of the Butterfly Gems to finish off the card. And that my friends is How They Made That!
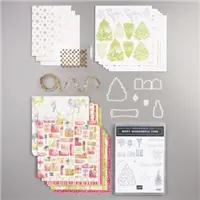
Card Recipe:
I have created a little graphic for you to pin to your Pinterest boards with the main items listed that was used, so if you recreate this card you can save that and know what was used. If you want to check out my other Project Recipes you can click here and see them all on my Recipe Board.

Video Tutorial:
If you are viewing this post by email you will have to click here to view the video. Thanks for dropping by today, I hope that you enjoy this new series. If you have suggestions or projects from one of the catalogs that you would like to know How They Made That drop me a comment below with the stamp set and description of the project along with the page number and which Catalog it's in and I will see if I can show you how they made it. If you need any of the supplies that I used on today's card you can find them in my Online Store by clicking on the item in the Stampin' Up! Shopping List below.

Happy Stampin'
Rick Adkins
Rick Adkins

Use the Host Code on any order of $35 (before taxes & shipping) or more by August 14th and receive my August Monthly Card Class Kit & Invitation to my Zoom Live Class featuring the Ridiculously Awesome Stamp Set as a Thank You. ($25 value) In the Kit you will receive the supplies to make four different card designs. If your order is $150 or more, please do not use the host code. You will forfeit your Stampin' Rewards if you do; and I want you to get those rewards. Monthly Card Class Kits will be mailed to you by August 22nd.

If you place any size order with me during the month of August, you will receive the August Creative Stampers Tutorial Bundle from me as a little thank you. This month's tutorial bundle has ten project tutorials that feature our favorite new Cozy Critters products from one of the new Stampin’ Up! Catalogs. The Creative Stampers Tutorial Bundle can either be earned for FREE with any size order or Can be purchased for $22 from me.