
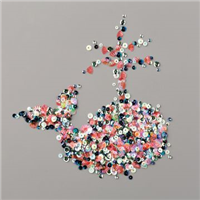
Hello and welcome to my blog; today I am going to share a fun and easy technique with you on how to get multiple colors on one stamped image. This is a super easy technique but looks like you spent hours inking up the stamp or used multiple stamps to create the look. I am going to share with you how to do the markering technique. On my card today I used the new 2020-2022 In Colors and the Prized Peony Bundle. Here is a look at my project.

As I mentioned above this is a super easy technique that just gives fabulous results but there are a few tips and tricks you need to be aware of. So to start this technique uses water based markers. You get the best effect with those. You can use the blends but you take the risk of damaging your blends and staining your stamps without being able to remove the stain. Plus the alcohol in the blends could ruin your stamps. Anyway, the stampin' blends work the best and are quick and easy to do. The hardest part of this technique is knowing where to add each color.

I used the new 2020-2022 In Color Stampin' Blends for my coloring today. I used every one of the colors to achieve this multicolored look on the stamped image on my card. This technique also works best on cling stamps because the red rubber has just a little more grip for the ink from the markers to hold onto. You can do it with photopolymer but it takes a little more effort. I started out my inking up the Bumblebee areas first. You will always use the side of your maker (the brush tip) to ink up your stamps. I then came in with Just Jade on the leaves and stems. I wanted a little shadow to the some of the areas on the leaves and stem so I added just a touch of Misty Moonlight here and there.

Next I came in with the Magenta Madness Stampin' Write Marker and colored in the Peony. I also came back in and added just a little Cinnamon Cider to the edge of the center of the flower where I had the Bumblebee. The Cinnamon Cider didn't show up as much this time as it did in my trail card. But, was something I expected since each time you do this technique you get a little different result each time.
Video Tutorial:
If you are viewing this post by email you may not be able to see the video above. If so click here to go to the video on my YouTube Channel.

So, as you can see I have a beautiful multicolored stamped image that I didn't have to spend hours inking up with ink pads, no masking areas that I wanted to be a certain color, or ink everywhere on my Stamparatus plates. Some key takeaways to remember are; make sure to use the side of the brush tip on your stampin' write markers, start with your lightest color and work darker, make sure to huff on your stamp to remoisten the ink before stamping down, and the most important tip of all have fun playing.
Thanks for dropping by today I hope you have a wonderful day. If you need any of these supplies you can pick them up in the shopping list below in my online store. Don't forget about the awesome pick a bundle promotion going on right now when you purchase the starter kit and join my team. You could get the Prized Peony Bundle Free when you join in June, or any other bundle that you may pick.

Happy Stampin'
Rick Adkins

Use the Host Code on any order of $50 (before taxes & shipping) or more during the month and receive a gift from me in June as a Thank You. If your order is $150 or more, please do not use the host code. You will forfeit your Stampin' Rewards if you do; and I want you to get those rewards.

If you place any size order with me during the month of June, you will receive the June Creative Stampers Tutorial Bundle from me as a little thank you. This month's tutorial bundle features twelve Masculine themed projects. All the products used can be found in the new 2020-2021 Stampin' Up! Annual Catalog. The Creative Stampers Tutorial Bundle can either be earned for FREE with any size order or Can be purchased for $20 from me.
Three main reasons to Join!
You Get at least a 20% discount on all your orders while you are a demo.
You get to join my fun Kinsmon Crafters Team and Private Facebook Group.
Access to directions to all my online classes
I All Ready Know I Want to Join! Sign Me UP!
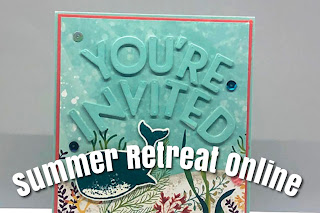
I announced my Online Summer Retreat yesterday on my blog and my newsletter. If you missed the information you can click here to join me for a fun day of crafting in July. We will have a Whale of a good time. Learn more about my Summer One Day Retreat here and let's beat the heat and do a little crafting together.
") | |||
 | |||
 |  |  |  |


 Shimmer Ribbon")


")
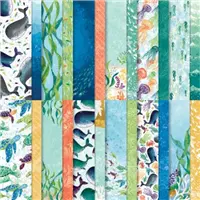
 Designer Series Paper")


