Saturday, August 24, 2019

Rick's Saturday Simple Stamping Episode 29: Magnolia Blooms Birthday Card

Hello and welcome to my blog; today I am going to share with you share with you the latest Episode of Rick's Saturday Simple Stamping.  In this episode we are going to make a super quick and easy birthday card using one of the Stamp Sets from the Beginners Brochure.  You can download it if you haven't gotten to the right of this post under catalogs.  For those of you that haven't joined me for a Saturday Simple Stamping Card; these are all designed with the person that have never stamped before in mind or the person that is just starting out.  They are super easy projects that you can recreate without problems, only using a few supplies.  This week as I mentioned we are making a birthday card.  Here's a look at the card we are going to make and I will also share with you a version that is stepped up just a little bit also closer to the end of this post.

For the card today I used a piece of Petal Pink Cardstock cut at 4 1/4 x 11 scored at 5 1/2 a smaller strip that was about 1 1/2" x 4 1/4, a piece of Whisper White Cardstock 4 x 5 1/4, and two ink pads Petal Pink and Tuxedo Memento Black.  I am using the Magnolia Blooms Stamp Set (#152729) for my card today.  This stamp set was designed to coordinate with the Good Morning Magnolia Stamp Set from the 2019 Annual Catalog.  It has some images that was made a little smaller from the stamp set but has some sentiments you can only get in this set.  It's also a photopolymer set meaning you can see right through it, unlike the Good Morning Magnolia set which is a cling set (red rubber).
I started off by taking the whisper white cardstock and stamping the larger magnolia image from the Magnolia Blooms stamp set around the card in Petal Pink ink.

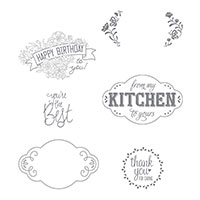
Next I came in with the Magnolia Bloom from the set and stamped it around randomly.  I started filling in any open areas that I had on the cardstock.

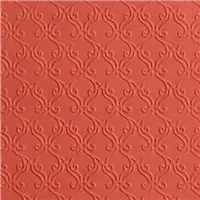
After that I came in with the little leaf image and filled in all my open areas on the whisper white cardstock.  If you have followed my Simple Stamping Series you have seen me do this before.  What we are doing is creating our own designer series paper.

So once I had everything stamped the way I wanted it on the whisper white cardstock it was time to attach it to our card front.  So I folded and burnished the card base using my bone folder (an must have tool for any project; this allows you to get a nice clean crisp line).  Once this was done I added it to the card front with a little Snail Adhesive.
I then took the 1 1/2" strip of Petal Pink Cardstock and stamped the Happy Birthday Sentiment and made a diagonal edge to create a banner.  I attached that using Snail Adhesive also.  I placed it about in the bottom 3/4 of the card.

Video Tutorial: 


If you are viewing this post by email you may have to click here to view the video.

Step it Up Just a Little: 
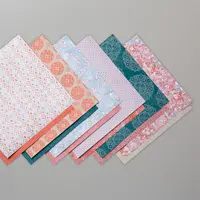
Now as I mentioned above I would share with you a slightly stepped up version of this card.  All I did to step it up a little this week was add the addition of a punch.  Yes, that's what I said.  And that one little addition changes the look of the card completely.  
 I could dress this up a little bit more with the addition of some matching ribbon and a few rhinestones and create an even bigger look.  I did a piece of whisper white to the inside of this version with the addition of some stamping going up the side.  You can kind of see that in the picture above.  
Thanks for dropping by today, I have to run and get ready for an event that I am attending today.  See you tomorrow for the next project in my Color Inspiration Series.  You can find all the supplies listed below.  
Happy Stampin' 
Rick 


Stampin' Up! Shopping List
Paper Snips
[103579]
$10.00

Friday, August 23, 2019

My Uniquely Colored Cow Card for You Today!

Hello and welcome to my blog; today I am going to share with you a very uniquely colored version of one of the cows from the Over the Moon Stamp Set that I used on my card today.  I do love bold bright colors and sometimes you don't have to color things the way people except or think they should be.  For example on my card for today, I used some colors on the cow that just might make you laugh if you saw this cow in real life.  I mean can you imagine walking through a field and you look up and a purple and pink spotted cow was following you. I can visually see the reaction on your face, and hear you bust out in laughter; right!   But, it's a card and you want to make people laugh and feel good when they open it.  So why not be udderly fantastic with a little of your coloring choices;  I mean sometimes life is a little to serious and we all need a good laugh so why not.  Here's a look at my card.

I wanted to do something that was a little unexpected with the coloring of this cow since the sentiment reads "You're Udderly Fantastic!"  So I thought why not give the person that gets this card, because we all now that one person that is udderly fantastic, and that would love this card and it make their day!  Just like everytime I see the commercial of the two ladies at the drug store. And,  they see the girl with the purple hair!  You expect one reaction but one of them runs to the color aisle and grabs boxes of purple hair color.  In the very next scene you see them walking into their high school reunion with purple in their hair.   Then we see them having just the best time dancing, laughing, and having fun talking to everyone.  This is what this card makes me think of it makes me think of that one or two people I know that I could send this card to and they would just love that they got a card with a purple headed cow on it.

So one of my points is for you to be you!  If you want a purple headed and pink spotted cow on your card go for it!  And, you color that purple and pink spotted cow if you want to!  Life is way to serious to be so uptight all the time over little things like coloring a few spots on a cow.  Card making is about making people feel something, about making them feel better about themselves, and about letting them know that you love them.  Over the past few days the sympathy cards have been coming in and I love every single one of them. Because I know that they were made with love and support from the person that sent them.  So why not send someone a uniquely colored cow in the mail.  The person you send it to just may need that laugh and feeling of love at the time.  Card making is so much more than what colors we put down on paper.  It's about the love that we share through that little piece a love with a fold in the middle.


Thanks for dropping by today, I hope that I have inspired you a little to think outside the box a little with your coloring, and remember always be you no matter what your doing.  After all your friends love you for who you are not who they think you should be.  Have fun and color a purple headed pink and purple spotted cow today! You want regret it, because you just may need that little laugh. 
Happy Stampin' 
Rick 


Stampin; Up! Shopping List


Host Code and Free Gift:

 AUGUST HOST CODE:  QM9NBQR9
  1. Spend any amount (using this month’s host code) and get the August Creative Stampers Tutorial Bundle FREE (This month we are featuring products from the Come Sail Away Suite in the 2019-2020 Annual Catalog)
  2. Spend $25 (before taxes and shipping) or more using this month’s host code and get my August Monthly Card Class Make & Takes Mailed to you FREE as a Thank you.
  3. Spend $75(before shipping and taxes) or more and get the August Monthly Make & Take Class and a Sample of the Iridescent Sequins for FREE as a Thank You gift when you use this month’s host code.
  4. Spend $150 or more and get the July Creative Stampers Tutorial Bundle, July Monthly Card Class Make & Takes, & the Iridescent Sequins pack for FREE as my thank you.  If your order is over $150 please don’t use the host code.  You will give up your Stampin’ Rewards if you do. 

Please remember that if you use the host code you can not use that order towards my KCRP’s (Kinmon Crafty Reward Points) that would be double dipping and is not allowed.  For more information on KCRP’s click here


Redeem Your Coupons Now before August 31, 2019 Click here to find out how! 


Holiday Catalog Paper and Product Share Reservations are open now!  Take advantage of this cost saving way to get your hands on a sampling of all the new papers and ribbons in the 2019 Stampin’ Up! Holiday Catalog.  Click here to Reserve your Spot today!  Deadline is September 2, 2019.  


Get your spook on with the September Paper Pumpkin Click here to Subscribe today!  


 Your invited to one of my Virtual Catalog Launches and my Catalog Walk through you can find all the information on my Facebook Page under the Events Tab!  


Only a few more days left to take advantage of this Extra Extra Joining Special, you earn 2 times the Extras!  Join my family of Kinsmon Crafters now and earn an extra $30 in FREE items to add to your $99 Starter kit.  That means you can pick out $155 of wonderful Stampin' Up! Products for only $99.  And you get FREE shipping on your starter kit.  Extra #2 You will receive a $10 Coupon Code if you Sign up in July to use in August. If you sign up in August, your will get the Coupon Code to use in September.  Have questions visit my Join my Team Page and my FAQ page for more details.  

Three main reasons to Join!  

1.     You Get at least a 20% discount on all your orders while you are a demo.   
2.     You get to join my fun Kinsmon Crafters Team and Private Facebook Group.
3.     Access to directions to all my online classes 

I All Ready Know I Want to Join!  Sign Me UP!


Are you on my list to get a NEW 2019 Holiday Catalog?  If you are not a demonstrator or don’t have a demonstrator that you work with in the US I would love to: 

1.       Send you a Copy of the 2019 Holiday Catalog and Idea Book
2.       Add You to My mailing list for 10 + PDF tutorials in my Monthly Newsletter each month
3.       Ordering opportunities and my customer Ordering specials
You can click the link here to sign up or you can message me or email today.  Email rick@rckinsmonstudio.net

Thursday, August 22, 2019

Quick & Easy Thank You Card

Hello and welcome to my blog; today I am going to share with you the super quick and easy thank you card that I made last night during my weekly Facebook Live.  I used the Label Me Pretty Stamp Set; and I will tell you this set has been on my list since it came out but I would keep forgetting to order it until after the order was submitted.  This is a great set for so many occasions and uses.  It can be used on cards, on tags, and packaging, there's a sentiment to fit your needs.  This is one of those sets I consider a must have for any crafter.  Here's a look at my card.

When I designed this card I did so by picking out the designer series paper first.  And, then picked my colors around that.  I used Pretty Peacock, Purple Posy, and Whisper White.  I started with a piece of Pretty Peacock Cardstock for the card base which was cut at 4 1/4 x 11 scored at 5 1/2.  My next layer was the Woven Threads Designer Series Paper 4 x 5 1/4, but before I placed it on the card I used the Stylish Scroll Embossing Folder from the Holiday Catalog to dry emboss the paper.  This added even more texture to the printed texture on the paper.  Which by the way added just that little extra pop that this clean and simple card needed.
On a scrap piece of Whisper White Cardstock I stamped the label from the set, actually it was two images that created this label, I stamped the first one in Purple Posy Ink, and the next one with the flowers was stamped in Pretty Peacock Ink.    Next I used the Pretty Label Punch and punched it out.  I added a piece of the Scalloped Linen Ribbon in both colors to the front of the card using Tear & Tape Adhesive.  Tear & tape is my go to for adhering ribbon.  I then popped up the sentiment using Stampin' Dimensionals.  I added a few of the 2019-2021 In Color Faceted Dots to bring in a little more of the Peacock.  I added a piece of whisper white to the inside with a small strip of the designer series paper to finish the card.

Video Tutorial: 

If you are viewing this post via email and the video does not show you can click here to watch it.  
Thanks for dropping by today, I hope that you have a wonderful day and I am glad you spent a little time with me.  If you need any of the supplies you can order them by clicking on the image below in the Shopping list.  
Happy Stampin' 
Rick 

Stampin' Up! Shopping List: 


Template Designed by creativeworkerbee