Showing posts with label window card. Show all posts

Wednesday, February 19, 2020

Sending Flowers Little Ladybug - Hey Lady Card for #PCC371

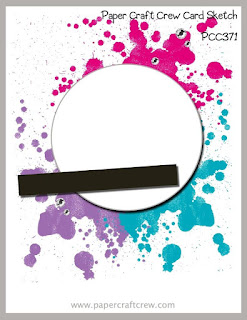
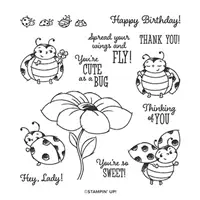
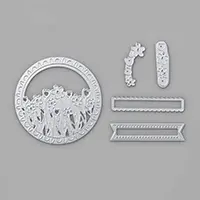
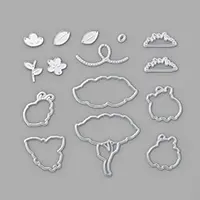
Hello and welcome to my blog; today I am going to share with you may card that I designed based off of this week's Paper Craft Crew Sketch Challenge.  I decided to use the Sending Flowers Dies which are part of the Coordinating Product Release (while supplies last of until March 31, 2020) and the Little Ladybug Saleabration Host Stamp Set.  I used the two to create a super cute window card that I just love.  Here's a look at my card.  

Sending Flowers Dies, Little Lady bug stamp set, die cut window card, Stampin' Up!, Rick Adkins Independent Stampin' Up! Demonstrator

Here's a look at the sketch that inspired today's card.

Tips & Tricks:

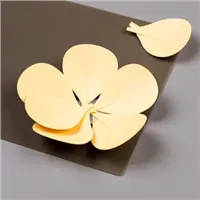
I made my card by die cutting the large floral circle die cut from the center of a piece of Mossy Meadow Cardstock to make the card base (4 1/4 x 11 scored at 5 1/2).  Once the center of the card was cut out I needed to die cut all the flowers in from the different colors.  I cut them multiple times from Purple Posy, Calypso Color, Flirty Flamingo, and So Saffron Cardstocks.  This is a great way to use up some scraps, which is what I did.  I actually cut a few more than I needed.  I then attached each of the colored flowers to each flower.  I added each alternating the colors with a little Multipurpose Liquid Glue.  Before gluing all the flowers down I placed my Silicone Craft Mat underneath the card front.  The silicon craft mat is a must have item since snail, Multipurpose Liquid Glue, tear & tape, and hot glue will not stick to it.  

Sending Flowers dies, Little Ladybug Stamp Set, Stampin' Blends, Window Card, Stampin' Up!, Rick Adkins Independent Stampin' Up! Demonstrator

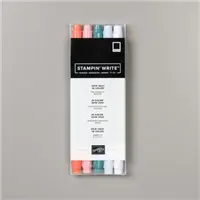
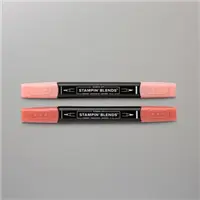
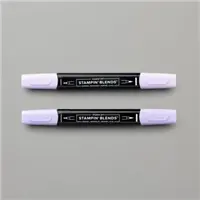
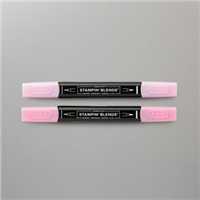
Once I had all the flowers covered, I then stamped three of the ladybugs from the Little Ladybug Saleabration Host Stamp Set in Memento Tuxedo Black Ink.  Once the ink dried I colored each of them with my Stampin' Blends in the following colors; Flirty Flamingo & Petal Pink, Purple Posy & Gray Granite, Calypso Coral & Petal Pink Combo Packs.  The first color listed is the colors of the wings and the second color is the face and belly color.  Once they were colored I used the Ladybugs Dies (also part of the Coordinating Product Release) to cut them out.  Once I had them cut out I cut out two of the grass clumps from a scrap of Mossy Meadow Cardstock.  I then stamped a sentiment on a scrap of Whisper White Cardstock in Purple Posy Ink (Discontinued).  But, you could use the Purple Posy Stampin' Write Marker from the 2019-2020 In Color Stampin' Write Markers.  

Sending Flowers Dies, Little Ladybug Stamp Set, Ladybugs Dies, Stampin' Up!, Rick Adkins Independent Stampin' Up! Demonstrator

I pulled up all the little flaps that the floral die made on the outside of the circle.  I then added a piece of the 2019-2021 In Colors Designer Series Paper (in Seaside Spray) behind the floral die cut with liquid glue.  I then added the flirty flamingo ladybug tucked into the top left corner secured with a little liquid glue.  I added one of the tulip die cut to her flower with a Mini Stampin' Dimensional.  I then added the Purple Posy ladybug at the top with a Stampin' Dimensional.  I then used the scalloped banner die from the Sending Flowers Dies and cut out the sentiment.  I added it to the card with a Dimensional and a little liquid glue.  I then popped the other ladybug on the card over the end of the sentiment strip with a dimensional.  The grass was added the same way.  I did take a little mossy meadow ink and did a little ink blending up to the grass clumps to have a little bit of a contrast.  


Thanks for dropping by today, I hope that you like this super cute little card and that you will play along with us this week.  You can click on the sketch image at the top and see what the other design team members came up with.  If you need any of the supplies I used today you can pick them up in my online store.  You will find everything that I used listed in the Stampin' Up! Shopping List below.  

Stampin' Up! Shopping List: 


Happy Stampin'
Rick Adkins 


Join my NEW Online Technique & Fancy Fold Club!  You can find out all the details by clicking here!

Last day to sign up for my Monthly Card Club by February 20, 2020!  Sign up and learn more about Card club by clicking here!  February's featured stamp set is the Morning Star Stamp Set.  Stamps sets are not included in the club but may be purchased using the host code as an add on.  Or you may use something you already own.  


Receive the January Creative Stampers Tutorial Bundle with any size order!  Features 17 projects designed by Stampin' Up! demonstrators from around the world.  This month we all featured a item in the Sale-a-bration Brochure.  

Tuesday, December 24, 2019

Window Card - Honey Bee Bundle Stampin' Up! Video Tutorial

Hello and welcome to my blog; I hope that you are having a wonderful day.  Today, I am going to share with you a super quick and easy window card using a new bundle from Stampin' Up!.  The Honey Bee Bundle is one of the twenty new bundles in the January-June Mini Catalog.  It's also one of those that I noticed right off the bat when I first thumbed through the catalog.  It's a super cute Spring and Summer stamp set that will let you create great greeting cards that are oh so sweet.  Here's a look at my project.


Tips & Tricks: 

With the Honey Bee Stamp Set, you’ll make greeting cards that are oh, so sweet! Use the greetings in this set to convey your thoughts of friendship and support. This is a Distinktive** stamp set; it has a special texture that gives added depth and dimension in a single step, creating photo-realistic images. **Patent pending

The Honey Bee Bundle includes the Honey Bee Stamp Set and the Detailed Bee Dies.  Create custom die-cut flowers, bees, a honeycomb, a beehive, and more using the Detailed Bee Dies. Use these dies with the Honey Bee Stamp Set to quickly cut out stamped images from the set. Create thank you cards, thinking of you cards, and other fun cards and paper crafts!
I stamped the large bee all over the Real Red card base in matching Real Red ink to add a little pattern and texture to the card.  I then used the Stitched Nested Label Dies to cut out the window on the card front.  I then stamped and die cut the large bee and the smaller one in Tuxedo Black ink and colored it with my Crushed Curry Stampin' Write marker (from the Regal Marker Collection).  Next I stamped the Bee Hive in Crushed Curry and cut everything out with the matching dies.  I added them to the front of the card with a couple dimensionals.
For the inside of the card since you are able to see inside with the window I added a strip of the Golden Honey Specialty Designer Series Paper (which can only be earned for Free with a qualifying order during Saleabration) to the center of the inside of the card.  I made sure that the designer series paper lined up with the points of the large stitched window.  I then added a thin strip of whisper white with the sentiment stamped in Real Red ink in the center of the designer series paper.  To finish off the card I added a few Red Rhinestones around the front of the card and on both sides of the sentiment.

Video Tutorial: 

If you are viewing this post by email you will have to click here or click on the image below to view the video.  

Sizes & Dimensions: 

  • Real Red Cardstock:  5 1/2 x 8 1/2
  • Whisper White Cardstock:  4 x 5 1/2 (inside) 1/2" x 5 1/4" (sentiment) Scrap for Bees and Bee Hive
  • Golden Honey Specialty Designer Series Paper:  1 1/2" x 5 1/4" 
Happy Stampin' 
Rick Adkins 

If you live in the US.  I would love you to choose me as your demonstrator.  If you would like to purchase any of these products you can click on the Shop Now Button or by clicking on any of the images below.  Alternatively, you can also contact me by email to place your order.  Please be sure to use the monthly host code and I’ll send a little something out to you the following month to say Thank You!  

 HOST CODE:  3PN3UVRP
  1. Spend any amount with me this month and receive the Creative Stampers Tutorial Bundle.  Plus get a gift from me in February
Please remember that if you use the host code you cannot use that order towards my KCRP’s (Kinmon Crafty Reward Points) that would be double dipping and is not allowed.  For more information on KCRP’s click here.  


Three main reasons to Join!  
1.     You Get at least a 20% discount on all your orders while you are a demo.   
2.     You get to join my fun Kinsmon Crafters Team and Private Facebook Group.
3.     Access to directions to all my online classes 

Last Week To Take Advantage of the Close Out Sale:


Stampin' Up! Shopping List:

Template Designed by creativeworkerbee