Hello and welcome to my blog; today I am going to share with you how to take something that is in the August-December Mini Catalog intended for Christmas and turn it into something for all occasions. I used the Joy Dies as a main part of my card today but I didn't want to use them as a Christmas Card. So I turned one of them into a sentiment for a card that could be used for a all occasion card. Here's a look at my card.

Think Outside the Dies:
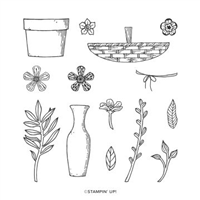
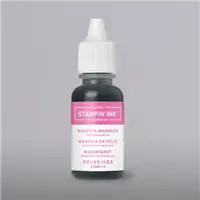
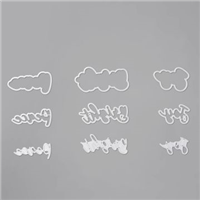
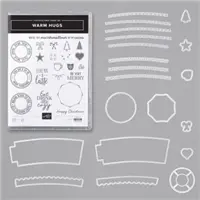
I used the bright word die from the Joy Dies as the main part of my sentiment today. I used all three dies (the shadow, outline, and main die) and cut them from Basic Black, Whisper White, and Magenta Madness Carstocks. I layered them up like you normally would and set them to the side to figure out the rest of my card. I used the Basket of Blooms Stamp Set and stamped a few of the flowers and stems onto a piece of Whisper White Cardstock. I used a blender pen to give each a watercolor look. This is one of my favorite ways to watercolor because I don't have to break out my watercolor palette. I can use the blender pen and the ink pads to add just a hint of color to what I want to have the watercolor look.

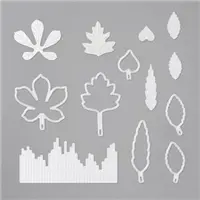
After coloring each item I took the Small Blooms punch and punched out the flowers. The stems I used my paper snips and fussy cut them out; I know there's that dirty word "fussy cut". But these are not bad todo and it doesn't take to long. I added those to my pile of supplies that I decided to use on my card. Next I took a piece of Whisper White Cardstock and the stitched border die from the Stitched Leaves Dies and ran it through my NEW Stampin' Cut & Emboss Machine (which will be available to everyone in September). Next I used one of my Water Painters and flicked on some plain old water onto the Whisper White Cardstock. I sprinkled on some Gold Stampin' Emboss Powder and heat set it with my Heat Tool. When you are doing this type of embossing you have to heat set it not only from the front but mainly from the back. You have to evaporate the water so by heating setting it from the back helps in doing this.

Now to start building my card. I started out by adding a piece of the Flowers For Every Season Designer Series Paper to the left-hand side of my card front. I used a little Stampin' Seal to do this. Next I added the stems of the flowers with Multipurpose Liquid Glue and popped each flower up on a Stampin' Dimensional. To add just a little more bling to the card I added a Champagne Rhinestone to the center of each flower; this added that necessary pop and added sparkle. After that I popped up my Bright layered sentiment with Stampin' Dimensionals. Now I needed to finish the sentiment! So, the hunt began to find the perfect little compliment. And, I found it in the Well Said Stamp Set. I stamped the wishes in Magenta Madness Ink onto a scrap of Whisper White and cut it out and popped it up with a half of a Stampin' Dimensionals. You could totally use a Mini Dimensional here but I was being lazy and didn't want to pull them out. Once I had everything attached to my card front I attached it to my Magenta Madness card base.
Project Recipe:
I have created a little graphic for you with the main items of this card in case you would like to save it to a Pinterest board. This will help you remember those key items if you want to recreate it the way that I did. You can check out my other project recipes here.

Thanks for dropping by today; if you need any of the supplies that you have seen today you can pick them up in my online store by clicking on the item below in the shopping list. I hope that you have a wonderful day and I will see you again tomorrow with another fun little project idea.

Happy Stampin'
Rick Adkins
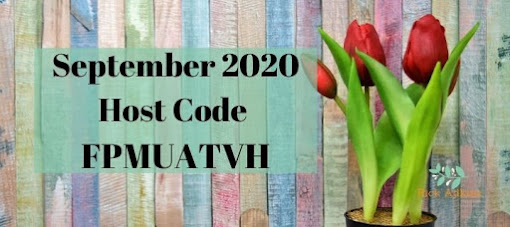
Use the Host Code on any order of $35 (before taxes & shipping) or more by September 11th and get invited to my September Monthly Card Class as a Thank You. ($25 value) If your order is $150 or more, please do not use the host code. You will forfeit your Stampin' Rewards if you do; and I want you to get those rewards.
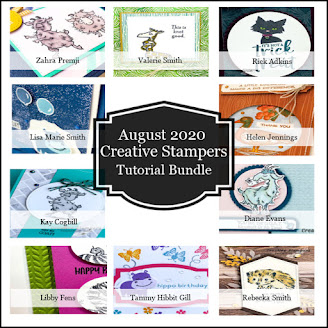
If you place any size order with me during the month of August, you will receive the August Creative Stampers Tutorial Bundle from me as a little thank you. This month's tutorial bundle has ten project tutorials that feature our favorite new Cozy Critters products from one of the new Stampin’ Up! Catalogs. The Creative Stampers Tutorial Bundle can either be earned for FREE with any size order or Can be purchased for $22 from me.

I am very close to earning the 2021 Stampin' Up! Incentive Trip to Maui and your orders can help me get there. I am running a few special promotions until the end of September to not only help me earn this trip but to help you save a little cash as well.
Join me for an exclusive Online Stamp a Stack for World Card Making Day! This is an exclusive event for my customers. We will make 10 different cards during the event you can use whatever stamp sets you would like. To join me it’s super simple place a $100 order before shipping and taxes in my online store using the provided host code attached to this link. I will send you an invitation to this exclusive event. You will not find these projects posted anywhere online. And, at the end you will have a stack of cards to send out for World Card Making Day this year and all year long.

I will have a new smaller promotion each week that runs from Tuesday of one week till Monday of the following week. You will find the smaller promotions posted on my Facebook Business page each week. So be watching for those as well. Some promotions will only last a couple days. Shop Now for this offer!
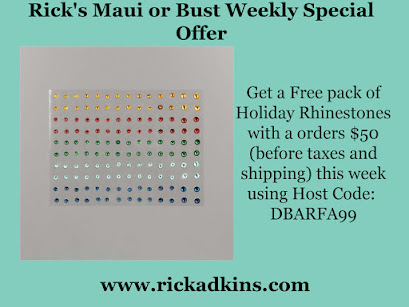
With each $1000 I earn I will be cutting off a chain from my Maui or Bust Countdown Chain.
Rick Adkins

Use the Host Code on any order of $35 (before taxes & shipping) or more by September 11th and get invited to my September Monthly Card Class as a Thank You. ($25 value) If your order is $150 or more, please do not use the host code. You will forfeit your Stampin' Rewards if you do; and I want you to get those rewards.

If you place any size order with me during the month of August, you will receive the August Creative Stampers Tutorial Bundle from me as a little thank you. This month's tutorial bundle has ten project tutorials that feature our favorite new Cozy Critters products from one of the new Stampin’ Up! Catalogs. The Creative Stampers Tutorial Bundle can either be earned for FREE with any size order or Can be purchased for $22 from me.

I am very close to earning the 2021 Stampin' Up! Incentive Trip to Maui and your orders can help me get there. I am running a few special promotions until the end of September to not only help me earn this trip but to help you save a little cash as well.
Join me for an exclusive Online Stamp a Stack for World Card Making Day! This is an exclusive event for my customers. We will make 10 different cards during the event you can use whatever stamp sets you would like. To join me it’s super simple place a $100 order before shipping and taxes in my online store using the provided host code attached to this link. I will send you an invitation to this exclusive event. You will not find these projects posted anywhere online. And, at the end you will have a stack of cards to send out for World Card Making Day this year and all year long.
I will have a new smaller promotion each week that runs from Tuesday of one week till Monday of the following week. You will find the smaller promotions posted on my Facebook Business page each week. So be watching for those as well. Some promotions will only last a couple days. Shop Now for this offer!
With each $1000 I earn I will be cutting off a chain from my Maui or Bust Countdown Chain.