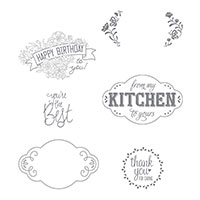
Hello and welcome to my blog; today I am going to share with you the super quick and easy thank you card that I made last night during my weekly Facebook Live. I used the Label Me Pretty Stamp Set; and I will tell you this set has been on my list since it came out but I would keep forgetting to order it until after the order was submitted. This is a great set for so many occasions and uses. It can be used on cards, on tags, and packaging, there's a sentiment to fit your needs. This is one of those sets I consider a must have for any crafter. Here's a look at my card.
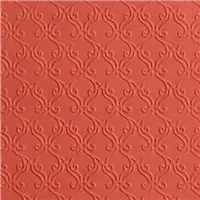
When I designed this card I did so by picking out the designer series paper first. And, then picked my colors around that. I used Pretty Peacock, Purple Posy, and Whisper White. I started with a piece of Pretty Peacock Cardstock for the card base which was cut at 4 1/4 x 11 scored at 5 1/2. My next layer was the Woven Threads Designer Series Paper 4 x 5 1/4, but before I placed it on the card I used the Stylish Scroll Embossing Folder from the Holiday Catalog to dry emboss the paper. This added even more texture to the printed texture on the paper. Which by the way added just that little extra pop that this clean and simple card needed.
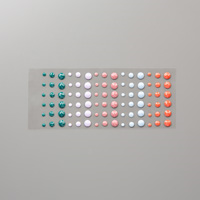
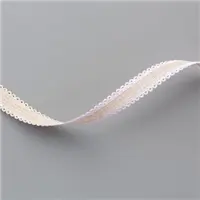
On a scrap piece of Whisper White Cardstock I stamped the label from the set, actually it was two images that created this label, I stamped the first one in Purple Posy Ink, and the next one with the flowers was stamped in Pretty Peacock Ink. Next I used the Pretty Label Punch and punched it out. I added a piece of the Scalloped Linen Ribbon in both colors to the front of the card using Tear & Tape Adhesive. Tear & tape is my go to for adhering ribbon. I then popped up the sentiment using Stampin' Dimensionals. I added a few of the 2019-2021 In Color Faceted Dots to bring in a little more of the Peacock. I added a piece of whisper white to the inside with a small strip of the designer series paper to finish the card.
Video Tutorial:
If you are viewing this post via email and the video does not show you can click here to watch it.
Thanks for dropping by today, I hope that you have a wonderful day and I am glad you spent a little time with me. If you need any of the supplies you can order them by clicking on the image below in the Shopping list.
Hello and welcome to my blog; today I am going to share with you a card that I created last Tuesday for my Facebook Live. This Facebook Live was the first one this year where I went back to the porch for my Stampin' On the Porch Series that I did when I first started doing videos. So I was excited to bring that back to everyone that had been asking when it was going to happen. I am happy to announce that during the Summer and Fall as long as there is good weather we will be doing this series on Tuesday afternoons at 4 pm CST during my Facebook Live.
So last week as I mentioned we created a card during the first episode of the Second Season. I used the Inspiring Iris Stamp Set and by the way that was a set that was on my list as soon as I saw it but had not ordered it yet. I had forgotten about it until I saw it used at a Mini Retreat by Stampin' Up! back in June. So as the demonstrator was show casing it I was online ordering the set. And, I am so glad that I did. Here's a look at my card.
The Inspiring Iris Stamp Set is a multi-layer stamp set that builds on each other. By that I mean that it's a layering set. So, I started out by Stamping the outline of the irises in Mossy Meadow ink on a piece of Whisper White Cardstock. Since I was not using my Stamparatus I felt this was the best way to go. I then stamped the full colored image of the irises in Gorgeous Grape Ink and then the stems and leaves in Pear Pizzazz ink. I then layered that onto a piece of Highland Heather Cardstock. I then stamped my greeting on a 2" Whisper White circle and layered that onto a 2 1/4" Pear Pizzazz Circle.
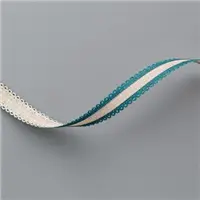
Before attaching the card front to my card base and the sentiment to the front I added some of the Tricolor Ribbon using a couple mini glue dots. Once I had the ribbon secured I added the entire card front to my Gorgeous Grape card base 4 1/4 x 11 scored at 5 1/2. I then added my sentiment using a couple Stampin' Dimensionals.
To finish off the card I stamped the a piece of Whisper White with the border stamp in Gorgeous Grape ink and placed it on the inside of the card. And Stamped some of the irises on the flap of a Whisper White medium envelope.
Video Tutorial:
If you are viewing this post by email you may have to click on the image below to view the video.
The Inspiring Iris Stamp Set give us the power to inspire people just as they inspire us. You can create beautiful inspiring projects with this set. The Inspiring Iris Stamp Set is a photopolymer stamp set that features 16 high quality stamps. Remember that this is also a Two Step layering stamp and you can use either a Stamparatus or your clear blocks to line everything up with ease.
Thanks for dropping by today, If you need any of the supplies I have shared with you today you can pick them up in my Online store by clicking on the Shopping List below, or the Shopping Button below or even by clicking on the Shop button in the menu above.
Happy Stampin'
Rick
Spend any amount (using this month’s host code) and get the
July Creative Stampers Tutorial Bundle FREE (This month we are featuring
products from the Follow Your Art Suite in the 2019-2020 Annual Catalog)
Spend $25 (before taxes and shipping) or more using this
month’s host code and get the my July Monthly Card Class Make & Takes
Mailed to you FREE as a Thank you.
Spend $75(before shipping and taxes) or more and get the
July Monthly Make & Take Class and a bolt of the Tricolor Ribbon for FREE
as a Thank You gift when you use this month’s host code.
Spend $150 or more and get the July Creative Stampers
Tutorial Bundle, July Monthly Card Class Make & Takes, & a Bolt of the Tricolor
Ribbon for FREE as my thank you. If your
order is over $150 please don’t use the host code. You will give up your Stampin’ Rewards if you
do.
Please
remember that if you use the host code you can not use that order towards my KCRP’s
(Kinmon Crafty Reward Points) that would be double dipping and is not
allowed. For more information on KCRP’s click here.
Take advantage of my Summer Retreat TOGO! Featuring the Beautiful Friendship Stamp set. Get all the perks of attending a Retreat but from the comfort of your own home. Click here to learn more and to sign up. Space is limited.
Hello and welcome to my blog; today I am going to share with you Episode 26 of Saturday Simple Stamping. In this weeks episode I am going to show you how to incorporate a little designer series paper into your card making as a beginner. You can pick what ever designer series paper you would like one of the keys is to have a really good sentiment set and the new Here's a Card Stamp Set is just that. It has sentiments for all occasions for both the outside and inside of the card; so there's no hunting from set to set to find the perfect match. Here's a look at this weeks card. Well cards actually!
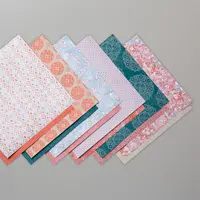
I started out with the intent to make each card the same, but when I went to add the adhesive to the green side I forgot to flip it over. I added adhesive to the floral side instead. That's okay because both sides of the designer series paper is pretty. By the way I am using the Perennial Essence Designer Series Paper on my cards today. If you cut it the way I have you can get 12 pieces for your cards from one sheet of designer series paper.
As I mentioned above this was my goof up card, only because I added the adhesive to the wrong side of the designer series paper. But as you can see it still makes a fabulous card. You can not go wrong with either side of the paper.
Video Tutorial:
If you are viewing this post by email you may have to click on the image below to view the video.
Thanks for dropping by today I hope that you have enjoyed this episode of Saturday Simple Stamping. You can click here and download the PDF Shopping List with Sizes and Dimensions. Remember you can pick up all these supplies in my online store 24/7.
This host code and offer only good
from June 30, 2019 till July 17, 2019.
Spend any amount (using this month’s host code) and get the
July Creative Stampers Tutorial Bundle FREE (This month we are featuring
products from the Follow Your Art Suite in the 2019-2020 Annual Catalog)
Spend $25 (before taxes and shipping) or more using this
month’s host code and get the my July Monthly Card Class Make & Takes
Mailed to you FREE as a Thank you.
Spend $75(before shipping and taxes) or more and get the
July Monthly Make & Take Class and a bolt of the Tricolor Ribbon for FREE
as a Thank You gift when you use this month’s host code.
Spend $150 or more and get the July Creative Stampers
Tutorial Bundle, July Monthly Card Class Make & Takes, & a Bolt of the Tricolor
Ribbon for FREE as my thank you.If your
order is over $150 please don’t use the host code.You will give up your Stampin’ Rewards if you
do.
Please remember that if you use the host code you can not use that order towards my KCRP’s (Kinmon Crafty Reward Points) that would be double dipping and is not allowed.For more information on KCRP’s click here.
Thank you for shopping with me I am trying to earn a Trip of a lifetime to Maui and every amount you spend with me helps get me a little closer there.
Slizzin’ Summer Promotion:
Summer's here and I am ready to beat the heat!
To celebrate Summer, I am going to run a three month promotion with the chance
to earn a prize in September! I will be giving away a few prizes from the
Holiday Catalog in September and you can get your name in the Coconut
now! Click here for all the details.
You have to ways
to get the July Creative Stampers Tutorial Bundle. 1.) Earn it FREE with
a qualifying order (see above host code information). 2.) You can
purchase it from my Tutorial Store for $20 US by clicking here as a Instant Download. This
month's Creative Stampers Tutorial Bundle features 8 projects using products
from the Follow Your Art Suite.
Now's a great time to
shop! For every $50 you spend in my online store Stampin' Up! will send
you a $5.00 Coupon code by email to use toward your orders in August. Click here to shop!
With the Extra
Extra Joining Special, you earn 2 times the Extras! Join my family of Kinsmon Crafters now
and earn an extra $30 in FREE items to add to your $99
Starter kit. That means you can pick out $155 of wonderful Stampin' Up!
Products for only $99. And you get FREE shipping on your starter
kit. Extra #2 You will receive a $10 Coupon Code if
you Sign up in July to use in August. If you sign up in August, your will get
the Coupon Code to use in September. Have questions visit my Join my Team Page and my FAQ page for more details.
Three main
reasons to Join!
1.You
Get at least a 20% discount on all your orders while you are a demo.
2.You
get to join my fun Kinsmon Crafters Team and Private Facebook Group.


 Tricolor Ribbon")
 Circle Punch")
 Circle Punch")


