

Sail Away Bundle Class
Class Date: When ever you choose
Class Time: When it’s best for you
RSVP & Payment Due: April 16, 2020
Location: Comfort of your own home
Cost: Based on Budget Friendly Option You Pick
Details:
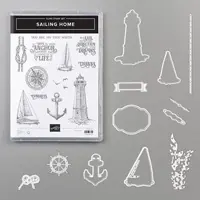
Join me for this month’s bundle class! This month we are feeling the cool breeze of the ocean on our skin and the smell of salt water in air with this month’s bundle class. For April’s bundle class I am featuring the Sail Away Bundle from the 2019 Stampin’ Up! Annual Catalog. You will make five different projects in this month’s class. We are making four cards (one is a wow card) and a 3d project using products from the Come Sail Away Suite.

This month’s featured bundle is the Sail Away Bundle and you can purchase it as an add on to your class. Or you can use something else that’s similar that you may already own. If you want to make the cards exactly the way that I did you will need the bundle. You will also need your basic tool kit with your favorite adhesives; snail, multipurpose liquid glue, stampin dimensionals (both sizes), mini glue dots, and tear & tape along with your bone folder, paper snips. You will also need a Paper Trimmer and Simply Scored scoring tool (or similar) this month. The only additional supplies besides what’s listed you will need a Night of Navy and Sahara Sand Classic Ink Pads or similar colors to complete the projects.
Option 1: Basic Sail Away Bundle Class $35.00
- (No Stamp set or bundle included)
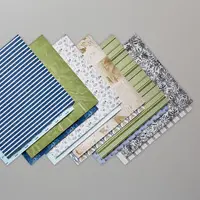
- ½ pack of Come Sail Away Designer Series Paper
- 1 bolt of Night of Navy/Sahara Sand Baker’s Twine
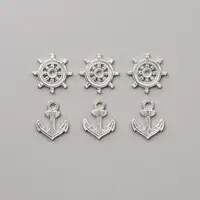
- 1 pack of Sail Away Trinkets
- Card Kit (with all the precut die cut supplies ready for you to assemble)
- PDF Printable Tutorial
- Instructional Video Tutorial (that will walk you through each project)
Option 2: Sail Away Bundle Class with Add on Sail Away Bundle $85.25
- Includes the Sail Away Bundle (priced with no additional taxes or shipping a 19% discount)
- ½ pack of Come Sail Away Designer Series Paper
- 1 bolt of Night of Navy/Sahara Sand Baker’s Twine
- 1 pack of Sail Away Trinkets
- Card Kit (with all the precut die cut supplies ready for you to assemble)
- PDF Printable Tutorial
- Instructional Video Tutorial (that will walk you through each project)
- Available in my Online Tutorial Store as an Instant Download
Register Here:
Loading…
Schedule:
Class sign up closes on April 16, 2020. Once I have received all the signups for this class, I will order all the products for the class and have them sent to me. All class supplies will be ordered on April 17, 2020. Which usually takes about five days. Once received I will cut, prep, and repackage all the supplies and get them ready to be sent out to in by USPS Priority mail in a padded USPS Priority Flat Rate Padded Envelope. The class will start shipping on or before April 27, 2020. On date I will start email out the tutorials, and video links.


 Cardstock")


