Hello and welcome to my blog again for my second post today; You may be wondering why I have a post going up so late in the evening today? Well, it's because I am taking part in the very first Global Stampin' Video Hop and I am going to share that here with you and the project I made for this Global Stampin' Up! Independent Demonstrator Vlog Hop. We have demonstrators from all over the world sharing videos with you today as part of the Global Stampin' Video Hop, I believe we have someone from almost every market that Stampin' Up! is in. So this is a great way to see what other's around the world are sharing using the wonderful products from Stampin' Up!. This will happen each month on the last Friday of the month (which for me falls on the last Thursday of the month due to my time zone here in the US), where we will be sharing a project video with you featuring a new theme around some of the best products around. This month our theme was "NEW". We could pick from any thing that would be new; like a new baby, new home, new product, new whatever. I picked to share a new product that will be coming out in a few days as part of the 2nd Sale-A-Bration release. I am going to share with you a card that I made using the new Rhine & Shine Reversable Sale-a-bration stamp set. Here's a look at my project.
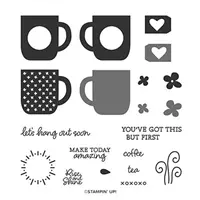
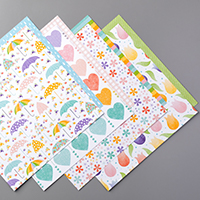
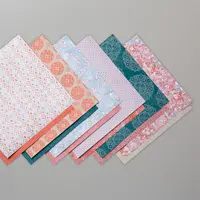
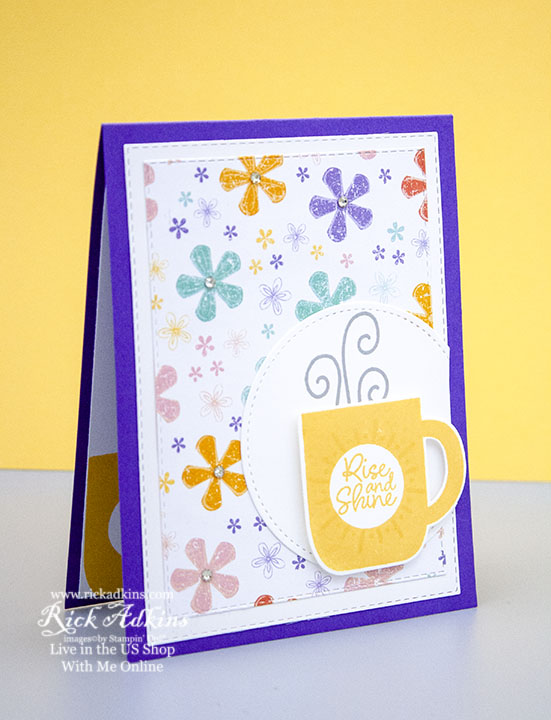
I just love this little fun stamp set and so will any coffee or tea drinker in your life. It has such fun sentiments and imagery that will make anyone happy. I paired this with the Please as Punch Designer Series Paper for a fun colorful card that would make you just feel super happy if you received this card. My card base is a piece of Gorgeous Grape cardstock cut to 4 1/4 x 11 scored at 5 1/2 to make a top folding card. I used the Stitched Rectangle Dies to cut out my mat and Designer Series Paper layers. I used the largest and next to largest rectangle dies to do that. I just love how the Stitched Rectangle Dies layer together perfectly. The Rise & Shine Stamp set makes you want to rise and shine and start stamping! Use the Rise & Shine Stamp Set to create cards and other projects with hot morning beverages and greetings that are sure to warm anyone’s heart. This stamp set is a Reversibles** set, so some of the stamps are two sided with an image on each side of the stamp for more creative options. Earn this stamp set FREE March 3–March 31, 2020, during part two of our Sale-A-Bration promotion!
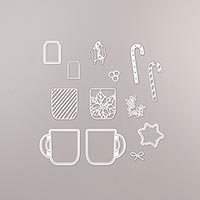
To cut out the stamped cups and a couple of the other images in the stamp set I used the I used the Cup of Cheer Dies from the 2019 Holiday Catalog. Yes, these were listed on the Retirement list so if you pulled yours and put them in your retired stash you will differently want to pull them back out again to have a fun time matching them with the Rise & Shine Stamp Set.
The Rise & Shine Stamp Set with the Cup of Cheer Dies will add a little warm feeling to your heart during the Spring and any other season that comes along.
Video Tutorial:
Here you will find my video which is part of this video hop. If you are viewing this post by email you may have to click here or the image below to see the video. Not all mail servers will show the embedded video.
After layering the designer series paper and the whisper white mat onto my card base I cut out a the largest stitched circle from the stitched shape dies and added it to the card front with the steam image stamped on to it with Smoky Slate ink. I then placed it so that it was coming off the edge of the card and snipped off the excess. I then stamped one of the cup images from the set and cut it out with the Cup of Cheer Dies and placed it on the circle where it looked like the steam was coming from the cup. I popped the die cut cup up with a few Stampin' Dimensionals to give it a new layer.
I then stamped the same cup onto a piece of 4 x 5 1/4 piece of whisper white along with another sentiment from the stamp set for the inside of my card. And, glued it to the inside with multipurpose liquid glue. To finish off my card and add a little shine to it I added a few Basic Rhinestones on some of the flowers on the Pleased As Punch Designer Series Paper layer (which by the way matches punches from the Sale-a-bration brochure and the January-June Mini Catalog.) If you don't have this paper yet you totally need to grab it and any other of the coordinating products before they are gone. They are only while supplies last or until March 31, 2020.
Next on the Video Hop if you're not on my YouTube channel is Jana Muller You can see her video by clicking the next button above or by clicking on the video below.
Thanks for dropping by I hope that you have fun hopping along the video hop with us this evening. If you need any of the supplies that I used to create my project today you can pick them up in my online store by clicking on the item below in the shopping list. Remember that the Rise & Shine Stamp Set can be earned with a qualifying order starting on March 3, 2020 and will be while supplies last till the end of Sale-A-Bration. If you want to get your hands on them early you can purchase them as a demonstrator by joining my team of Kinsmon Crafters. Plus until the end of Sale-A-Bration you not only get to pick $125 in products for only $99 but you get the mini trimmer, the DSP sampler pack and a stamp set of your choice along with a paper pumpkin kit, a business pack all valued based on your stamp set choice to $247.
Hello and welcome to my blog; today I am going to share with you two alternative projects with the February Paper Pumpkin Lovely Day Kit. I came up with a super cute card for my card project and I decided to do something a little different for my 3d project. I decided to make a Junk Journal which I have been seeing more and more of lately. So I thought I would give it a go. Here's a look at my projects.
Before we really get into what I did for my alternatives I wanted to share with you a little look at what came in this month's kit and the intended projects. This month's kit was packed full of some really neat items. I am in love with these top folding envelopes with the half circle flap. I really would like to have more of these.
This month's kit made 9 cards with coordinating envelopes. This has been one of the best kits that I've seen recently. I know I said that last month too; well, it's just because they just keep getting better and better.
Alternative Card:
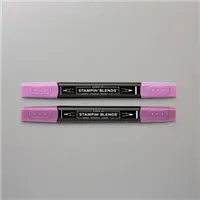
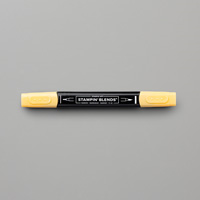
For my alternative card this month' I took inspiration from the die cut flower that came in this month's kit. I took the stamp set from the set and stamped five of the flower images in tuxedo black ink on the top and right-hand side of a piece of whisper white. Once the ink dried I used my Stampin' Blends in Rich Razzleberry, Rococo Rose, and So Saffron to color all the flowers. I also added a faux layer on this panel with a few other blends. You will see the list below of all the colors that I used. Once the coloring was done I then took the card panel and added it to a mat that I made from one of the card bases from this month's kit. I then added it to a Whisper White Thick Card base cut at 4 1/4 x 11 scored at 5 1/2. Once that was done I stamped my sentiment on one of my labels from the kit and added it to the card base. I then added the foam foil word die cut sticker to the front of the card. I actually put a dimensionals under the L & Y so that everything was balanced.
Junk Journal:
Junk journals are surprisingly easy. All you have to do is take some of your collection and make book pages, and pockets for your album. A Junk journal is a handmade book made up of recycled items such as papers from magazines, brochures, patterned paper, music sheets, envelopes, packaging, brown paper bags, maps, greeting cards, post cards, doilies, to name a few. The book covers can be made from cereal boxes, old book covers or any hard card boards. Basically anything that you can find including the kitchen sink.
I used some of the card bases, envelopes, (from the kit) and additional DSP and cardstock to make mine
All I had to do was fold everything up and arrange it into how I wanted the signature to be. Which by the way are the sections of pages in your journal or book. Once all the signatures are lined up and the way you want it it's time to do a little piercing of the paper to make the holes for your ribbon, twine, or book rings to go through to hold everything together. I choose to use ribbon to secure my book close. I used the stripped Organdy Ribbon for this purpose. For some of my signatures I used the Woven Thread DSP from the Annual Catalog.
I even made pull out pockets to write a little note or something that I want to remember or use sooner. Here are a few pictures of the inside pages.
As you can see I have places for pictures, keepsakes, and memory keeping all throughout. Thanks for dropping by today, I hope that you have a wonderful day. If you are viewing this post on my word press site you will need to click here to view the blog roll. Thanks for dropping by.
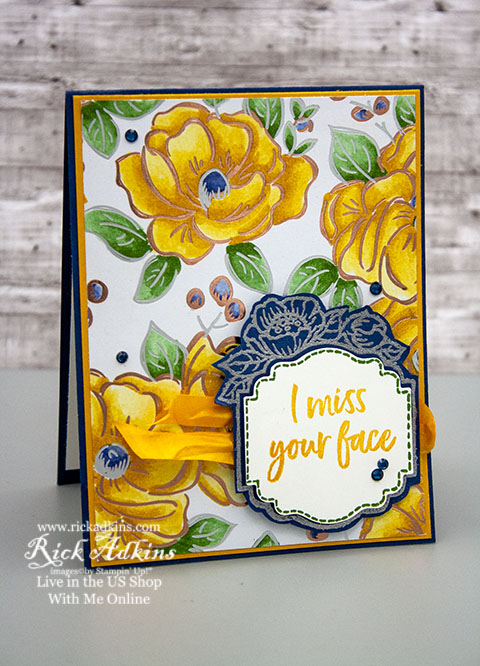
Hello and welcome to my blog; today I am going to share a card with you that I designed using the Flowering Florals Speciality Designer Series and the Tags In Bloom Stamp Set; both are new Sale-a-bration items that will be coming out on March 3, 2020. I also designed this card for this weeks Global Design Project Color Challenge. Which are featuring some fun regal colors this month. Here's a look at my card.
Tips & Tricks:
I started off my card by cutting my piece of Flowering Florals Specialty Designer Series Paper down to 4" x 5 1/4". I went ahead and cut down to card front size so that it would be easier to turn and move while coloring. To color this piece of DSP I used Crushed Curry, Night of Navy, and Garden Green Stampin' Write Markers along with a Blender Pen. This paper has a slicker surface to the front and allows the ink from the Stampin' Write markers and blender pen to move easier than some others. I had to be careful how much ink I put down because it's not watercolor paper and will only hold so much moisture. I put the darkest (pure color straight from the marker) where I wanted the shadows to be, and then used the blender pen to pull it out to the other parts of the flowers, leaves, and berries. I worked petal by petal of the flowers repeating this process until I had everything colored.
Once I had all the images colored I then layered the colored designer series paper onto a Crushed Curry Mat that was cut 4 1/8" x 5 3/8". And, then applied it to my Night of Navy Card base. To finish off the outside I stamped the floral tag from the Tags in Bloom Sale-a-bration set in Versamark ink onto some scrap of Night of Navy Cardstock and heat embossed it with Silver embossing powder. I then used my paper snips and cut it out. I added some of the crushed curry crinkled seam binding to the front and placed my embossed image on top. I then stamped the stitched layer from the stamp set in Garden Green Ink and the sentiment in Crushed Curry. I punched this out using the Label Me Lovely Punch and added it to the center of the embossed image with a few Stampin' Dimensionals. To finish off the front I used some Navy Rhinestones from the Holiday Rhinestone pack from the Holiday Catalog that are carrying over.
For the inside of the card I created a simple pop up theired pop up panel with some whisper white cardstock that was cut at 4 x 10 1/2" and scored at 5 1/4. I also colored some more of the Flowering Floral Speciality Designer Series Paper and cut them out by hand and added the colored leaves, flowers, and berries to the pop up feature of the card. I attached each with a little perfectly placed liquid glue. I stamped a inside sentiment and add a night of navy mat to that and attached it below the pop up.
Here's the Global Design Project Color Inspiration for this project. You can play along or just check out what's been created by the design team and others using this color combination by clicking on the image above. Thanks for dropping by today, if you need any of the supplies that I used you can find them in the supply list below. Remember that the Tags in Bloom and Flowering Florals Speciality Designer Series Paper will be available March 3, 2020.

 The Rise & Shine Stamp set makes you want to rise and shine and start stamping! Use the Rise & Shine Stamp Set to create cards and other projects with hot morning beverages and greetings that are sure to warm anyone’s heart. This stamp set is a Reversibles** set, so some of the stamps are two sided with an image on each side of the stamp for more creative options. Earn this stamp set FREE March 3–March 31, 2020, during part two of our Sale-A-Bration promotion!