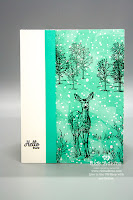
Hello and welcome to my blog; today I am going to share with you another Card for my CASE the Catalog bi-weekly series. In this weeks posts we are going to tackle one of the cutest cards I've laid eyes on in the 2019 Holiday Catalog. Yes if you read the title we are Casing the card on page 23. The Yummy Christmas Card featuring that adorable little gingerbread house. I am going to share with you some tips and tricks I learned while recreating this card last night. If you have just joined me and have never heard of CASEing it means to Copy and Share Everything or Copy and Selectively Edit. This is a great technique to know, and it helps you improve your card making skills plus it helps build your crafting wheel house. Here's a look at my version of today's card.
Yes I colored all the pieces of this card for you today, I actually really like to color so it really wasn't that bad and it only took me maybe 45 minutes to figure out this entire card. Here's a look at our inspiration piece. As I mentioned before it's on page 23 of the 2019 Holiday Catalog. If you don't have a catalog or a demonstrator you work with and your in the United States I would be happy to send you one. Just click
and fill out the information. Here's a look at the card from that I CASEd.
I couldn't tell from the photo in the catalog but I think the card base has been stamped with some of the small images as well, since I couldn't tell I just left my card base plain. I did however stamp the small images on the Pool Party piece. I don't think it's a huge difference so I am okay with that. You will see in some pictures of the card that I did where I don't have the enamel dots, I knew they where there but got so excited about how my card was looking and started taking pictures of it as it it was done. So once I realized I had forgotten them I went back and put them back on and snapped a couple more photos.
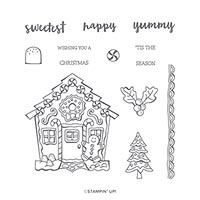
So to start out recreating this card I had to figure out what all was used. I knew figured out the colors and what supplies I needed and pulled them from my stash. The Yummy Christmas stamp set is a photopolymer set so I also pulled my Stampin' Pierce Mat. This provides the extra cushion you need for photopolymer sets; it allows you to get even pressure and ink coverage with detailed or background stamps. I stamped the images that needed to be colored in Memento Tuxedo black ink (because I knew I was going to color with my blends).
I stamped my images on a piece of Thick Whisper White cardstock. When coloring with blends or any alcohol markers it's a good idea to use the thick whisper white, you get much better coverage with the ink. The alcohol ink in the blends gives a much brighter result once I switched to the thick cardstock.
Don't be afraid of putting colors together that you're not sure will blend or go together. For example here I used the Soft Suede Blends together with the Daffodil Delight Blends. I was totally unsure of what would happen but they produced a wonderful gingerbread color. It has the perfect shade of crispiness. I was afraid I was going to end up with a burnt gingerbread house, but was pleasantly surprised.
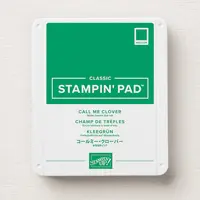
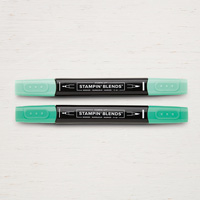
For the trees I colored them using just Call Me Clover light and dark blends, and the Dark Soft Suede for the trunk. I added the dark Call Me Clover blends to where I knew my shadows would be, the points where the brunches overlapped the once below it. And, then just blended it out to get the light I wanted on the trees, and wreath. I only used Call Me Clover, Real Red, Soft Suede, and Daffodil Delight Blends to color this entire card. As you can see with just those few colors I have a full range of hues and values. So don't over think it. Sometimes less is really more.

Once everything was colored and die cut out (by the way the matching dies to this stamp set are the Cuckoo Clock Dies) it was time to work on the rest of the card. I used my Stitched Rectangles Dies to cut a piece of Pool Party cardstock. I used the third largest rectangle. Once that was done I took the small images from the stamp set and stamped them in Pool Party ink on the background in a random pattern. Then it was time to layer up the card. I placed the pool party piece in the center and just adhered it with some snail adhesive. I then started by adding my gingerbread house, which I popped up on Stampin' Dimensionals. The two trees closest to the house are also popped up. The other two trees are adhered with snail adhesive and tucked behind the trees that are popped up. Now it became time to figure out where they got the green baker's twine. Well I realized they just colored it with the light Call Me Clover Stampin' Blend. Duh! Instead of the light I used the dark.

To color your whisper white baker's twine just pick the colored blend you want to use and lay it flat on a piece of grid paper. Place the stampin' blend on top of it using the brush tip (make sure not to press to hard to ruin your tip) and simply pull it through on both sides until you have the desired color. Set it aside to dry for a few minutes.
Next came the sentiment. I stamped it in Real Red and Call Me Clover Inks on to some of the whisper white I had left from the gingerbread house and trees. I used another one of the stitched rectangles to cut it out as well. The 'This the and Season is actually one stamped perfectly made to fit the letters of the larger sentiment. The other small sentiment in the set is done the same way. This made me so super happy you don't even know. There wasn't 45 minutes of trying to get them both to line up perfectly with the real red sentiment.
So to finish off the card I added some of the Toile Tidings Glitter Enamel Dots around the card. I tied my colored baker's twine in a large bow and attached with a mini glue dot and placed my sentiment over it with a few stampin' dimensionals.
I hope that you have enjoyed my version of the Yummy Christmas Gingerbread house card from the catalog. If you need any of the supplies you have seen today you can pick them up in my online store. I will see you tomorrow with another fun project.
Happy Stampin'
Rick
If you live in the US. I would love you to choose me as your demonstrator. If you would like to purchase any of these products you can click on the Shop Now Button or by clicking on any of the images below. Alternatively, you can also contact me by email to place your order. Please be sure to use the monthly host code and I’ll send a little something out to you the following month to say Thank You!
September HOST
CODE: SQ2WWJZN
- Spend any amount with me this month and receive the Creative
Stampers Tutorial Bundle featuring Fancy Fold or Interactive Projects. Plus get a gift from me in October.
Please
remember that if you use the host code you cannot use that order towards my KCRP’s
(Kinmon Crafty Reward Points) that would be double dipping and is not
allowed.
For more information on KCRP’s
click here.
Don't forget about my fundraising effort! When you purchase the Nature's Beauty Stamp Set using the Host Code above from September 28, 2019 until October 10, 2019 I will donating 20% off all the sales from that set to NAMI. Which is the National Alliance for Mental Illness. As my gift to you you will get two VIP Card Kits to go along with the Stamp Set FREE. My goal is $1500! Help me help others in need.
Click here to purchase this set.
Stampin' Up! Shopping List: