Showing posts with label valentine's card. Show all posts

Tuesday, February 5, 2019

Meant to Be Popped Up Heart Card

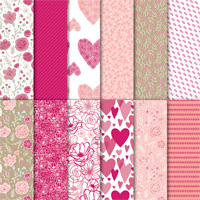
Meant to Be Cling Bundle, All My Love Designer Series Paper, Balmy Blue Stampin' Blend Dark, Heart Epoxy Hearts, All My Love Ribbon Combo Pack, Rick Adkins

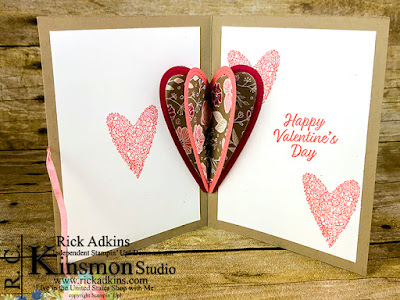
Hello and welcome to my blog.  Today, I am going to share with you a card that features products from the All My Love Suite from the 2019 Stampin' Up! Occasions Catalog.  With Valentine's Day right around the corner now's the perfect time to make those last minute cards for your loved ones.  And, why not make it a card that's very special.  My card today is one of those type cards.  It has a special feature that shows that special person just how much you really care.  This simple looking card on the outside has a little special love on the inside.  I know that you are wondering what the inside looks like so I am going to share it with you now. 

Meant to Be Cling Bundle, All My Love Designer Series Paper, Balmy Blue Stampin' Blend Dark, Heart Epoxy Hearts, All My Love Ribbon Combo Pack, Rick Adkins

Tips & Tricks: 

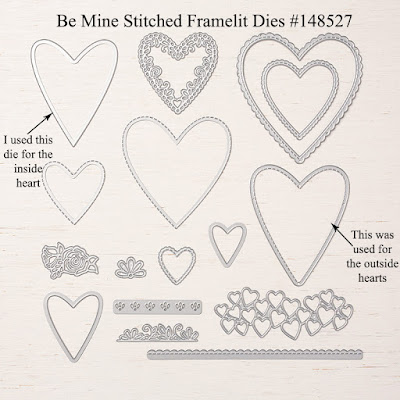
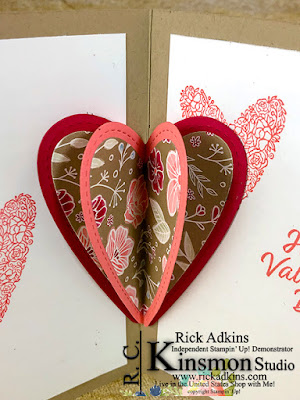
This card looks a lot harder than it really is, and if you have followed my blog you know that's how I roll.  I love cards and projects that look complicated but are quite easy.  I started out with a piece of Crumb Cake cardstock (5 1/2 x 8 1/2 scored at 4 1/4) as my card base.  I actually started this card on the inside instead of working on the outside design first.  I used the Be Mine Stitched Framelit dies to cut out a stitched edged heart in Lovely Lipstick and Flirty Flamingo cardstock.  I used the second die marked in the pictured to cut out the smaller heart from the All My Love Designer Series Paper.  I cut 3 hearts to use.  I cut the Lovely Lipstick heart in half and then scored the flirty flamingo cardstock heart and the designer series paper hearts in half.  I folded and burnished the hearts on the score lines.  I then took the designer series paper hearts and glued them to the cardstock hearts.  At this point it was time to put the outside heart pieces together.  I took the center hearts and glued one side to half of the lovely lipstick heart.  Then I glued the other side to the other piece the lovely lipstick heart.  Once they were all together I set them aside to dry.  
Meant to Be Cling Bundle, All My Love Designer Series Paper, Rick Adkins, Stampin' Up!, Heart Epoxy Droplets, All my Love Ribbon Combo Pack

You can see in the above photo how the heart on the inside stands out from the card base.  Before adding the hearts I had to stamp and add a few pieces of Whisper White Cardstock.  Actually I used two pieces on the inside of the card.   The inside measurements are 3 3/4 x 5.  At this point I could add the heart in the center that would pop up.  

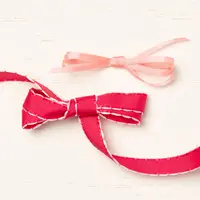
Before adding the card front to the card I had to add a little ribbon from the All my Love Ribbon Combo pack so that I could close the card.  For the outside of the card I added a piece of Lovely Lipstick cardstock (4 x 5 1/4).  I layered a piece of the all my Love Designer Series Paper (3 3/4 x 5) on the outside.  I added one more Lovely Lipstick heart with the same designer series paper heart on the outside.  I added a sentiment banner (of whisper white) with the sentiment I love our life together.  Depending on what sentiment you put on the inside you could easily make this a wedding card or any other love themed card.  \

Meant to Be Cling Bundle, All My Love Designer Series Paper, Rick Adkins, Stampin' Up!, Heart Epoxy Droplets, All my Love Ribbon Combo Pack

I hope that I have inspired you to give this technique a try.  If you need any of the products you have seen today you can pick them up in my online store.  I wanted to take a few seconds and thank you for dropping by.  Remember that we are in the middle of Saleabration.  Where you can earn free products based on either each $50 or $100 you spend.  
Below you will find a full list of the supplies that I used for my card today.  


Product List: 

Happy Stampin'

Tuesday, January 29, 2019

Saturday Simple Stamping Episode 9: featuring Sweetest Thing

Hello and welcome to my blog and YouTube channel.  Today, I am going to share with you Saturday's Simple Stamping Episode #9 featuring the Sweetest Thing stamp set.  This is a very fun birthday set that was one of my favorites from the Occasions catalog.  But, I am not using it as a birthday card today, I created a Valentine Card using this set.  Here's a look at my card.


Simple Stamping involves just stamps ink and paper.   All demonstrators were challenged at our convention that we had back in November in Orlando called OnStage to share cards that used just stamps ink and paper monthly.  For January we where challenged to use the simple stamping method but could also use a punch with it; to create a Valentine Card.  

Tips & Tricks:  

I designed my card so that you could move the sentiment around the card where you needed it.  Depending on where you put the sentiment you can get a different look from the card.  

This was my first go with this card design.  I put all the small stamps in the stamp set onto one block to create a background stamp.  I used a Clear Block size D and arranged all these wonderful sweet stamps on.  I then inked up the all the stamps at one time; which was easy since we put them on just the single block.

 I inked up the stamps in Coastal Cabana Classic Ink to start with and stamped them going down the left hand side.  Next I used Granny Apple Green and stamped the images down the center.  I finished off the stamping with Gorgeous Grape down the right hand side.

I then stamped the sentiment on a piece of whisper white and used the same three colors I punched the main image with a 2 1/4" circle punch and stamped the Sweets for You sentiment twice on scrap whisper white in Granny Apple Green and Gorgeous Grape inks.  Next I took my paper snips and cut the sentiments apart and trimmed off the s at the end of sweets.  I then arranged the words to read for you sweet, and added a heart that I drew using a granny apple green stampin' write marker.  I added a 2 1/2" circle punched from granny apple green cardstock.  I layered both circles together and popped it up using stampin' dimensionals.

For the second card I repeated the same process but changed up the order of the colors, and changed the placement of the sentiment.  

Video Tutorial: 


I hope that you give #simplestamping a try and if you do make sure you share it online with the #simplestamping.  You will find a list of all the supplies I used in the product list below.  

Happy Stampin'
Rick


Template Designed by creativeworkerbee