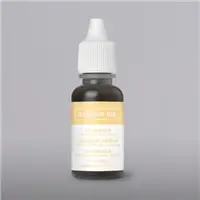
Hello and welcome to my blog; today I have a super cute and fun card to share with you using the Faux Distress Oxide Technique. I did a very traditional Distress Oxide technique on my card today; Ink Blending! Here's a look at my card.
Hello and welcome to my blog; today I am going to share with you the card that I made for this week's creative challenge over at the Spot Challenge Blog. This week we are hosting an Emboss Resist Challenge for you to play along with.
There are many different ways to do emboss resist and many many different techniques to do this technique. I picked one of my favorites, as you will see in my card today using the Joyful Holly Stamp Set from the August-December Mini Catalog.
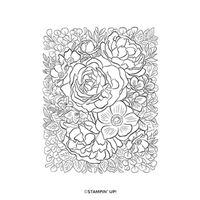
Hello and welcome to my blog; today I am going to share with you another card using the beautiful background stamp Breathtaking Bouquet. I shared three cards yesterday using this same stamp set. If you missed that post you can check it out by clicking here. Today's card is using the Spotlight coloring technique this is a super fun and easy technique that allows you to spotlight a certain area of a stamped image. Or you can use it to add interest to your card. I used it to do both, and here's a look at today's project.
Tips & Tricks:
Use the Breathtaking Bouquet Background Stamp to create beautiful floral backgrounds you can use all year long for card making and other paper projects. This background image is ideal for coloring techniques. To create today's card I started out by stamping the background image onto the So Saffron cardbase in matching So Saffron Ink. Once I had that done I then stamped it again onto a piece a whisper white cardstock in Tuxedo Black ink. After stamping it the second time it was time to start some Stampin' Blends Coloring.
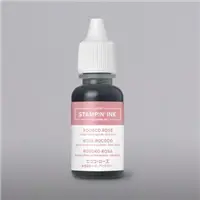
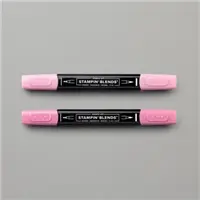
I colored all the flowers using the following Blends; So Saffron, Daffodil Delight, Seaside Spray, Rococo Rose and Mossy Meadow for the leaves. I used both the light and dark of each color to color most of the flowers, using the dark to light coloring technique. Meaning I started with the darkest color in the shadow areas and then blended them out with the lighter colors. I did this for all of them but the rose. For the rose I started out with Daffodil Delight light in the dark areas and then used the So Saffron dark over that before blending it out with the light So Saffron blends. For the leaves I added the dark in the shadow areas that are overlapped by the flowers, and along the center of the leaves. I then colored over them with the light Mossy Meadow.
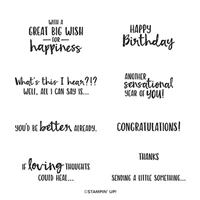
Once all the coloring was done I used my paper snips and cut out the flowers that I had colored. I added it to the card base by attaching it with dimensionals. I then stamped my sentiment from Sending you Thoughts Stamp Set (which can be earned with a $50 order during Saleabration for Free). I then popped it up over the bouquet also using dimensionals to give it a nice lift. I finished off the card by adding a little bling with the Basic Rhinestone Jewels. Thanks for dropping by I hope that you are inspired to give spotlight coloring a try. If you need any of the products that I used today you can pick them up in my online store by clicking on the shopping list below.
Join my NEW Online Technique & Fancy Fold Club! You can find out all the details byclicking here!
Last day to sign up for my Monthly Card Club by February 20, 2020! Sign up and learn more about Card club byclicking here! February's featured stamp set is the Morning Star Stamp Set. Stamps sets are not included in the club but may be purchased using the host code as an add on. Or you may use something you already own.
Receive the January Creative Stampers Tutorial Bundle with any size order! Features 17 projects designed by Stampin' Up! demonstrators from around the world. This month we all featured a item in the Sale-a-bration Brochure.
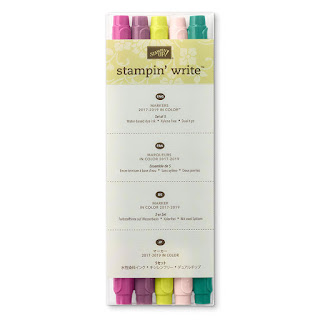
Hello and welcome to my blog for the second post today; In this post we will be talking about this weeks Simple Stamping Card. This week the retiring list was announced if you missed that post you can see it here. Sadly on that list was the All Good Things Stamp Set, but also on that list was the 2017-2019 In Color Stampin' Write Markers. I don't think a lot of people realize what you can do with the Stampin' Write Markers so for this weeks simple stamping card and video I wanted to show you one great technique that you can use these markers for.
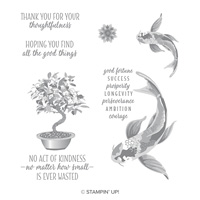
Did you know that you could use them to stamp multiple colors on one image all at once? If you are just starting out you may have not known this little trick. This technique is a great way to get more bang for your buck. You basically get five ink pads with just one small purchase. I used all five of the out going in colors one this one image. I did have to use one additional color to do the image. In addition to the 2017-2019 In Colors was a Soft Suede marker for the tree trunk, this way it looks like a natural tree. You can see exactly how I accomplished this in the video tutorial below. Please remember that you may have to click here to see the video. Some email servers will not show the embedded video.
Video Tutorial:
Tips & Tricks:
I colored the image in all the colors all at once and then I huffed (a couple deep breaths) onto the inked up image to remoisten the ink on the stamp. By doing this it will allow you to get a nice impression each time. The warmth of your breath helps the ink to moisten back which allows it to transfer.
When you first start stamping you may want to do a image just like this but you don't own a stamp positioner, or you may not have all the ink pads. You probably only own a few supplies so the Stampin' Write Markers are a great addition to add to your collection. Because, you can get them and you have every color of ink in this small slender tube. Plus another great thing is you can purchase them all at once in the Many Marvelous Marker set or you can also buy them in color family for a little cheaper price up front. And for some beginning stampers this is very important. The in color families always come out in new sets of five every year. Each group is out for two years before they are retired. This year the leaving colors are the 2017-2019 In Colors (Lemon Lime Twist, Berry Burst, Tranquil Tide, Powder Pink, and Fresh Fig). They will probably sale fast since they have been on the retiring list and they are very popular colors.
This is one of the best things for new stampers to learn because it will open up a whole new world for your crafting and stamping. I also used the whisper white note cards to produce today's simple stamping card.
Thanks for dropping by today for this weeks Simple Stamping Episode. I hope that you found some information and that this has helped you. You will find a full list of the supplies that I used today in the list below.
Stamp Sets are guarennted until May 24th to be in stock while the other products are only while supplies last.
Use my April Host Code with a $50 order (before taxes and shipping) and I will send you the Creative Stampers Tutorial Bundle Free as a thank you. If your order is over $150 please don't use the host code because I will send it to you as a thank you also. You can get a sneak peek at the projects below.
You can purchase just the tutorial any where in the world for only $20 US in my tutorial store.
Join me in a six weeks online class learning how to create beautiful watercolor cards. Time is running out! So sign up soon.
Sign up by May 10th and get the exclusive Hugs from Shelli Paper Pumpkin. You can watch a introduction video to this kit by clicking here. If you want this kit I am just going to say sign up before the 10th I predict that it will sell out way before the 10th.