I have a super cute SIP card to share with you today using the Nuts & Bolts Stamp Set from the January-June Mini Catalog. I shared this card with my Crafty Corner Card Club Members back in February. Here's a look at the card.
Hello and welcome to my blog for Simple Sunday! This week I have a simple birthday card to share with you using stamps ink and paper. This week I also used a punch out that I had on hand to use also. This card also serves another purpose as well; if you stick around you will find out what that surprise is.
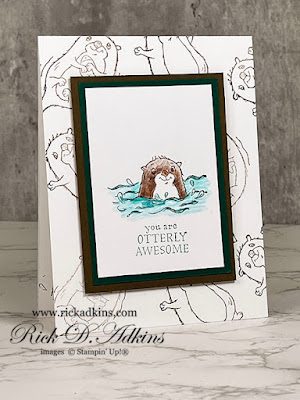
Hello and welcome to my blog; today I have a Simple Sunday project for you. This is a project created using mostly Stamps, Ink, & Paper. Today's SIP (Stamps Ink & Paper) Card features the Awesome Otters Stamp Set. Here's a look at my Simple Sunday project.
Simple Sunday is my series that I share each week for beginner crafters. I also share some basic supplies that all beginner crafters should purchase to get started along with a few tips and tricks to make paper crafting easier and recreateable for the new crafter.
Hello and welcome to my blog; today is Sunday, and that means it's Simple Sunday. Which if you are new here this is the day I share cards designed for beginner crafters using only Stamps, Ink, and Paper. SIP cards (Stamps, Ink, and Paper) are a great way to learn how to create cards. Stamps, Ink, and Paper are the basic tools you need to create cards. So, I have designed this series to use those basic supplies. Here's a look at this weeks card.
Hello and welcome to my blog; I am working on getting back onto my schedule after the surgery. So I have a SIP Card for you today since this is Simple Sunday! If you are not sure what I mean by SIP card this is a simple stamped card that uses stamps, inks and paper. For this weeks card I crafted up a super sweet little birthday card to share using the Sweets & Treats Stamp Set from the July-December Mini Catalog. Here's a look at the card.
Hello and welcome to my blog; today I am sharing with you a card I made this week using the My Meadow Stamp Set. I can not believe that I've not played with this stamp set since I got it back in November at Centerstage. I think I was a little intimidated by it. I thought it would be a little harder to create with than it really was. But it was quite easy. Here's a look at today's card.
All I used for this card was the stamp set, a little ink, and a little cardstock. I know right! Can you believe that this was created with just stamps ink and paper. I started out by stamping the gazebo in Soft Suede Classic Ink where I wanted it to be. Then I added the ground in Pear Pizzazz Classic Ink. I stamped it a couple times and decided where it overlapped looked likes little hills.
Next I stamped the set of tree trunks in the background first. Then I stamped the larger tree trunk in the stamp set in the foreground. All the tree trucks were all stamped in Soft Suede Classic Ink. I then added the leaves with a combination of first and second generation stamping in Garden Green Classic Ink on to of the trunks. I then stamped the water with Coastal Cabana Classic Ink in the foreground. I justed used one stamp to create the water. I just flipped it around to fit into the each area.
To finish off the card I added the stamped background to a Pear Pizzazz mat and stamped the sentiment onto a Pear Pizzazz piece and made a fishtail banner. I popped the sentiment up on Stampin' Dimensionals. I added the completed matted card front to a Garden Green card base. And that finished the card. Thanks for dropping by today if you need any of the supplies you have seen today you can pick them up in my online store by clicking on the items in the shopping list below.
Happy Stampin'
Rick Adkins
Use the Host Code on any order of $50 (before taxes & shipping) or more during the month and receive a gift from me in June as a Thank You. If your order is $150 or more, please do not use the host code. You will forfeit your Stampin' Rewards if you do; and I want you to get those rewards.
If you place any size order with me during the month of June, you will receive the June Creative Stampers Tutorial Bundle from me as a little thank you. This month's tutorial bundle features twelve Masculine themed projects. All the products used can be found in the new 2020-2021 Stampin' Up! Annual Catalog. The Creative Stampers Tutorial Bundle can either be earned for FREE with any size order or Can be purchased for $20 from me.
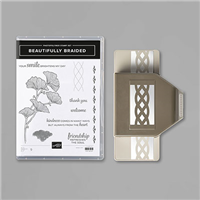
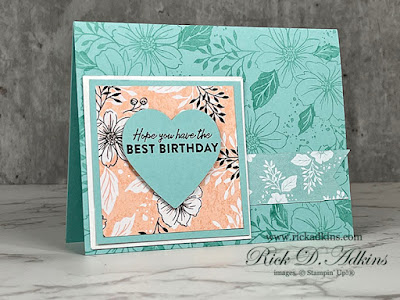
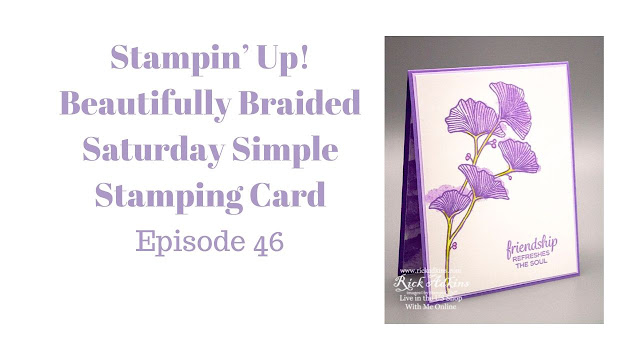
Hello and welcome to my blog and the next Episode of my Saturday Simple Stamping Card Series. Today's project marks forty-six project tutorials that I have shared with beginning stampers and crafters. This is a series that goes back to the basics and uses just stamps, ink, and paper (SIP Cards). You can see all the SIP cards by either doing a search in the search bar or click here and see the playlist. For my card today you I used the Beautifully Braided Stamp Set from the January-June Mini Catalog. Create elegant borders with flowers, scallops, and braided patterns in the Beautifully Braided Stamp Set. With the included phrases, you can make greeting cards for your friends. With the large images it makes for a perfect set to use on SIP Cards. Here's a look at my project for today.
Simple Stamping Tips & Tricks:
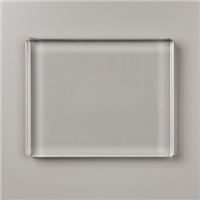
For my card today I used the Stamparatus to stamp the images; I did this because it was a little easier to stamp the large floral image onto my Whisper White Cardstock (4 x 5 1/4) perfectly. If I didn't get a good impression the first time I could stamp it again just making sure the cardstock was in the positioner in the same place. Do you have to use the Stamparatus or other Stamp Positioner? No, you could use the large Clear Block F (which I have listed below in the shopping list) and just place the block on your table with the stamp facing up. And, ink it up and place your paper on top of it making sure to give good even pressure on your cardstock by walking your fingers across every inch of the image. I stamped the image in Highland Heather Classic Ink, and then used my watercolor pencils to color in the open line areas of the stems and berries. I used the other stamp in the set to fill in the floral image by stamping off onto scratch paper to create a lighter ink color.
I then stamped my sentiment on the right-hand side of the card in the Highland Heather ink. I picked the sentiment because I thought it could be used for any occasion to send to a friend. Once my stamping was done I used Snail Adhesive and attached it to my Purple Posy (5 3/8 x 4 1/8) mat. I then added the card front to the Highland Heather card base (4 1/4 x 11 scored at 5 1/2) using Snail Adhesive. I think that beginners do better with a dry adhesive when they first start out over the Multipurpose Liquid Glue. I remember when I started how frustrated I got using the liquid glue. It was either to much or not enough, until I got used to squeezing the bottle correctly. So I try to teach you from my mistakes or set backs from when I started out stamping. To finish my card I added another piece of Whisper White Cardstock to the inside cut to the same measurement as the front layer.
Simple Stampin' Video Tutorial:
If you are viewing this post by email you may have to click here or on the image below to see the video. Some mail servers do not like to show the embedded video.
Steppin It Up to Causal & Avid Cards:
The Beautifully Braided stamp set can be purchased as part of a Cost Saving Bundle along with the Braided Bolder Punch. When you purchase the bundle you save 10% off the cost of both items. Here's a look at the cards I designed using the Bundle for the Casual and Avid Crafters. For my Causal Crafters I used the Beautifully Braided Bundle along with some additional cardstock and a couple more punches to create the Causal style card that can be seen here on the left.
I punched out a 2" Circle Punch from the center of my Purple Posy cardstock. I punched out from the center of the mat layer because no one will ever see it and know if you don't tell them. This is a great trick to save on cardstock and get the most use from your investment.
I then stamped my sentiment on the front panel and used a 1 3/4" Circle Punch from that. I then stamped the same image that we filled in the floral with the same way over the sentiment to create a little interest. I then layered this onto our Purple Posy Circle with a little liquid glue.
I used the Braided Bolder Punch and some scraps of Highland Heather Cardstock and punched out the border braid. I then attached it over the bottom third of the whisper white card front using liquid glue before matting it.
I then popped up the circle sentiment embellishment over the opening where I did the punch out to hide the hole in the card front. I popped this up using Stampin' Dimensionals. And that finishes how I made the Casual Crafter version of this card.
For my Avid Crafter card I repeated the same steps as for the Casual Crafter with a few alterations and additions to the card.
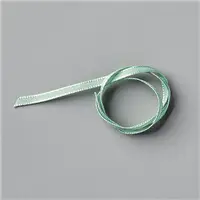
Once I had the braid punched out I decided to braid in some additional texture to the embellishment. I picked the 1/8" Mint Macaron Sheer Linen Ribbon and weaved it in and out of the openings on the braided cardstock until I got to one side. Then I cut it off and repeated it in the other openings creating a double braid. Once I was to the other side I tied the two loose ends of the ribbon into a bow. It took about 28 to 30" of ribbon to do this. I attached the double braided embellishment to my card front with liquid glue that I put behind it making sure to not only add the liquid glue behind the cardstock but the ribbon as well.
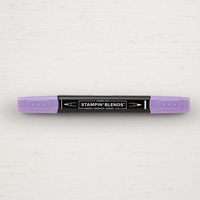
I then took some Basic Rhinestones Jewels and colored them with my dark Highland Heather Stampin' Blends. This is a great way to get a custom embellishment to match your projects without a lot of work. You do have to color them and then let them dry a little while. But, the look is stunning. To do this you are going to color them while they are still on the backing from the packaging and just use the darkest blend that matches your project and color them. Easy peasy! Once the newly colored rhinestones where dry I just popped them on my card. I added a couple on the sentiment piece, and then placed the others over the berries for a little extra bling.
All the items listed before the bundle on the shopping list is what I used for the SIP version of my card. Everything after that are for the two stepped up versions.
Join my NEW Online Technique & Fancy Fold Club! You can find out all the details byclicking here!
Last day to sign up for my Monthly Card Club by February 20, 2020! Sign up and learn more about Card club byclicking here! February's featured stamp set is the Morning Star Stamp Set. Stamps sets are not included in the club but may be purchased using the host code as an add on. Or you may use something you already own.
Receive the January Creative Stampers Tutorial Bundle with any size order! Features 17 projects designed by Stampin' Up! demonstrators from around the world. This month we all featured a item in the Sale-a-bration Brochure.


 For my Causal Crafters I used the Beautifully Braided Bundle along with some additional cardstock and a couple more punches to create the Causal style card that can be seen here on the left.
  For my Avid Crafter card I repeated the same steps as for the Casual Crafter with a few alterations and additions to the card.