Hello and welcome to my blog; today I am going to share with you five fun and easy projects using Fall leaves that will inspire you this season. I used the Colorful Season Stamp set and matching Seasonal Layers Dies to create all the projects for today's post. Here's a look at the projects.
As I mentioned before I used the
Colorful Seasons Stamp Set and matching dies to create the projects I am going to share with you today. I may have gotten a little carried away with the Fall leaves, I am just saying. The Colorful Seasons Stamp Set is a great one to own because you have images to create projects for every season. Summer, spring, winter, autumn... I don't care what season it is...you'll stamp for all of them with this set and you'll have fun doing it! The Colorful Seasons Stamp set is a Photopolymer set featuring 24 photopolymer stamps. Photopolymer stamps are totally transparent for perfect image placement. They have just enough give to create a perfectly stamped image every time. And, they cling like crazy to our clear blocks so you don't have to worry about slipping. You can save space—you need only one set of blocks for all your photopolymer stamps (blocks sold separately). They come packaged in cases with images on the spine for easy storage and quick reference.
Plus when you add the matching
Seasonal Layers Dies you can create custom die-cut patterns and shapes like flowers, leaves, snowflakes, a branch, a chair, and more in record time using the Seasonal Layers Dies. Dies help you create unique die cuts with just a quick run through your die-cutting and embossing machine. Detailed dies include ejection holes so you can remove the paper easily. So you can see why you want to pair both of these products together to make your crafting life easier.
Fall Leaves Projects Tips & Tricks:
For the first project I used just stamps ink and paper to create a fun card that's very impressive and gives you the quintessential feeling of Fall. You may be thinking I can not get all those colors on my leaves, but really you can. I did all those different colors using the Stamparatus our stamp positioning tool. The Stamparatus allows you to get perfect placement each time with each image. here's what I did I stamped the large and small leaves at the same time in Crushed Curry ink onto a piece of Whisper White Cardstock. Without moving the stamp or the cardstock I then used my Sponge Daubers and put on some Pumpkin Pie and Cajun Craze inks. Just dabbing it here and there where I wanted a different hue to be. I then stamped the out line image on top to finish the leaves off I repeated this process until I had the card finished.
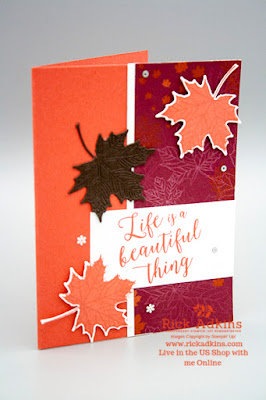
For the next card I used a little more products and added in some copper foil to the mix to give a little wow to the card. I started out with my card base in
Calypso Coral Cardstock. And added a strip of Soft Sea Foam Cardstock to the front plus two strips of
Copper Foil to accent the foil leaf that I die cut with Seasonal Layers Dies. I stamped the leaves from the stamp set on to two pieces of Whisper White cardstock in
Terracotta Tile and Soft Sea Foam ink. And, placed a third in the center to pop up the foil leaf. I stamped the sentiment below with Terracotta Tile ink.
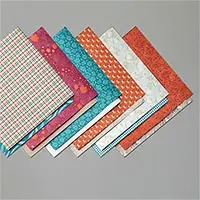
For the third card I threw in a little
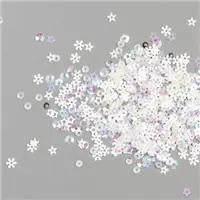
Come to Gather designer series paper to one side of a Terracotta Tile Card Base. I added a little strip of whisper white cardstock to under the designer series paper and three of the leaves, two where stamped and die cut and one was the more detailed die cut. I then added some of the snowflake sequins from the Holiday Catalog to finish it off.
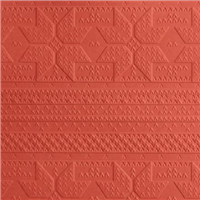
The fourth card I created I used scraps of different designer series paper, past projects that didn't make the cut (pun not intended) and some gold foil and cut them into strips and added them to a strip of cardstock with snail adhesive. I keep all these strips in the same color family the only difference was the size of the strips. I then added it behind my card front that I embossed with the Winter Knit 3D Embossing Folder. I did cut a section a little smaller than my insert out of the card front. I then added two small strips of real red cardstock to the insert to tie everything in.. I then added one leaf and stamped it the same way as I did with the first card but I added gold embossing to the outline of the leaf. before cutting it out and popping it up on the card.

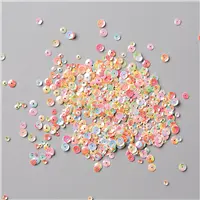
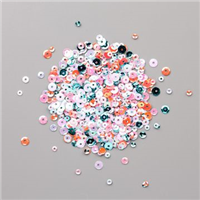
For my final card today, I went all out and created a shaker card. My window openings were made using the open leaf die from the die set. I cut tree from a piece of the Come to Gather Designer Series Paper. I picked matching colors for the rest of the card. After cutting the openings I add a piece of window sheet to the back cut to size with strong adhesive. I then used the foam adhesive strips to make my wells for each window. I used the iridescence sequins in one the Woven Thread sequins in the second one and some fall sequins from a past paper pumpkin kit for the last. I then added a piece of matching cardstock to the top back to enclose my opening. I figured out with a lot of time killed that if you cut the backing the same size as the front you don't have to fuse forever to get the sequins covered and to stay in the well. I then added that to a Purple Posey cardbase with a Soft Sea foam mat. The sentiment was embossed with Gold Embossing Powder on a piece of Vellum Cardstock.

That finishes my five Fall Leaves projects for you today. I hope that you have enjoyed this post and you are inspired to play with some Fall Leaves. I will see you again tomorrow for another project.
Happy Stampin'
Rick Adkins
If you live in the
US. I would love you to choose me as your demonstrator. If you
would like to purchase any of these products you can click on the Shop Now
Button or by clicking on any of the images below. Alternatively, you can
also contact me by email to place your order. Please be sure to use the
monthly host code and I’ll send a little something out to you the following
month to say Thank You!
October HOST CODE: SQ2WWJZN
1. Spend any
amount with me this month and receive the Creative Stampers Tutorial Bundle
featuring Fall & Halloween Projects. Plus get a gift from me in
November.
Please remember that if you use the host code you cannot use that
order towards my KCRP’s (Kinmon Crafty Reward Points) that would be double
dipping and is not allowed. For more information on KCRP’s click here.
Three
main reasons to Join!
1. You Get at least a 20% discount
on all your orders while you are a demo.
2. You get to join my fun Kinsmon
Crafters Team and Private Facebook Group.
3. Access to directions to all my
online classes
Stampin' Up! Shopping List:


")


 Scalloped Edge Ribbon")


